Creekwalker and I have been exchanging some emails about correcting underwater photos. I think it would be really advantageous for me to post the process here so we all can enjoy the sights we saw, but the camera saw a little differently. Light does some pretty funny things in even the slightest amount of dissolved sediment, and water on it's own filters some of the spectrum away. That doesn't mean we have to have washed out yellow and white photos
The software that I've been working with is Gimp (http://www.gimp.org/). It is FREE and it's available for any platform. If others figure out how to use these functions in other programs, it would be great if you post it here on this thread.
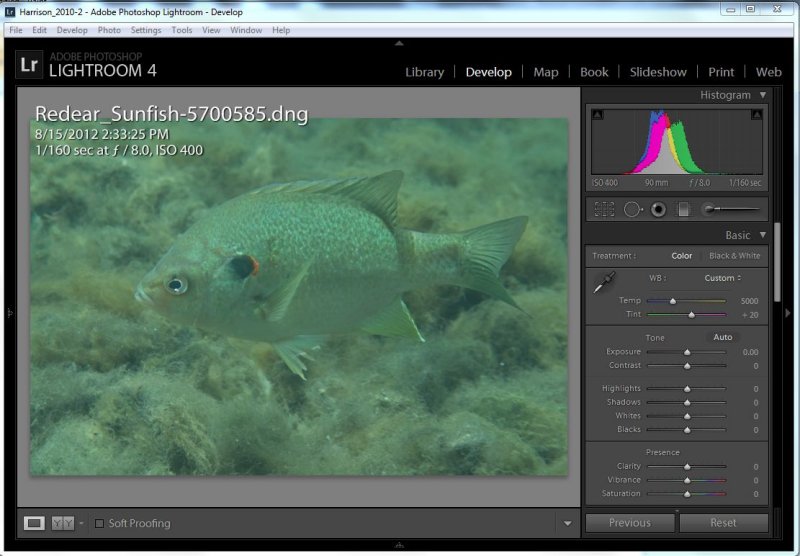
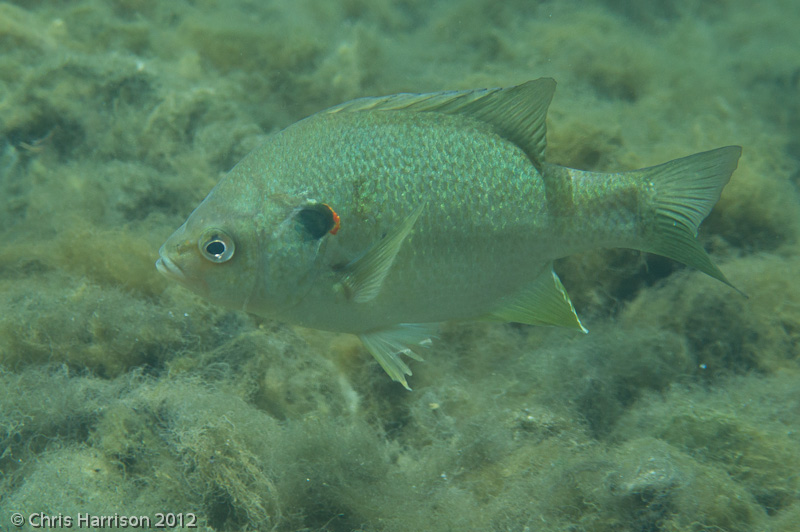
The example I will use is one of the most difficult situations... A flashed image with sediment becoming mobilized around the object. The original appeared like this:
 Big Tuck original.jpg 226.06KB
2 downloads
Big Tuck original.jpg 226.06KB
2 downloadsNot awful, but it has more potential than this.
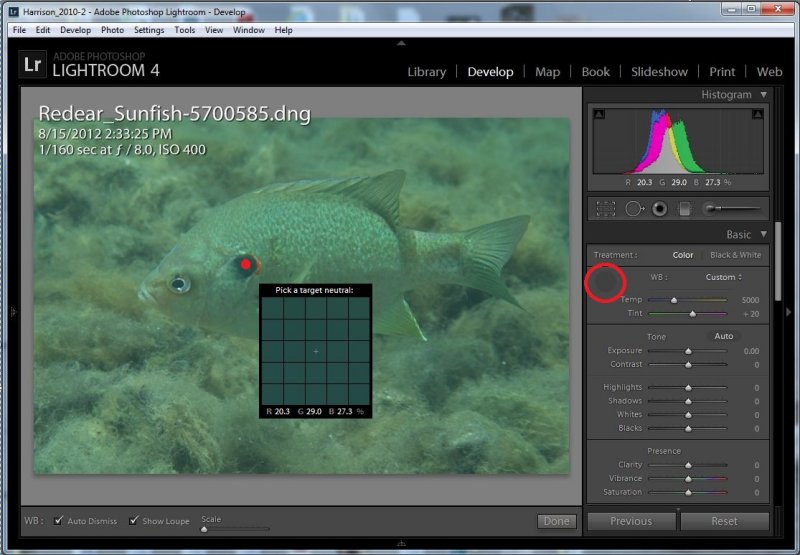
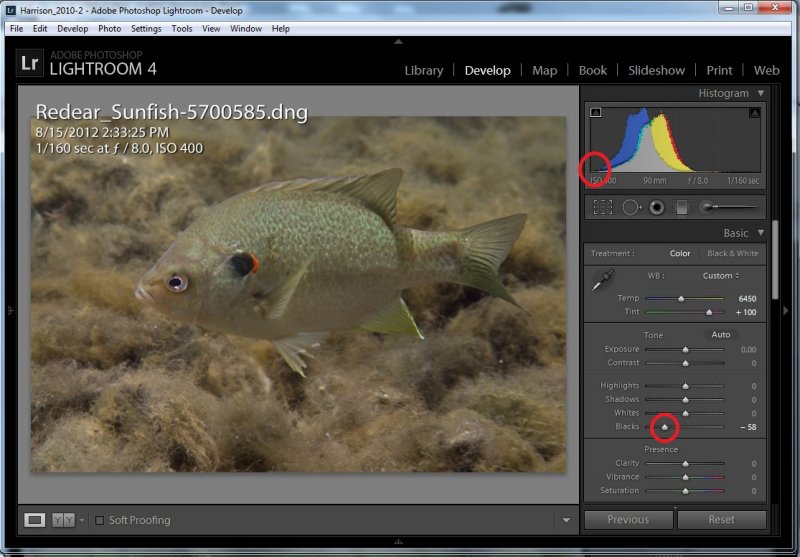
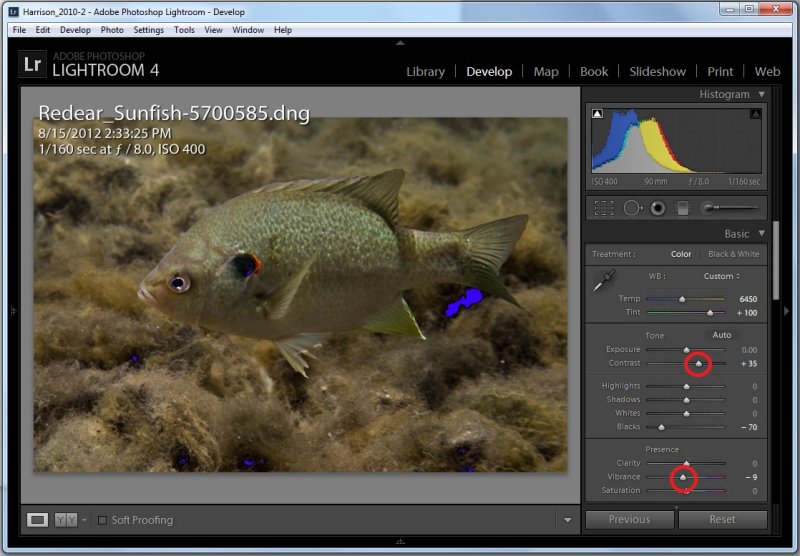
I used to do a lot of tinkering with colors and curves and what a hassle and expense in time. Fortunately I met the master, Jeremy Monroe, of Freshwaters Illustrated, and he's shown the way. You want to use the histogram function in your software... In Gimp, it's under Colors:Levels.
01.jpg 127.37KB
1 downloadsHere you will see a histogram of the colors, with arrows marking the shadows (left), midtones (middle) and highlights (right).
02.jpg 102.97KB
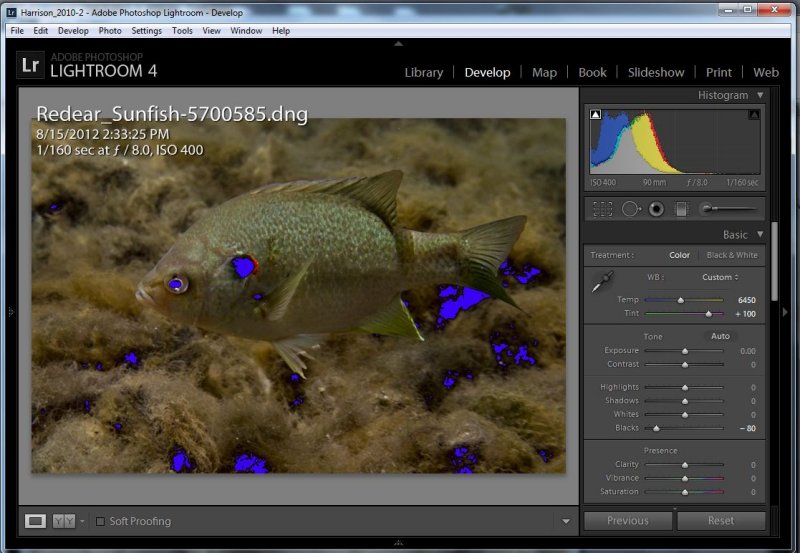
2 downloadsWhat you want to do is tighten the arrows to the curve so that you're only viewing the colors that are present in the image. All the rest is just "blank".
03.jpg 105.33KB
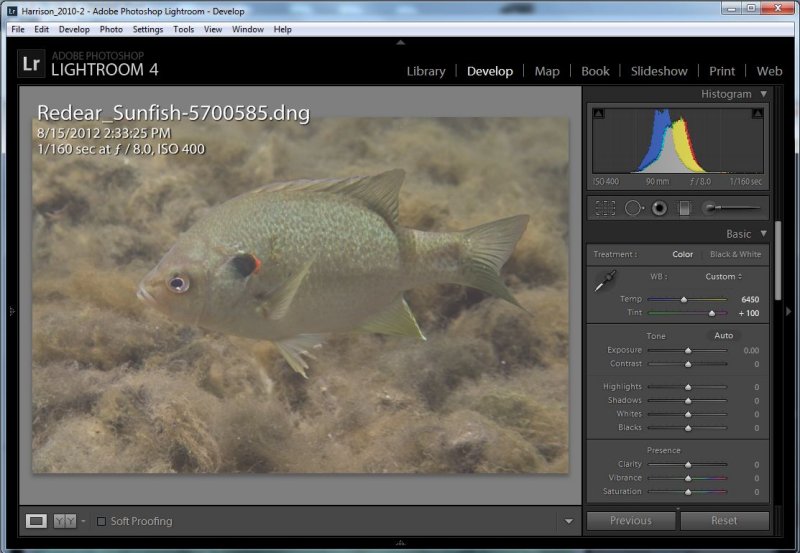
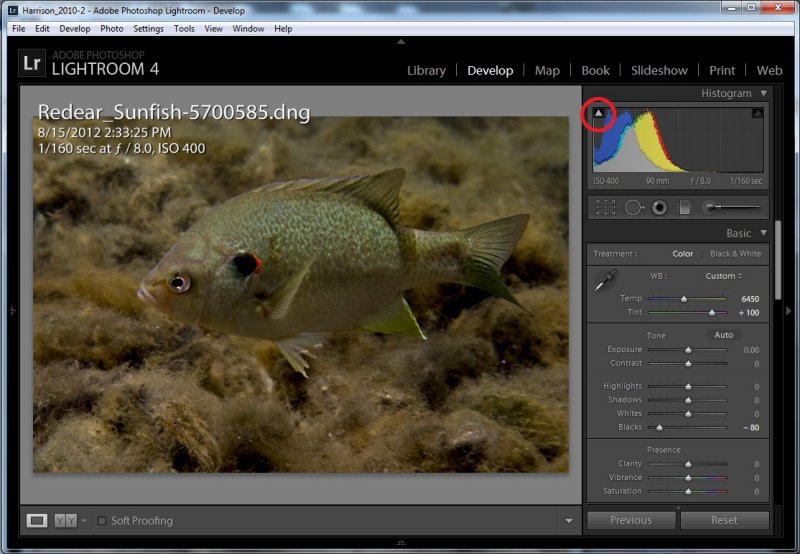
4 downloadsThen you can go through by each color band... Red, Green Blue:
05.jpg 111.87KB
7 downloadsAnd once through the bands, and this is important... RETURN to "Value" to make sure it's still squared up (you may have to reset the arrows there again).
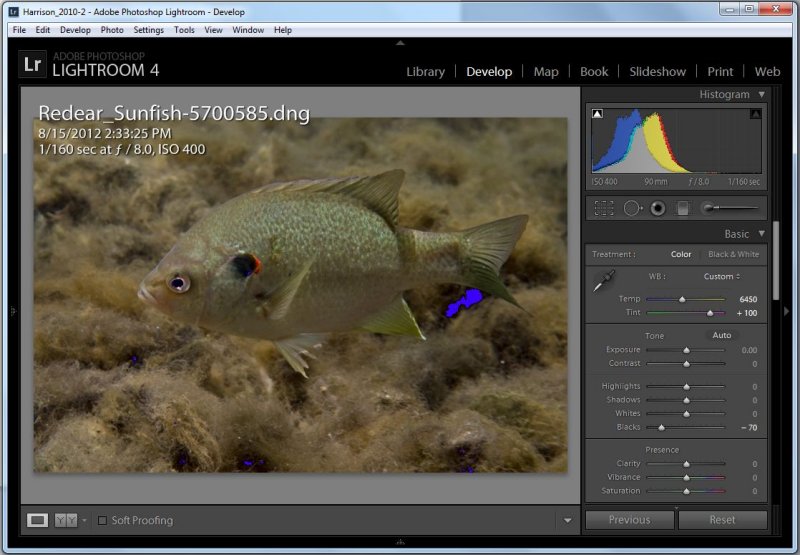
In most cases, that would be it and would be the difference between these photos:
shiners.jpg 60.48KB
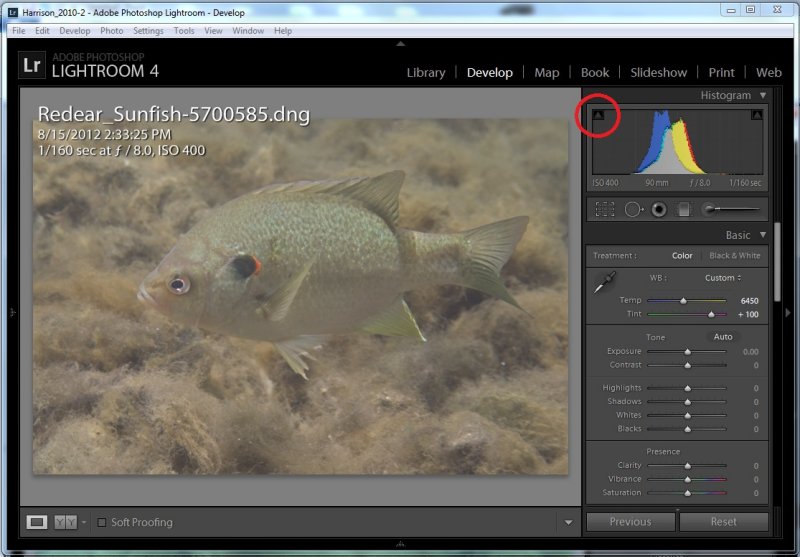
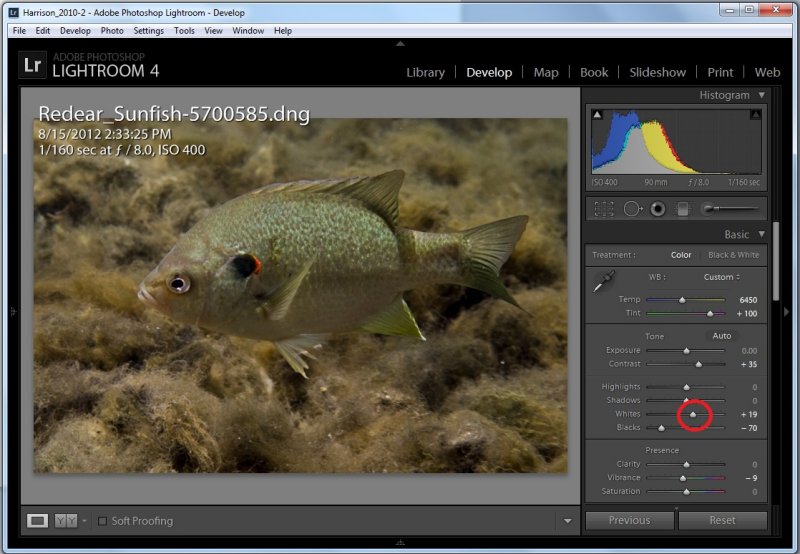
8 downloadsHowever, you might want to tweek the brightness and contrast, which is found under Colors:Brightness-Contrast.
04.jpg 143.55KB
5 downloadsI usually find that I darken images and increase the contrast. Remember, on a laptop, its going to look different... So don't push anything too far. Trust the software
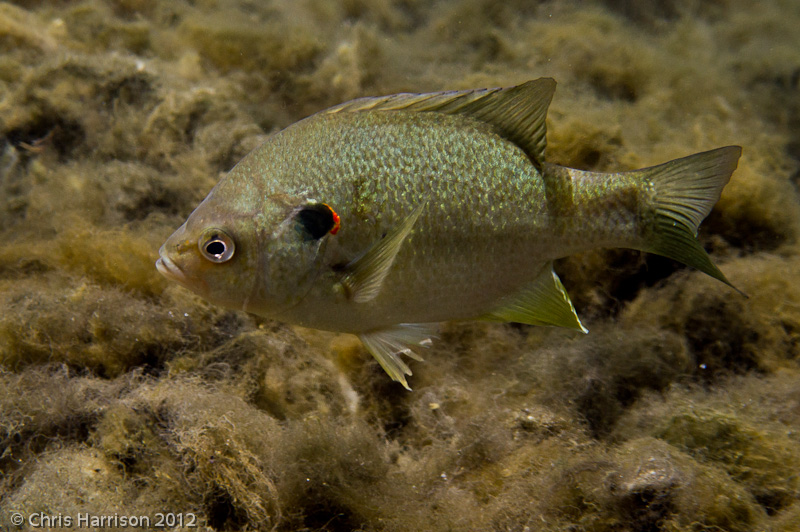
And you end up with something like this...
Big Tuck 2.jpg 280.46KB
4 downloadsTo get a little more color out of it, esp in a blown out pic like this, consider cropping before you make the modifications.
cropped.jpg 40.95KB
3 downloadsWhich is the true essence of gutselli!
So hopefully this is helpful. I don't make any of these suggestions as a criticism, just hoping to help everyone show our native critters off in the best light possible
Todd
Edited by farmertodd, 08 May 2012 - 11:00 AM.