Day 4 Update:
Day 4 was a near bust. Still no water in the tank (still don't know if it will hold water...eek) I cleaned and added the large rocks for cover/structure to the tank...near final position. I also added a solid black background. I began my DIY sponge filter but it isn't working out as.......smoothly as I wanted. The sponge I bought had a hole already in it, and the hole is a little too big and doesn't fit snug. However, it is a good size. Also, in order to use it I need to move my powerhead up the tank, as addressed in my last post. I guess tomorrow I will buy some pipe fittings to make that work. I'm going to try to find some different sponge tomorrow also.
Then to add insult to injury the new lamp I bought doesn't work. I'll have to take it back tomorrow. Anyways, here's some photos.
Filter Tube - I drilled holes after this pic

Sponge Filter to attach to the powerhead

Rocks

Rocks - cave like structure

Full Tank

To Do:
Sponge Filters/Powerheads
Real Filter - Eheim Classic (Probably)
Replace Lamp
Lunar Lights
Water
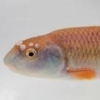
FISH!!!!!!!