Jump to content


Photo

Photo tank


  • Please log in to reply
38 replies to this topic

#1 Michael Wolfe

Michael Wolfe
  • Board of Directors
  • North Georgia, Oconee River Drainage

Posted 02 August 2009 - 07:46 PM

Background and Introduction

I love the photos that several of my fellow NANFAns are able to capture. And I like the idea of being able to “capture and keep” fish without always having to have a spare aquarium ready for them. Technology has made digital photography better and easier. I have a pretty good camera. And there are some instructions out there for how to build an acrylic, field photo tank. However, I am not that comfortable working with acrylic and solvents, while trying to keep five sides of a box all perpendicular to each other at the same time.

But I do have a fair amount of experience in woodworking, and I have enjoyed reading some accounts that others have put on the web of building wooden (usually plywood) aquariums. One thing that I learned about those wooden aquariums is that while wood is good for structural purposes, it is hard to make it watertight. One option is to coat the wood with a laminate. Often fiberglass resin is used for larger aquarium, but a purchased laminate would also work.

So putting these two ideas together (photo tanks and wooden aquariums) I decided to construct a wooden photo tank. I decided to use readily available white, laminated shelving as the basic material. It is relatively easy to cut and drill with standard wood working tools. And it is covered with a solid, watertight coating. It also has the advantage of being white, which will help in reflecting light into the photo area.

Construction

I cut equal portions off of the ends of the shelf to use as the left and right side of the photo tank. These were cut to a length that is the same as the width of the shelf so as to be able to use the full width of the shelf as the height of the photo tank. The bottom and back are cut from the remaining middle of the shelf. In order to keep the volume of the photo tank down, and in so doing make it easier to fill, I chose to rip the sides and bottom down to about 3.75 inches.

The back, bottom and sides were drilled, the holes countersunk. All of the edges, whether those to be screwed together or exposed, on each piece were coated with silicone to provide some water resistance for the shelving substrate. The sides were then screwed to the bottom, and the back screwed onto the assembly to create the basic frame for the photo tank. All of the edges were then filled with silicone to seal the tank.

Finally, A thick bead of silicone was applied to the front edge of the photo tank and the pre-cut, pre-sized piece of glass was placed directly on the front of the tank and a weight applied while the silicone cured.

I purchased a piece of lexan to use as the background “paddle” for controlling the fish. Using a grinding wheel, I slightly rounded the corners to minimize the possibility of gouging the silicone seal. This was then spray painted a medium grey color. By looking at what others have done I believe that this color is the best compromise for displaying various colors of fish.

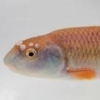
So here are some of my first tries with my wooden photo tank...

Attached File  swamp darter 20090802-1.jpg   103.74KB   29 downloads
Attached File  tourquoise darter 20090802-1.jpg   164.85KB   12 downloads
Attached File  ironcolor shiner 20090802-1.jpg   87.86KB   10 downloads
Attached File  rainbow shiner 20090802-1.jpg   74.02KB   9 downloads
Attached File  florida flag fish 20090802-1.jpg   219.77KB   8 downloads
Either write something worth reading or do something worth writing. - Benjamin Franklin

#2 Guest_Uland_*

Guest_Uland_*
  • Guests

Posted 02 August 2009 - 07:58 PM

Looking good Michael. If these were my first photos, I would have been ecstatic as you should be. Like anything, practice makes perfect...well never perfect :happy:

Edited by Uland, 02 August 2009 - 07:58 PM.


#3 Michael Wolfe

Michael Wolfe
  • Board of Directors
  • North Georgia, Oconee River Drainage

Posted 03 August 2009 - 01:54 PM

Thanks, Uland. I must admit to being rather impatient... in large part because these were all fish I scooped up out of aquariums at my house, and I didn't want to stress em out too much... and it was pretty hot here yesterday... so I just snapped a few pictures and put em back in their homes...

We will have to wat and see if the wooden photo tank idea is really durable enough... I mean it worked for one day, but I don't know how the wood and laminate is going to hold up...

In any event, it was fun to get a few pictures of fish... they are swamp, tourquoise, iron color, rainbow and florida flag... in that order.
Either write something worth reading or do something worth writing. - Benjamin Franklin

#4 Guest_blakemarkwell_*

Guest_blakemarkwell_*
  • Guests

Posted 03 August 2009 - 02:00 PM

I think your Ironcolor Shiner (Notropis chalybaeus) looks quite a bit Dusky Shiner-ish (Notropis cummingsae). But mabey you got it from a location where only one occurs and in that case I will be eating my words.

Blake

#5 Michael Wolfe

Michael Wolfe
  • Board of Directors
  • North Georgia, Oconee River Drainage

Posted 03 August 2009 - 07:19 PM

I think your Ironcolor Shiner (Notropis chalybaeus) looks quite a bit Dusky Shiner-ish (Notropis cummingsae). But mabey you got it from a location where only one occurs and in that case I will be eating my words.

Blake


You could be right... this one (and his school mates) were collected in middle south Georgia where both species as shown as being present. I was going off an earlier identification that we made on-line... but that was not even as "good" a picture as this one and the fish were somewhat smaller/younger. This individual was just the one that made the wrong turn and ended up in the net for a photo.

Fishes of the Middle Savannah River Basin says that I can tell the difference by looking at the roof of their mouths... so I will go downstairs and ask him to say "ahhh" :laugh:
Either write something worth reading or do something worth writing. - Benjamin Franklin

#6 Guest_CATfishTONY_*

Guest_CATfishTONY_*
  • Guests

Posted 03 August 2009 - 08:08 PM

koodo's for your DIY pic tank.

#7 Guest_jblaylock_*

Guest_jblaylock_*
  • Guests

Posted 04 August 2009 - 09:20 AM

I'd like to see a pic of your actually photo tank. I attempted to make a photo tank out of some scrap plexiglass....didn't work.

#8 Michael Wolfe

Michael Wolfe
  • Board of Directors
  • North Georgia, Oconee River Drainage

Posted 04 August 2009 - 08:01 PM

Sure, here are a few...
Attached File  pt1.jpg   166.54KB   7 downloads
...pieces

Attached File  pt2.jpg   245.93KB   5 downloads
...silicone and screws

Attached File  pt3.jpg   201.76KB   8 downloads
...ready to recieve the glass

Attached File  photo tank.jpg   144.45KB   13 downloads
...me, the tank, a camera, and a FFF
Either write something worth reading or do something worth writing. - Benjamin Franklin

#9 Guest_farmertodd_*

Guest_farmertodd_*
  • Guests

Posted 04 August 2009 - 08:59 PM

That looks like it would be a lot more durable in the back of the Farmertodd van... That scares me a whole lot less to bother with spending the time. If I look at acrylic wrong, it seems it scratches. I'm just too rough on equipment.

Thanks for posting Michael :)

Todd

#10 Guest_Uland_*

Guest_Uland_*
  • Guests

Posted 04 August 2009 - 09:21 PM

I try not to make short posts but....I love it :wink:

#11 Guest_schambers_*

Guest_schambers_*
  • Guests

Posted 04 August 2009 - 10:17 PM

Oooooooo! I want one. You would have to be careful to completely seal the melamine, if water gets under the plastic to the particleboard base, you're gonna have a biiiiiig mess.

#12 Guest_bflowers_*

Guest_bflowers_*
  • Guests

Posted 05 August 2009 - 03:21 AM

Looks like I have a weekend project coming up. Looks great and nice idea. Definitely looks like it would hold up in the field better.

Bill F.

Beer is living proof that God loves us and wants us to be happy.
Ben Franklin

#13 Guest_jblaylock_*

Guest_jblaylock_*
  • Guests

Posted 05 August 2009 - 10:46 AM

That's really nice. Appears to be simple and straightfoward to build too. Did you seal the inside of the tank with epoxy or anything?

Nevermind, I see the beads of Silicone now.

Edited by jblaylock, 05 August 2009 - 10:47 AM.


#14 Michael Wolfe

Michael Wolfe
  • Board of Directors
  • North Georgia, Oconee River Drainage

Posted 05 August 2009 - 09:58 PM

Oooooooo! I want one. You would have to be careful to completely seal the melamine, if water gets under the plastic to the particleboard base, you're gonna have a biiiiiig mess.


This is what I am wondering/concerned about... I think I did a good job on the inside corners... but I think that I did not do a great job on the bottom front edge... may have a problem there as I use it a few times... but one other benefit of this construciton is that it is easy (at least it feels easy to me to be doing the wood working)... and it was cheap (for $6.45 I got the board and after I cut everything, have enough left over for another one, so 3 bucks!) and the glass can be salvaged if I do have a problem and have to re-make it.
Either write something worth reading or do something worth writing. - Benjamin Franklin

#15 Michael Wolfe

Michael Wolfe
  • Board of Directors
  • North Georgia, Oconee River Drainage

Posted 05 August 2009 - 10:00 PM

Nevermind, I see the beads of Silicone now.


You can't call those beads... I was all excited about getting the thing built so I could test it out and got rather sloppy with the silicone :wacko:

Edited by Michael Wolfe, 05 August 2009 - 10:00 PM.

Either write something worth reading or do something worth writing. - Benjamin Franklin

#16 Michael Wolfe

Michael Wolfe
  • Board of Directors
  • North Georgia, Oconee River Drainage

Posted 08 August 2009 - 07:23 PM

Oooooooo! I want one. You would have to be careful to completely seal the melamine, if water gets under the plastic to the particleboard base, you're gonna have a biiiiiig mess.


Well I am going to have to try again, because it you were right... I made the assumption (never ass-u-me...) that the edges would be sealed sufficiently... but they were not... I went to look at the tank today and realized that the particleboard underneath had swelled... not sure if the tank would have leaked, but it did not look like it was going to be as durable as I had planned, so time for me to try v2.0 and see if I can get the edges sealed more completely...

I really like this idea and the feel of the tank when I used it, so I am going to stick with the idea, and keep trying to refine the implementation.

Edited by Michael Wolfe, 08 August 2009 - 07:24 PM.

Either write something worth reading or do something worth writing. - Benjamin Franklin

#17 Guest_jdphish_*

Guest_jdphish_*
  • Guests

Posted 08 August 2009 - 07:50 PM

Very informative. Thanks. The photos look very nice.

#18 Guest_schambers_*

Guest_schambers_*
  • Guests

Posted 08 August 2009 - 11:05 PM

Well I am going to have to try again, because it you were right... I made the assumption (never ass-u-me...) that the edges would be sealed sufficiently... but they were not... I went to look at the tank today and realized that the particleboard underneath had swelled... not sure if the tank would have leaked, but it did not look like it was going to be as durable as I had planned, so time for me to try v2.0 and see if I can get the edges sealed more completely...

I really like this idea and the feel of the tank when I used it, so I am going to stick with the idea, and keep trying to refine the implementation.


Too bad! Keep us posted, I want to try this myself.

#19 Guest_BTDarters_*

Guest_BTDarters_*
  • Guests

Posted 09 August 2009 - 03:14 AM

You guys are braver than me! I don't think I would ever try making a tank out of particle board. Too many bad experiences with it, I guess.

Brian

#20 Guest_truf_*

Guest_truf_*
  • Guests

Posted 09 August 2009 - 09:08 AM

Well I am going to have to try again, because it you were right... I made the assumption (never ass-u-me...) that the edges would be sealed sufficiently... but they were not... I went to look at the tank today and realized that the particleboard underneath had swelled... not sure if the tank would have leaked, but it did not look like it was going to be as durable as I had planned, so time for me to try v2.0 and see if I can get the edges sealed more completely...

I really like this idea and the feel of the tank when I used it, so I am going to stick with the idea, and keep trying to refine the implementation.

Try some composite deck material. (polyvinyl chloride (PVC)-based products or other non-wood decking material)
These should not expand or absorb water, and working with them is similar to wood.


1 user(s) are reading this topic

0 members, 1 guests, 0 anonymous users