Jump to content


my stacked 75 gal and 40 gal diy stand project


  • Please log in to reply
4 replies to this topic

#1 Guest_hmt321_*

Guest_hmt321_*
  • Guests

Posted 16 January 2007 - 09:32 AM

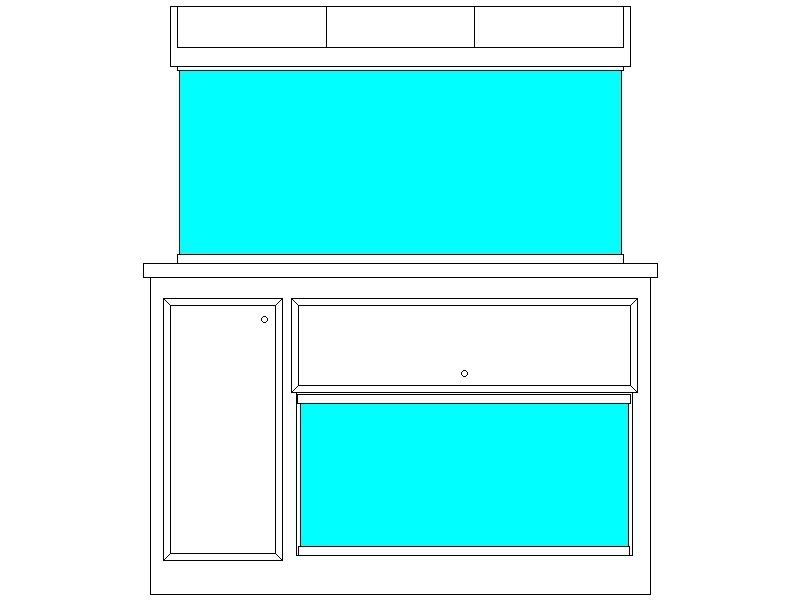
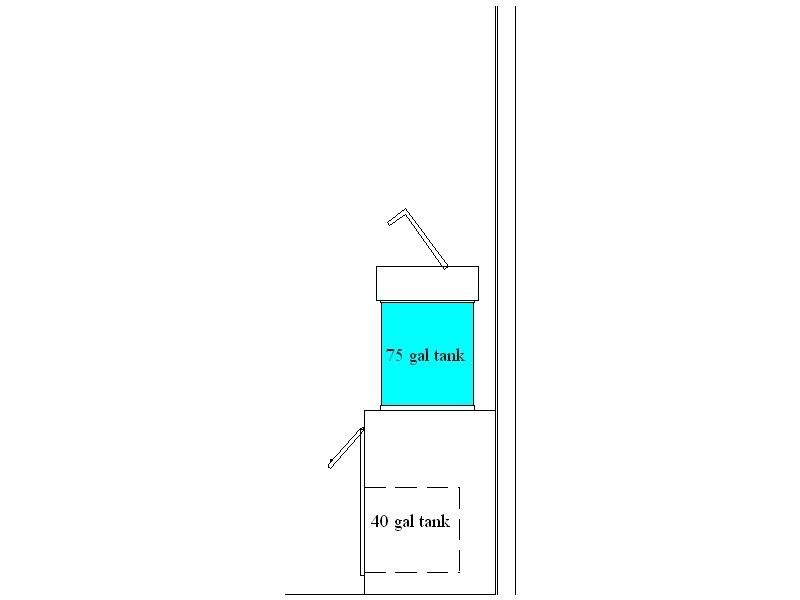
I built my stand for my 75 gal and 40 gal

here is what it will look like after completion
Posted Image

Posted Image

here is the base of the stand being built, i used 2x4's with 3/4" birch plywood on top.

before i had screwed it together

Posted Image

after i put the plywood skin on

Posted Image

this pict is adding the verticle supports, the guy in the pict is Miles, he helped me out Sat

Posted Image

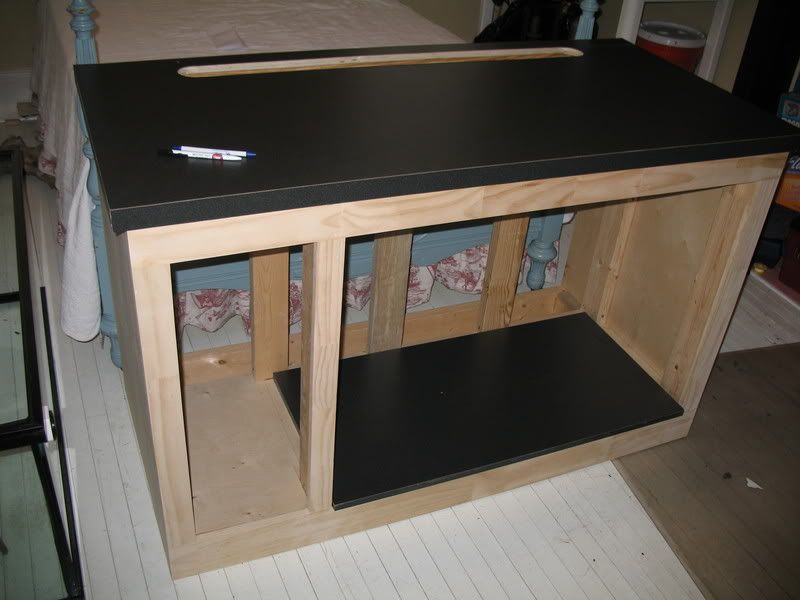
here is a pict after i have all the verticle supports up, you can see where the 40 gal tank will sit

Posted Image

the next pict is after the top frameing has been added

Posted Image

here is a close up of how I attached the top framing to the verticle supports, I used a 1 x 2 cleat with water proof glue fasened with multiple staples

Posted Image

next we added 1/2" plywood to the sides
Posted Image

and i added some non structral braceing to the back of the stand
Posted Image


time for the face frame
http://i27.photobuck...21/IMG_1052.jpg

here it is all glued up, ready for the plywood top and formica
http://i27.photobuck...21/IMG_1055.jpg

after that i hit a snag, I mis cut plywood top to the tank, it was getting late so we called it a day.
thats what happens when you let the boss (me) do a carpenters job

I had a crew finnish a job early on Monday afternoon so i sent them by the house to cut the top and stick the formica down

http://i27.photobuck...21/IMG_1062.jpg

the slott in back is cut using a 3" hole saw and cutting the plywood out in between (i made the slott big enough to get most of my arm in this time, and made it longer) here it is rdy to paint

I will order the doors today


more to come

#2 Guest_dredcon_*

Guest_dredcon_*
  • Guests

Posted 16 January 2007 - 10:30 AM

Looks good

#3 Guest_wolfie8000_*

Guest_wolfie8000_*
  • Guests

Posted 16 January 2007 - 10:38 AM

Looks great =D>
Keep up with the pictures and descriptions.

#4 Guest_hmt321_*

Guest_hmt321_*
  • Guests

Posted 22 January 2007 - 09:24 PM

I will post picts tommorow, completed as of today:

stand is painted

back of tank is painted (blue)

100 lbs of gravel has been washed

drift wood has been scrubbed and fastened to ceramic tile

tank has been plumbed, (tank was drilled, 1 1/2" intake to filter, return is custom 3/4" pvc)

bunch of picts tommarow

I have my big (shiner eating) fat sleeper and red spot sunnie and Tadpole madtom in a 35 gal rubber made trash can, and the fatsleeper was dead this morning. I believe it was stress induced (the sunnie and madtom are fine) the sunnie had been harassing the fatsleeper non stop for the last 2 weeks, i wish i had gotten on the ball and shipped him out but hind sight is 20/20.

#5 Guest_hmt321_*

Guest_hmt321_*
  • Guests

Posted 26 January 2007 - 10:40 AM

ok time for an pictorial update!!!

here is the stand with the top on it, i had one of my carpenters put the Formica on the top on a day when we were rained out.

Posted Image

here is some of the drift wood i will be using in the tank, i scrubbed it down, and soak it in a garbage can for a few days. i picked the drift wood off of the beach on mobile, bay. I screwed the pieces to a ceramic tile.

Posted Image

here is another pict of a few pieces of drift wood that i have hiding the filter intake, i use stainless sheet metal screws and suction cups to hold it to the tank wall.

Posted Image

here is the filter intake from the back side, I painted the back of the tank blue, the intake is 1.5" pvc reduced to a 5/8" hose barb (to fit the eheim hose)

Posted Image

here are the lights for the planted 40 gal, they are from ah supply, two 55 watt bulbs, i can unplug one if i need to.

Posted Image

here is the eheim 2028 for the 75 gal, the 40 gal has a 2227 on it (with the d/w fuction disabled) the 40 gal also has co2 injection with a bubble ladder

Posted Image

here is a shot of the whole thing, the 2028 had a hairline crack in it and so i will have to wait a few more days for a new one to get here , this is the 3rd one of these that i have gotten from the same company in under 2 months that was broken. (needless to say I will not be ordering from that outfit again)

Posted Image

my top for the 75 gal is still being painted and the doors for the cabinet are on order

they should be rdy next week


0 user(s) are reading this topic

0 members, 0 guests, 0 anonymous users