Jump to content


Photo

75 Gallon Native Stream Tank Build


  • Please log in to reply
392 replies to this topic

#81 Chasmodes

Chasmodes
  • NANFA Member
  • Central Maryland

Posted 22 February 2017 - 11:54 AM

Updates:
 
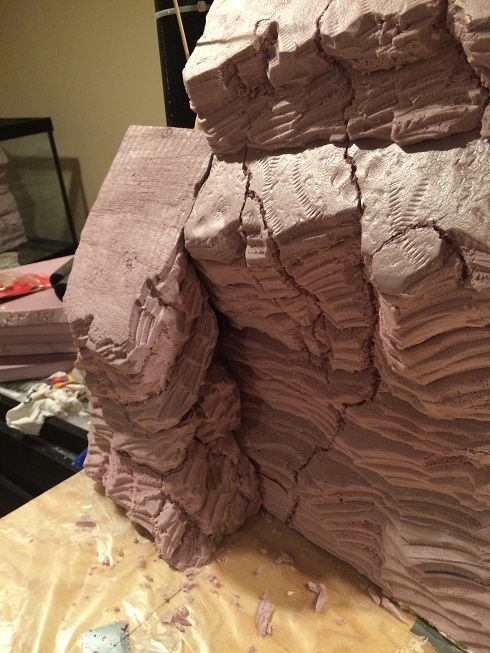
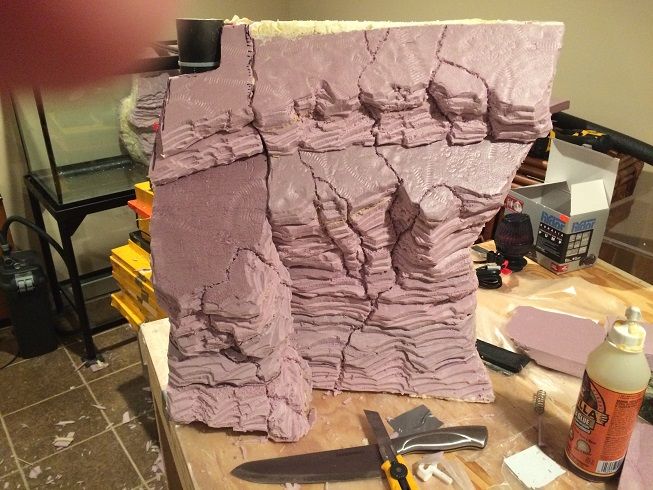
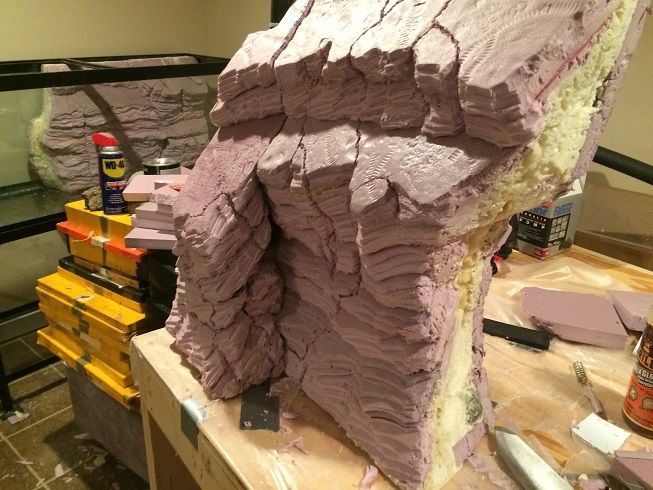
On Monday, I painted the cpvc and pvc stuff that would have been exposed to view. I also filled in the gaps and foamed sections 2 and 3 together. 
 
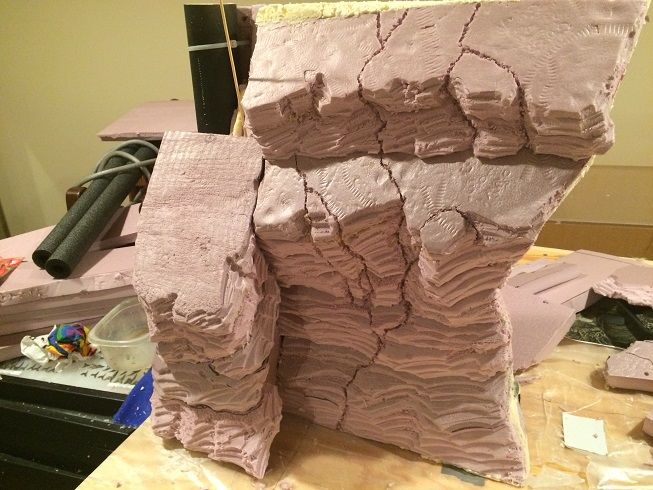
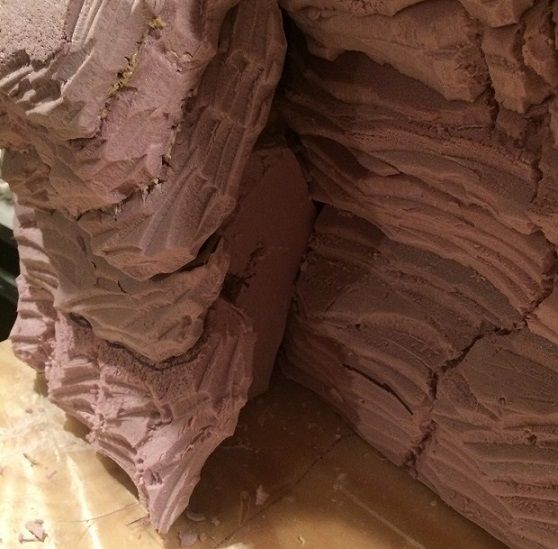
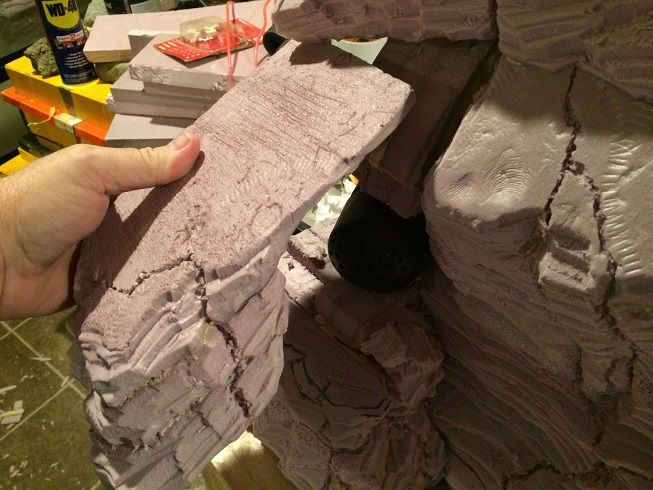
On Tuesday, I had my first setback: I cut sections apart 2 and 3 along the fissure. It was tougher than I thought to do for a couple reasons:
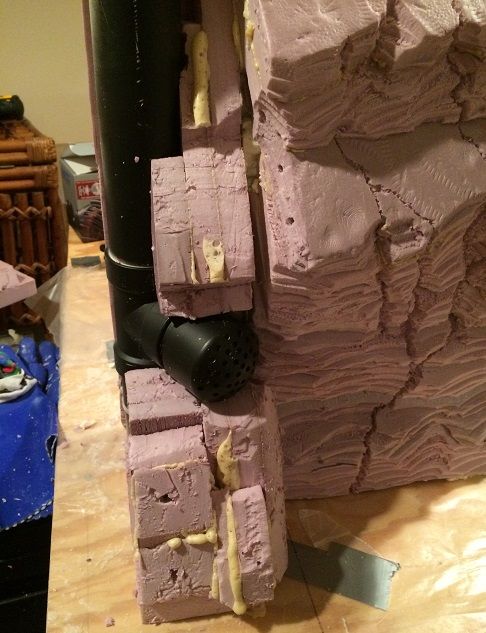
  1. I found some yellow goo - uncured Great Stuff. It doesn't cut well. So far, this is the first time that I've found this. I poked a bunch of holes into it and all around it deep into both sections. I checked on it today and it all seems fully cured. However, I poked a few more holes with a skewer and found some more. I think that the solution is to get some air (and maybe water) in there to speed up the curing of the thicker areas. If you remember, it's not all foam, but a good many stones are in there too. So, I'm not that worried about it. I'll keep poking holes until the skewers stop being sticky. I think that I'm going to go back, just in case, and do the same thing for section one.
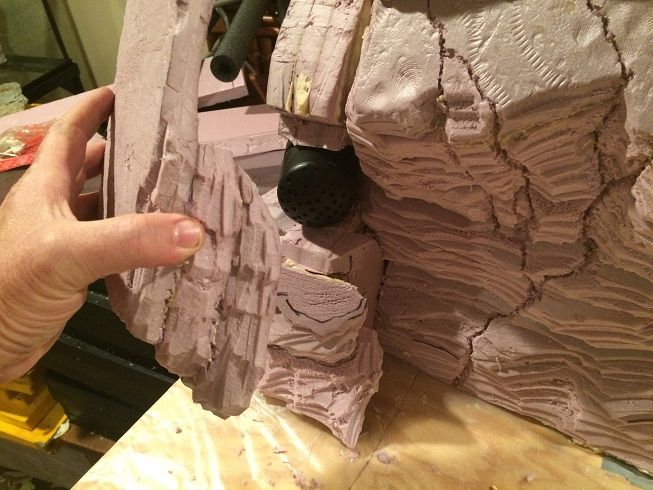
  2. When cutting the fissure between the sections, I had some trouble using my knives. So, I pulled out the heavy duty equipment, a saw. Should do the trick right? It was in an area where I had a plastic rod. That is what I thought it was, and the saw should have taken care of it. But, after a couple minutes of sawing and no progress, I realized what it was.  Did you know that it is really tough for a hand saw to cut through a river stone?

Kevin Wilson


#82 littlen

littlen
  • NANFA Member
  • Washington, D.C.

Posted 22 February 2017 - 01:58 PM

As long as the outer layer(s) are cured and dry, any tacky bits in the middle shouldn't be an issue--in terms of any uncured Great Stuff leaching chems into the water.   I had similar results making some rockwork for a terrarium years ago but the only noticeable issue was the concrete cracked and chipped away as the foam slowly continued to expand over the years.  No harm being cautious as you are.  You still hacking away at that store bought rock? :D


Nick L.

#83 Chasmodes

Chasmodes
  • NANFA Member
  • Central Maryland

Posted 22 February 2017 - 03:35 PM

Thanks Nick!


You still hacking away at that store bought rock? :D


=;    ](*,)  8-[


Kevin Wilson


#84 littlen

littlen
  • NANFA Member
  • Washington, D.C.

Posted 22 February 2017 - 04:36 PM

We may never be more than internet acquaintances but I'll remember you as the "guy who bought rocks" as long as I live. Hey, we all have to make an impression in this world, right!?!

Did you mention what fish will inhabit your masterpiece upon completion?
Nick L.

#85 Chasmodes

Chasmodes
  • NANFA Member
  • Central Maryland

Posted 22 February 2017 - 04:58 PM

Too funny!  I've been called much worse!  Reefkeepers buy live rock  :D/ 
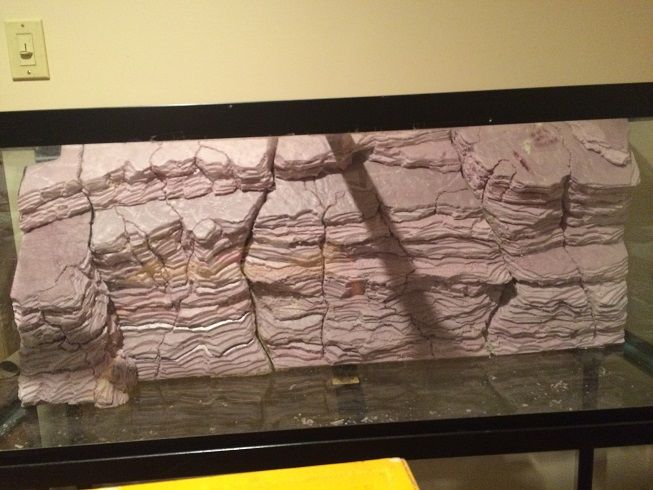
...just sayin', LOL.  Thing is, I live in the sticks, so there are plenty of rocks around the house that I could have gathered up.  But, at HD, they were there...calling me...  :biggrin:


I'd like my tank to best represent the peaceful species of fish that don't eat darters that live in the Upper Potomac watershed.  The species that I want to be sure to keep are all species of darters, shiners and minnows that I can legally catch and keep.  I would be thrilled to keep, if I'm lucky enough to catch them, rainbow and fantail darters, and either spotfin or satinfin shiners, rosyside dace, rosyface shiners, and silverjaw minnows.  I live within 15 minutes of the Mouth of the Monocacy.


I think that the only fish that I really want to avoid are cutlips minnows.  I don't want a tank full of no-eyed fish!


I'd be game for a future species 10g madtom/sculpin tank too.


Kevin Wilson


#86 littlen

littlen
  • NANFA Member
  • Washington, D.C.

Posted 22 February 2017 - 07:16 PM

I think you'll easily come across most of those species....Greenside darters as well.  That'll be a very nice tank.  I'll leave the ridicule alone (for now) and let you get back to work.  Looking forward to it.


Nick L.

#87 Chasmodes

Chasmodes
  • NANFA Member
  • Central Maryland

Posted 23 February 2017 - 07:54 AM

...but the only noticeable issue was the concrete cracked and chipped away as the foam slowly continued to expand over the years.


That explains why sections 1 and 2 didn't fit together the day after I cut that fissure apart after foaming them.  The same thing happened to sections 2 and 3 last night, they didn't fit.  So, I'll have more carving to do on all three by the time that I'm ready to install them into the tank.


The good news is that I poked a ton of holes with skewers in all of the sections where the most foam would be and the skewers weren't sticky after any of them.  So, I think that the foam is uniformly cured, although I realize it could still expand some.  


I'll leave the ridicule alone (for now) and let you get back to work.


It's perfectly fine Nick.  I can take it... y'all just need to be ready when it's my turn to dish it out  :biggrin:


I didn't get much done last night, but I have a long weekend to work on it.  It's time to build some roots!


Kevin Wilson


#88 truecrimson

truecrimson
  • NANFA Guest
  • Leb-A-non, PA

Posted 24 February 2017 - 06:11 AM

I am really loking forward to the roots.

If you had not cut and poked holes exposing the foam would it cure eventually anyway?

#89 Chasmodes

Chasmodes
  • NANFA Member
  • Central Maryland

Posted 24 February 2017 - 08:03 AM

I am really loking forward to the roots.

If you had not cut and poked holes exposing the foam would it cure eventually anyway?


I've read conflicting info on the web about that.  If it was in the process of curing, then I guess it probably would have cured on its own.  I've also read that without air or water, that it doesn't cure at all and that it's toxic if it ever gets released.  The Dow site also mentions that this could be a problem, but is pretty ambiguous.  I poked a heck of a lot of holes, so I'm pretty sure in my case that it has all cured.  I couldn't find any recommendations on what to do if you found uncured foam except to spray with water, poke holes, or scoop it out or do it over.  I figured poking holes was easy, and if that didn't work, then I'd cut it out and start over.  Luckily, the poking holes seemed to work.


Some people say that it will keep expanding for a long period of time, some say about a week and then it's done, others say months.  Who really knows?  In my case, after 2 days, I still had yellow goo.  Now that I've punched a bunch of holes, no problem.


How to prevent this from happening in your build?  You have about 2 hours to work until the can is unusable. In your case, you could spray the foam about an inch thick along the perimeter of the cavity from the bottom of the tank to the top, and then leave the middle of the cavity open a little bit so it has air and also room to expand.  If you did it that way, it should all cure OK and the expansion will fill in the final gap.  Just plan a bit before you start spraying.  Oh, and some people recommend using a spray bottle to spray a light film of water on the surfaces that you plan to foam and that will speed up and help the curing process.


Also, it will expand about 1 1/2 to 2x of what you spray out if you use the red can with the yellow lid, so allow for some room for expansion..  


Wear gloves, eye protection, and a long sleeve shirt that you don't mind messing up.  You don't want to get the foam on your skin...it can be very messy.  If you are careful and since you'd be foaming inside your tank, you should be OK and probably won't have an issue.


I sprayed pretty much all at once and also probably used more than I needed, not really thinking that my background was too thick.  As it expanded, I had foam oozing out of every crack and crevice.  I didn't realize that I had a potential problem until I cut the sections apart and found the not-so-Great-Stuff yellow goo.


Kevin Wilson


#90 Doug_Dame

Doug_Dame
  • NANFA Member

Posted 24 February 2017 - 10:07 AM

That info alone is well worth the price of admission to this thread. 


Doug Dame

Floridian now back in Florida


#91 Chasmodes

Chasmodes
  • NANFA Member
  • Central Maryland

Posted 06 March 2017 - 08:28 AM

It's been a while since I've provided an update, but I've been busy working on this project.  I'm OK with what I've done, but not 100% happy with it.  


First, I purchased a Hydor Koralia 3G circulation pump for a decent price.  This one moves 2,450 gph, so that should make for a pretty fast current.  If it turns out to be too much, then I can always move it to my other tank.  I will provide some current breaks.  If you don't remember the direction that I took regarding current, his tank is my attempt to mimic an eddy along an undercut stream bank/rock wall.

IMG_7687_zpsmkbdwn1s.jpg


I'm still working on the rock wall, as I'm almost done with the structure and carving.  This picture kind of shows the structure around the stand pipe. 

IMG_7688_zpsce5jnfqx.jpg


Rather than a mud wall made of spray foam, I decided to go ahead and finish the entire back as a rock wall to hide the stand pipe and intake:

IMG_7689_zpsrug9ffnz.jpg


To make the strainer on the stand pipe accessible for maintenance, I am making the rock section that covers it removable.   The second pic below will be the means for how I attach the lower end of the removable piece.  The upper end will be made by a peg and hole system.  All I have to do to remove it is to slide it down.  My only fear about this is if the current causes this piece to move, so I'll have to affix the mechanism tightly.  Another option might be to affix this piece to the root structure and have the root structure removable, or at least be able to move it enough to get to the strainer.

IMG_7690_zpsms4gcbrm.jpg

IMG_7692_zpsz1v2vrny.jpg


Below is a view that shows the side of the structure hiding the intake.  I'm not real happy about how this looks.  If you view the tank from towards the right side of the tank, you can see this.  I think that I will work on trying to make this look more realistic and add/carve a little more foam.  Another option is to add just enough foam to make it look like a cave, then paint the inside black.

IMG_7693_zpsecjtnsah.jpg


I know that it doesn't look like it, but there is plenty of space in there around the intake that will allow water to be drawn in.  Again, my concerns about this are the aesthetics and the functionality of the removable section.  After I finish this, then I'll move on to the roots.  Oh, another option to hide the cave is to use the root system to block that view.  In doing so, my challenge will be to make sure that the strainer is accessible.


I have to say that I'm discouraged a little because this is moving so slow.  I thought that I'd be a lot further along by now.  Part of that is because I have to wait for the glue to dry one section at a time.  If I try to do too much at once, it turns out not looking very good.  


Thanks for following.


Kevin Wilson


#92 Chasmodes

Chasmodes
  • NANFA Member
  • Central Maryland

Posted 07 March 2017 - 07:50 AM

I got to thinking that maybe I shouldn't make that piece removable, and just stuff some sponge in there as a prefilter.  I'm on the fence right now.  What do you all think?  


By the way, I modified that side area.  The amount of water that can enter the intake is the same.  It is just the lower support structure that I covered.  Here are some before and after pics.  I wasn't happy with the way that it looked.  I feel better about it now.  Hopefully, I'll be able to hide the powerhead about half as well as I did here.


Before:

IMG_7693_zpsecjtnsah.jpg


After:

IMG_7695_zpscojrocq1.jpg


Kevin Wilson


#93 littlen

littlen
  • NANFA Member
  • Washington, D.C.

Posted 07 March 2017 - 10:31 AM

If you think there is a chance you will ever need to access the pipe...I'd keep that option open.  It would be a shame to have to drain the tank, and cut away your hard work because something [inevitably] went wrong and that's the only way you could fix it.  But, it could also be a gamble worth taking for having an awesome looking tank.  If it doesn't work for you in the long run, you'll know next time when you hard-scape your 6' tank!  Nicely done.


Nick L.

#94 Chasmodes

Chasmodes
  • NANFA Member
  • Central Maryland

Posted 08 March 2017 - 07:30 AM

Thank you Nick.  I've thought this over and came up with several options:


  1. create a removable section so that I can access to the intake, always and option for a sponge as a prefilter
  2. modify the standpipe and create sort of an overflow where water enters from the tope, but that has potential problems if water evaporates and I'm on vacation or something because the cannister filter could run dry and get ruined.
  3. permanently affix everything, add a sponge as a prefilter to prevent the intake from clogging, but why even have a drilled intake
  4. permanently affix everything and see what happens.

I think that my original plan will work, to create the removable section.  It won't be easy, but then again, this project hasn't been as easy as I initially thought it would be.  If it doesn't work, then I'll try one of the other options.


As far as the next project, well, I've learned a lot and I could improve some things that I've done.  I seem to find something each time I work on it.  For example, a wire brush is great for hollowing out an internal chamber to get the shape that you want, rather than using a knife.  Less risk of losing a thumb too!  :biggrin:


Kevin Wilson


#95 Chasmodes

Chasmodes
  • NANFA Member
  • Central Maryland

Posted 09 March 2017 - 08:17 AM

I've decided to continue to go ahead with the removable section of background as Nick suggested above.  For now, I'm pretty much done carving the rock work and am ready to move on with constructing the roots.  I have to trim the right edge a little bit, about 1/2 to 3/4 of an inch, because when carving the final side, I wanted to leave enough extra material in case I messed up on my measurements.  I've taken this approach for each section and it seems to work for me.  But, now it's time to trim that right side and get the entire structure to fit into the tank.  I'm a little worried about the really tight fit overall because I have to leave some room for the silicone, so I may wind up trimming even a little more later.


The first pic below shows the left side of the background with the removable piece in place.  I still need to create the mechanism to hold the bottom of the removable piece in place securely.  The top part of that section slides out from under a firmly glued upper layer of the background, as seen in the second picture.

IMG_7696_zpsq0jhpzf2.jpg

IMG_7698_zpseylpicut.jpg


Below is a view from the middle of the tank showing the new final layers at the top.  I'm probably done building and sculpting the rockwork, but then again, sometimes I see something and have to meddle, so I'll say that most likely I'm done  8-[

IMG_7697_zpsahzb2nym.jpg


Kevin Wilson


#96 littlen

littlen
  • NANFA Member
  • Washington, D.C.

Posted 09 March 2017 - 09:05 AM

That's awesome.  You cannot even tell the piece is removable.  Great job.  I think you'll one day appreciate the 'removability' of that piece, or a Madtom will tank you for the excellent hiding space....


Nick L.

#97 Chasmodes

Chasmodes
  • NANFA Member
  • Central Maryland

Posted 09 March 2017 - 09:16 AM

Thanks Nick!  I have to come up with a way to secure the base.  I have a couple ideas.  Maybe I'll hollow out the base and then glue or spray foam some "store bought" rocks :biggrin:  to weigh the base down.  Or, devise a hooking system sort of like the pic below, or maybe do both.

IMG_7692_zpsz1v2vrny.jpg


I found some rubber tubing that can slide over the plastic rod and tighten up the connection  Basically, the hooks would be embedded into the main structure, and the plastic rod would run across a hollowed out gap in the removable piece and securely glued.  It should be tight enough to snap in place and hold, and then prevent the base from floating up.  The upper end of the removable piece would just slide under the two upper layers.


I plan on hollowing this section out quite a bit regardless of what direction I go, so that I can reduce the amount of foam and also the related buoyancy.


Kevin Wilson


#98 Chasmodes

Chasmodes
  • NANFA Member
  • Central Maryland

Posted 09 March 2017 - 09:11 PM

I trimmed the left end so that I could fit it all in the tank.  I have to do some more trimming on the back side to get a flush fit against the glass on the back left side, too much gap back there.  I also will have to break out another can of spray foam to fill in the remaining gaps on the left side up to the front of the strainer.


As far as the removable piece, someone suggested that I use neodymium magnets screwed into a piece of acrylic sheet and glued onto the foam.  I think that will work perfectly.  Great suggestion and much easier to accomplish.


Here are some full tank shots as I fitted the rock work in the tank:

background%2026_zps9vdbihnz.jpg


background%2027_zpsytt6xopl.jpg


background%2028_zps7dlg7bxa.jpg


Thanks for following and for all of your suggestions!


Kevin Wilson


#99 keepnatives

keepnatives
  • Regional Rep

Posted 10 March 2017 - 07:46 PM

Looks great you are the master.  Can't wait to see it up and running. 


Mike Lucas
Mohawk-Hudson Watershed
Schenectady NY

#100 Chasmodes

Chasmodes
  • NANFA Member
  • Central Maryland

Posted 11 March 2017 - 09:00 AM

Thank you Mike!


Kevin Wilson


0 user(s) are reading this topic

0 members, 0 guests, 0 anonymous users