I think you idea is going to work. You could also buy a short rod of PVC or fiberglass all-thread and skewer it through your removable piece. Then use a plastic or pvc washer and nut to lock it down from the top....which presumably would be above the water level.
If all else fails, you could could use The Force to hold it in place.
75 Gallon Native Stream Tank Build
Started by
Chasmodes
, Oct 24 2016 09:04 AM
392 replies to this topic
#101

littlen
-
- NANFA Member
- Washington, D.C.
Posted 11 March 2017 - 07:05 PM
Nick L.
#102
Chasmodes
-
- NANFA Member
- Central Maryland
Posted 12 March 2017 - 10:05 AM
Quick update:
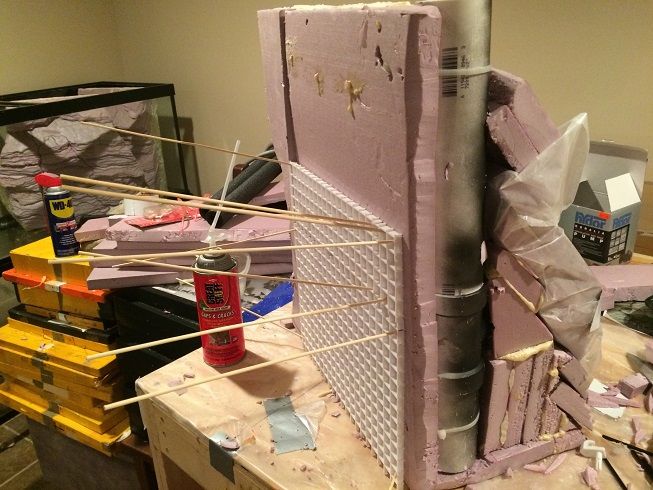
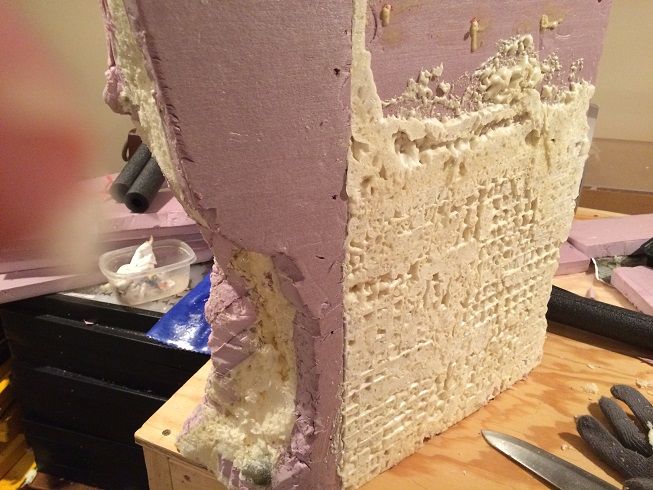
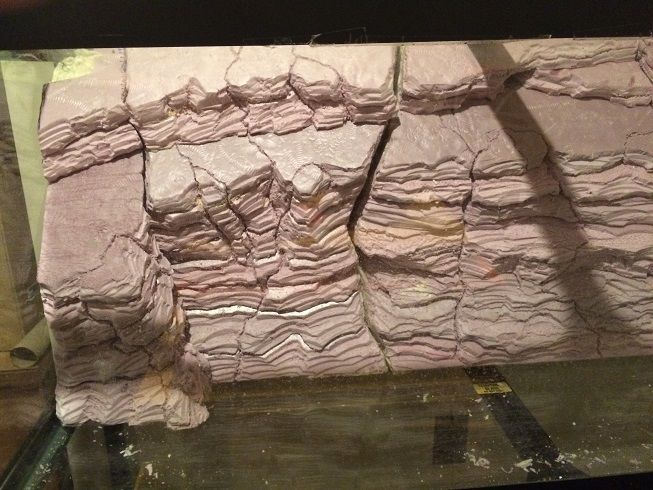
I had to even out the back wall so that gap between the background and glass would be not that much to silicone, so I had the idea of using egg crate to give me a final plane to cut against while having the ability to better bond both foam and silicone ultimately to the glass. Everything worked out as planned as I applied Great Stuff to the egg crate and foam, and fill out the gaps around the stand pipe and an uneven bottom on the right side of the third section...
...except, now I'm worried that I messed up and wasted a can of spray foam, because I didn't scour the back of the foam wall. DOH!!! I fear that it will just peel off. Well, worst case scenario is that if I can easily peel it off, then I can redo this step.
Kevin Wilson
#103
Chasmodes
-
- NANFA Member
- Central Maryland
Posted 14 March 2017 - 12:01 PM
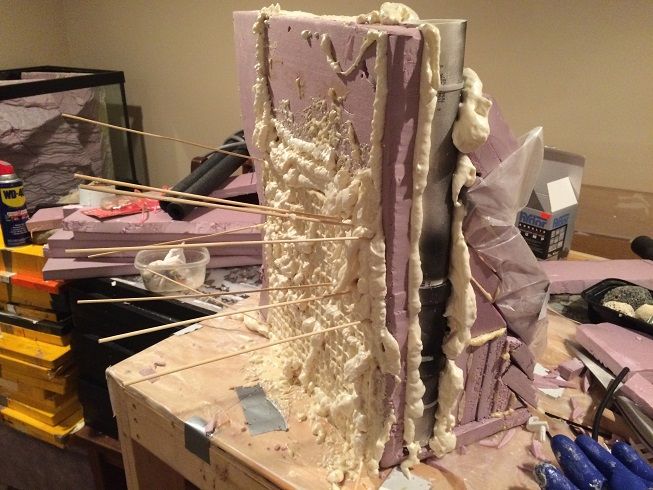
After letting it cure for a couple days, I trimmed off the excess foam and tried to remove it by hand. I couldn't budge it, so I guess it passed the test despite me forgetting to scour the foam board prior to applying the spray foam. I'm confident that it will hold up when siliconed to the glass. Plus, it's a continuous spray foam connection from the bottom of the structure to the back which added to the strength overall. In addition, the entire background will rest under the lop of the tank trimming and the middle support which should help keep everything in place.
I also used the foam to fill in some gaps along the stand pipe and also even up the bottom.
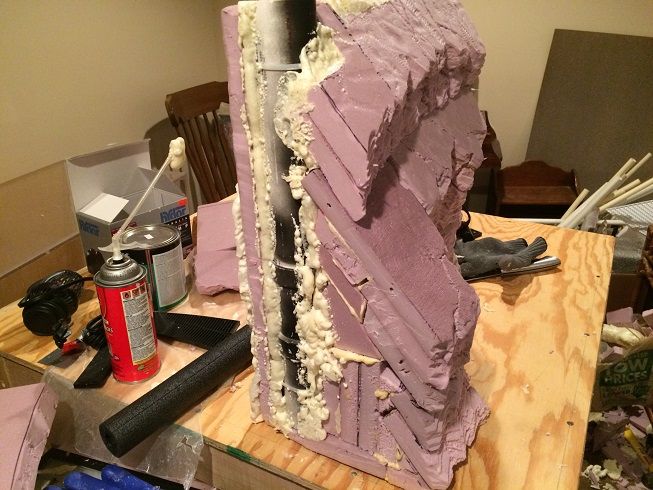
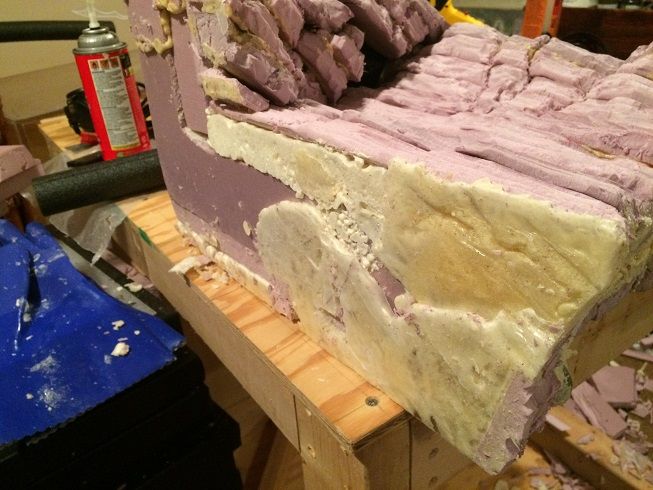
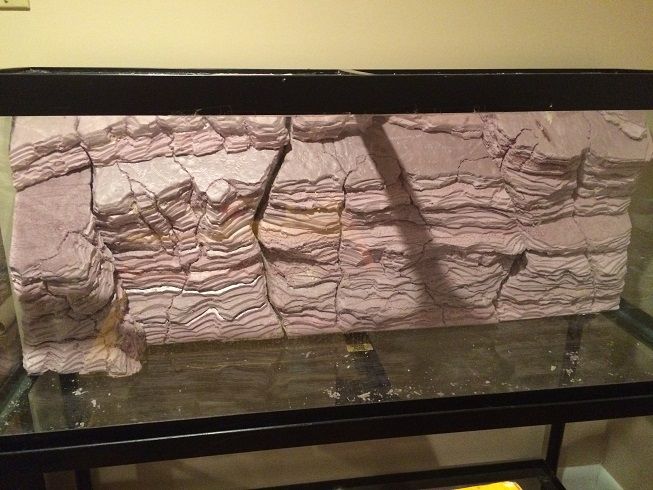
I'm not happy about raising the level of section 3, because it now makes that left fissure into more of a chasm. I guess it's OK, but fish can swim back in there and it doesn't look as good as I'd have hoped. I guess fish need hiding spots, so maybe it is a good thing. I'm a little bummed about it. Maybe after painting it with the Drylok, it will look better. Here are some pics when fitted into the tank:
Kevin Wilson
#104
Chasmodes
-
- NANFA Member
- Central Maryland
Posted 14 March 2017 - 06:13 PM
I was downstairs looking at it a while ago and the chasm is growing on me. I really liked the tight fit, but this kind of resembles a large section of rocks settling to create the chasm. It wasn't in my original design that was in my head, but, like I said, it's growing on me.
What do you all think? Fix it or keep it?
Kevin Wilson
#105
MtFallsTodd
-

- NANFA Member
- Mountain Falls, Virginia
Posted 14 March 2017 - 07:21 PM
Looks like you did it on purpose. I think it looks quite realistic.
Deep in the hills of Great North Mountain
#106
Chasmodes
-
- NANFA Member
- Central Maryland
Posted 15 March 2017 - 02:04 PM
Thank you Todd. It is growing on me. It might look better to me after painting. I'm going to move on to the construction of the roots before I make up my mind as to repair this or keep it. Perhaps I'll have a root "grow" into it.
Next steps:
- construct root structure
- apply tile grout to root structure and sculpt
- paint rock wall and roots with Drylok
- install into tank
Kevin Wilson
#107
brackishdude
-

- NANFA Member
Posted 15 March 2017 - 04:47 PM
I like the chasm, and the whole thing! Nature is rarely "regular".
I just hate to see all of the reduced water volume taken up by the foam. I'd be trying to find a way to hollow out much of it to make caves and hidey-holes for my critters. The reef guys can't stomach any area that may harbor detritus and foul the water, but a FW tank is generally more robust biologically.
Just a thought. It really looks fantastic! keep'em coming!!
As your fellow, I can demand of you no more, and accept no less, than I allow to be demanded of myself
#108
truecrimson
-

- NANFA Guest
- Leb-A-non, PA
Posted 15 March 2017 - 05:14 PM
The chasm does look very natural. I do not have the experience to assess whether fish getting into it would be a likely problem. I'd be inclined to keep it.
#109
lilyea
-

- NANFA Member
- Peace River Watershed, Central Florida, USA
Posted 15 March 2017 - 09:53 PM
I have been enjoying following your build - thank you for sharing! Remember that what it looks like now in its squeaky clean, pristine condition is not what it will look like when it is painted, prepped, and aqua-scaped and then it will change even more as it ages. Based on your initial "what I'm shooting for" picture, there appears to be some aquatic plant growth on the rocks in the river. If you attempt to replicate that element then the crevice will likely fill in by itself. Keep up the great work!
#110
Chasmodes
-
- NANFA Member
- Central Maryland
Posted 16 March 2017 - 07:32 PM
Thank you all for your feedback, very much appreciated. I think that I will keep ths chasm.
Yeah, the background takes up about 1/4 of the tank volume. I like the idea of carving out a little more hiding area and reducing some foam. The main reason that I tried to not do that was about worrying about fish getting stuck and die, or if I had to break down the tank in an emergency that I couldn't catch the fish to get them out.I just hate to see all of the reduced water volume taken up by the foam. I'd be trying to find a way to hollow out much of it to make caves and hidey-holes for my critters. The reef guys can't stomach any area that may harbor detritus and foul the water, but a FW tank is generally more robust biologically.
Kevin Wilson
#111
Chasmodes
-
- NANFA Member
- Central Maryland
Posted 30 March 2017 - 08:23 AM
Sorry for lack of updates. My plan was to move on to the roots, but I still needed to fix my problem with attaching the removable foam section that covers the filter intake. I guess that I have trouble multitasking. Recently, I bought some super strong magnets and planned to use them, but have been wrestling with a couple issues with how to attach secure them on both sections of foam. So, I came up with a variation of my original idea and scrapped the magnets. If my idea fails, then I can always go back to the magnet idea.
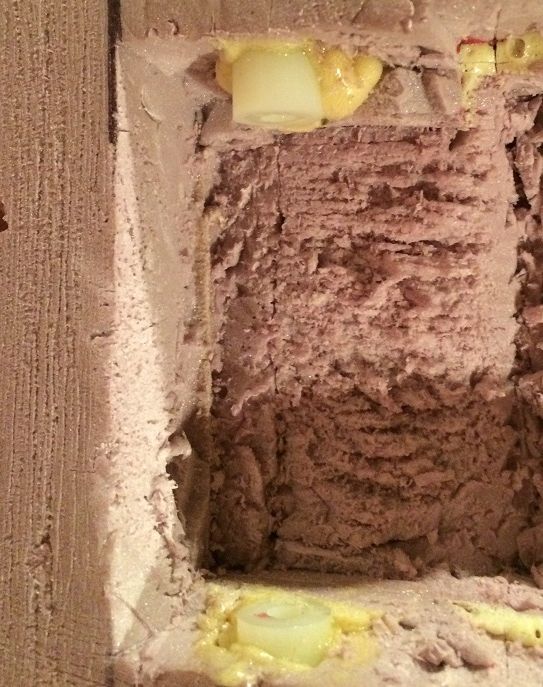
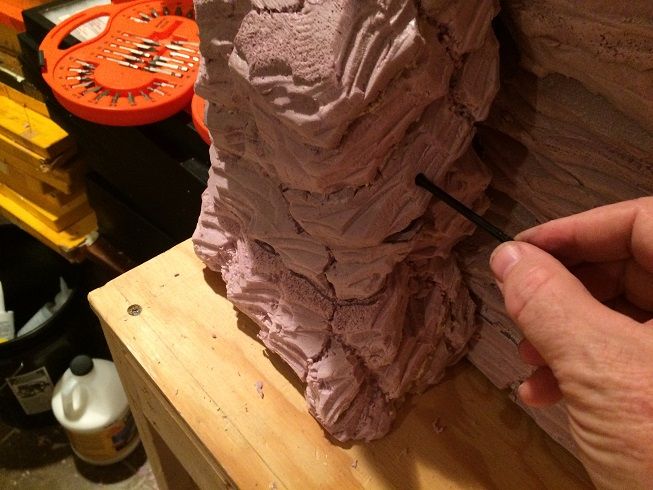
I bought some nylon spacers used for spacing nuts and bolts when attaching hardware and decided that I can glue two of them to the removable section, and one of them to a foam piece on the background. My first step was to cut to fit that foam piece and glue it to the background. Then, I had to use a drill bit (not using a power tool, but by hand, so as to remove foam at a controlled pace and get a more accurate hole size). The nylon spacers are basically 1" long by 1/2" in diameter. Once secured, then I could slide a plastic rod through all all of the spacers and secure the removable section. I did it, but it wasn't easy aligning everything.
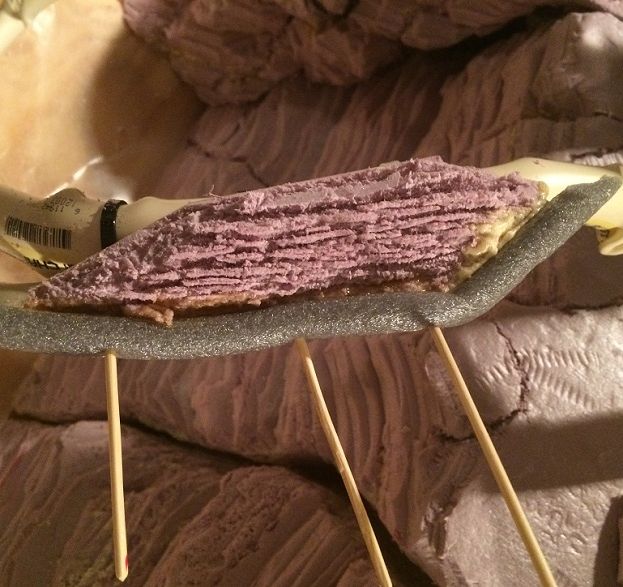
This pic shows the two nylon spacers glued into the removable foam section:
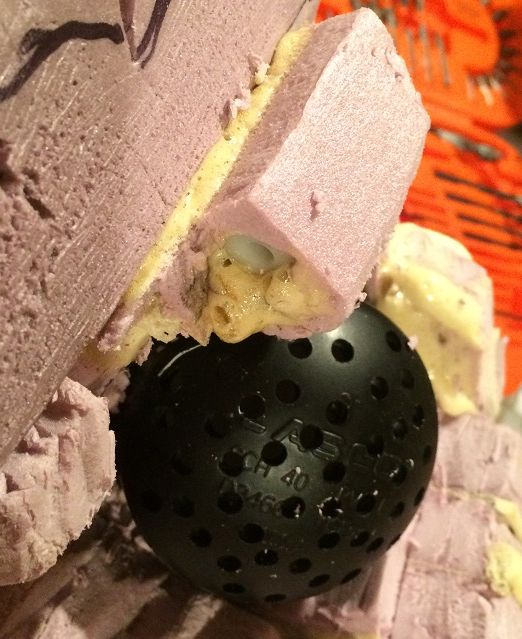
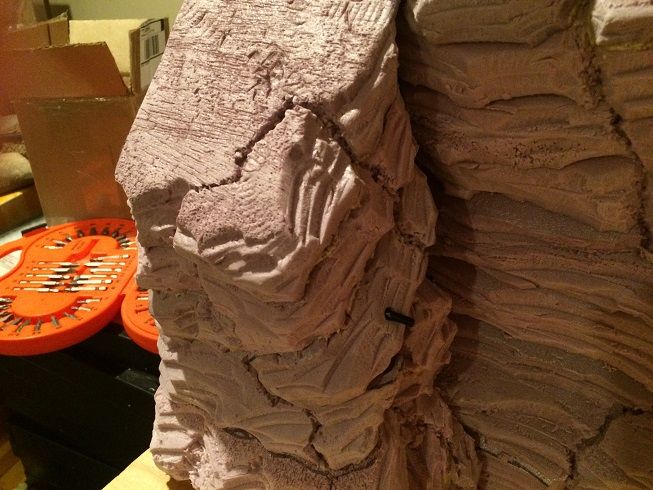
Here is the third nylon spacer glued into the extra foam piece that I attached to the main background. I used extra pieces of the plastic rods and glued them in to help with the alignment of the nylon spacer holes.
Trying to check for the fit, prior to sliding it in place. Getting the removable section in place isn't that bad, but getting the rod that connects them through the holes is a little challenging. I can get it done, but doing it with the tank filled with water might not be so easy. My solution to that is if I ever have to clear the filter intake behind this section from debris, then I'll drain the tank enough so that this section is out of the water (more than half of the water volume).
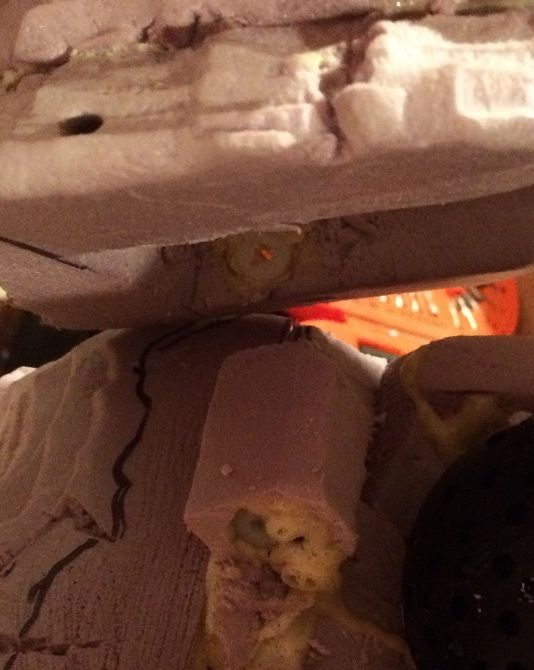
Sliding the plastic rod through the hole and nylon spacers provided a pretty tight fit, but it's a little challenging to get it aligned properly. You have to adjust the removable piece with one hand while sliding the plastic rod into the structure. It's not bad, but could be trouble in a full tank.
I needed a little bit of the plastic rod to stick out so I could remove it from the removable section to free the filter intake for maintenance. I'll have to figure out a way to disguise it from view later on but still have easy access to it. My current idea is to hide it with a movable root section.
I'm fairly happy with how it turned out. We'll see if it works correctly once the background is installed and the tank is filled with water.
I'm torn on my next steps, to paint the background then move on to the roots, or work on the roots and paint it all at once. I'm leaning toward the latter option.
Thanks for following!
Kevin Wilson
#112
brackishdude
-
- NANFA Member
Posted 30 March 2017 - 08:48 AM
very clever! keep'm comin'
As your fellow, I can demand of you no more, and accept no less, than I allow to be demanded of myself
#113
truecrimson
-
- NANFA Guest
- Leb-A-non, PA
Posted 06 April 2017 - 06:12 PM
I have nothing useful to contribute, but wow. Just wow.
#114
Chasmodes
-
- NANFA Member
- Central Maryland
Posted 07 April 2017 - 11:31 AM
Thank you TC. I finally have more time to work on this project later today and this weekend.
Kevin Wilson
#115
9darlingcalvi
-
- NANFA Guest
- Northern Minnesota
Posted 15 April 2017 - 08:45 AM
How's the tank?
Sent from my iPhone using Tapatalk
Sent from my iPhone using Tapatalk
#116
Chasmodes
-
- NANFA Member
- Central Maryland
Posted 17 April 2017 - 07:36 AM
Well Calvi, I'm struggling with the roots. I've bent and scrapped a bunch of CPVC scraps and can't come up with anything that I'm satisfied with. I'm at the point making a decision to start over with the roots or keep going. The look that I'm going for is to have a root system that conceals my powerhead which delivers flow to the middle to lower water column, while allowing to have the canister filter spray bar deliver flow at the surface over the top of the root system, but the roots conceal that from view. This picture is my inspiration, as I imagine that you'd be looking from the right side of the tank, with the front of the tank to the left of the photo:
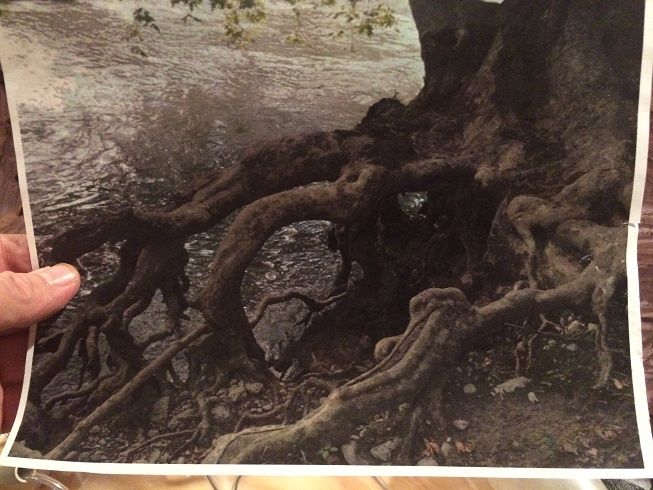
Obviously, I can't fit the entire structure of the picture into my narrow tank, but, I can mimic the cool aspects of the roots and achieve what I want...I hope.
I've put together a CPVC skeleton with some pipe insulation to kind of get me the basic root structure frame, right tank side view, like the picture:
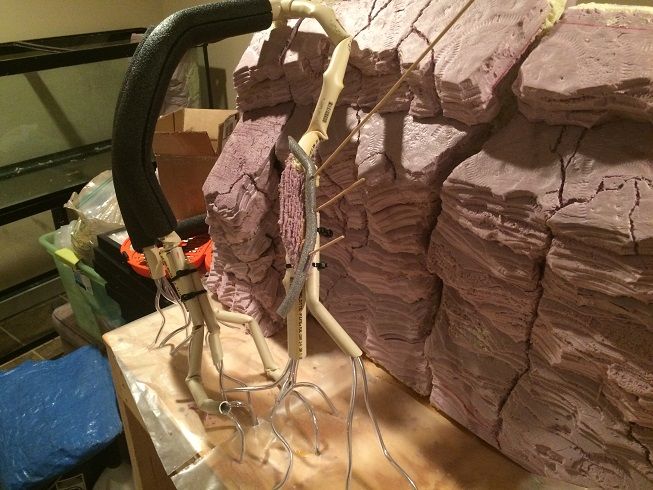
Here's the front view:

I really like the old torn away area of the root extending to the right in the picture, and want to incorporate that into my tank. But, although I'm getting there, I don't like what I've done, so I'll probably redo that:
I'm a little frustrated right now. If I decide to go forward, the next steps would be:
- finish the frame and secure all of the pieces.
- apply tile adhesive to the entire frame (so spray foam and grout can stick to it).
- use spray foam to add bulk and a more realistic shape that I can carve to achieve the desired look.
- apply grout to firm everything up and give it a base color. With the grout, I can further carve and shape to get the and shape texture that I want.
- use Drylok mixed with cement color to paint the final touches
That's the plan anyway. I had an idea this morning to just make the roots occupy the upper half of the tank to hide the powerhead and spray bar, and not have it go all the way to the bottom. If I do that, then I'll use pieces of what I have here. What do you all think? I appreciate suggestions very much.
Thanks for following!
Kevin Wilson
#117
9darlingcalvi
-
- NANFA Guest
- Northern Minnesota
Posted 17 April 2017 - 02:08 PM
I think the second option of roots hiding would look really cool, could also give the fish a place to hide under
Sent from my iPhone using Tapatalk
Sent from my iPhone using Tapatalk
#118
9darlingcalvi
-
- NANFA Guest
- Northern Minnesota
Posted 01 May 2017 - 07:26 PM
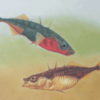
I found some red bellied dace with some bait yesterday
Sent from my iPhone using Tapatalk
Sent from my iPhone using Tapatalk
#119
Josh Blaylock
-

- Board of Directors
-

- Central Kentucky
Posted 09 May 2017 - 11:28 AM
This whole build blows my mind. You need to hurry up...I'm anxious to see it done! 
Josh Blaylock - Central KY
NANFA on Facebook
KYCREEKS - KRWW - KWA
I hope to have God on my side, but I must have Kentucky.
- Abraham Lincoln, 1861
#120
Chasmodes
-
- NANFA Member
- Central Maryland
Posted 12 May 2017 - 07:52 AM
Thanks Josh, I hope to have this finished soon.
As I said before, I've been a little frustrated, almost to the point that I couldn't even go downstairs and look at it. I couldn't envision the roots turning out realistic at all. Since then, I've been doing a lot of thinking and research about it and came up with some ideas to move forward.
But, I've decided to go with my original design and the frame but with some modifications. I went shopping yesterday and picked up the item that will do the job, plaster cloth wrap.
One of the potential issues holding me up, other than the looks of the roots so far, was getting stuff to stick to PVC. Honestly, the issue was in my head because I hadn't tried to see if my other plan would work (from the previous post) because somehow, I felt it would fail. Hence, more frustration.
But, it dawned on me that plaster cloth wrap that I saw used in other reptile builds might be the perfect solution, because it would be then coated with grout and then sealed by Drylok. Also, I don't like the foam insulation that I have on there currently. I will cut it off and use grout to build up my thickness and form. I don't want these roots to float, plus, I don't like the look of it. If the roots don't float, then I can make them removable for easy maintenance and tank cleaning.
So, my enthusiasm is back. My plan for this weekend is to:
- add more roots to the frame, cement the pipe and permanently attach wired roots. Drill holes in strategic spots to add more roots for realism.
- cut off the black foam insulation from the pipe.
- use foam board in a few places to get bulk, and achieve specific form and texture.
- use spray foam to add bulk and a more realistic shape in a few places, sparingly, that I can carve to achieve the desired look.
- wrap the entire frame and all roots with plaster cloth and let it dry.
- apply tile adhesive to the entire frame over the plastic cloth to seal it in and firm up the structure.
- apply grout to firm everything up, carve, shape, sculpt and sand to get form and texture that I want.
- use Drylok mixed with cement color to paint the final touches and seal everything up.
- build a small root structure that will be removable for access to my removable rock section
I know, I overthink things and stress about them way too much.
On a related note, I did receive my new Perfect Dipnet thanks to Mark  so I will be ready to stock this tank once cycled!
Kevin Wilson


0 user(s) are reading this topic
0 members, 0 guests, 0 anonymous users

