Nice! Glad to see ya rollin' ahead with this again.I still can't believe the layering you got with the "rocks"!
75 Gallon Native Stream Tank Build
Started by
Chasmodes
, Oct 24 2016 09:04 AM
392 replies to this topic
#141

mattknepley
-

- NANFA Member
- Smack-dab between the Savannah and the Saluda.
Posted 03 July 2018 - 01:30 PM
Matt Knepley
"No thanks, a third of a gopher would merely arouse my appetite..."
"No thanks, a third of a gopher would merely arouse my appetite..."
#142
Chasmodes
-
- NANFA Member
- Central Maryland
Posted 03 July 2018 - 02:14 PM
Thanks Matt. Yeah, it feels good to get it going again.
Kevin Wilson
#143
Chasmodes
-
- NANFA Member
- Central Maryland
Posted 18 July 2018 - 01:30 PM
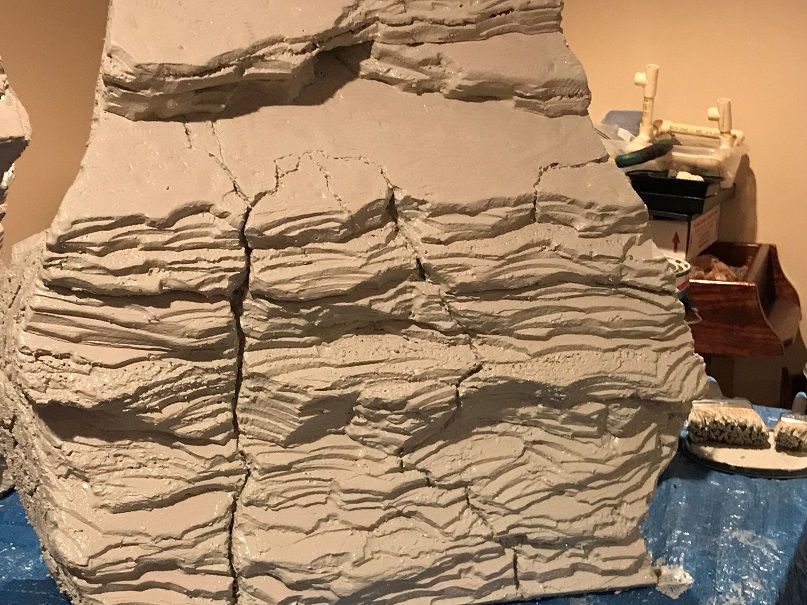
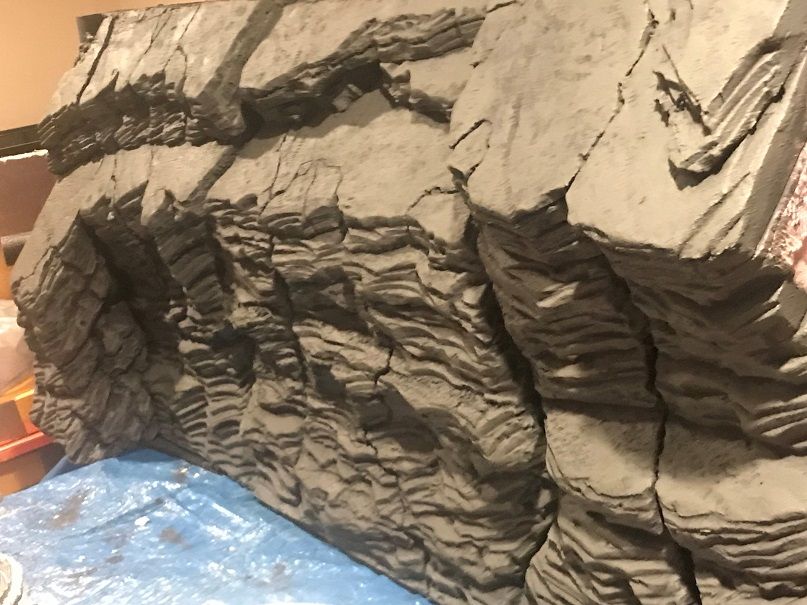
I have a question for you guys... I'm going to post a pic here of the middle section again so you don't have to go back and look. This has the first layer of Drylok gray color painted on. My next steps are to add various colors so that it looks more realistic and matches our local riverside cliffs. My question is about shading... I see in other faux foam wall builds, be it for aquaria or model train scapes, that the DIYers paint their colors and highlights first, then go back and paint shading by using dark, watered down paint in a spray bottle and let the dark stuff run into the cracks and crevices and run off the surface. It seems effective. But, I was looking at this picture and wondered if I need to do that. It appears to me that my cracks and crevices seem pretty distinct, and am wondering if I need to do a step like that to begin with. What do you think?
Kevin Wilson
#144
9darlingcalvi
-
- NANFA Guest
- Northern Minnesota
Posted 18 July 2018 - 05:20 PM
The cracks and all the crevices look great! I like the natural shadow the foam sections make also
Sent from my iPhone using Tapatalk
Sent from my iPhone using Tapatalk
#145
Chasmodes
-
- NANFA Member
- Central Maryland
Posted 19 July 2018 - 07:23 AM
Thank you Calvin. I think that I'll just focus on trying to match the natural coloration of the rock walls of my stream. Algae and detritus will do the rest.
Kevin Wilson
#146
Chasmodes
-
- NANFA Member
- Central Maryland
Posted 23 July 2018 - 07:34 AM
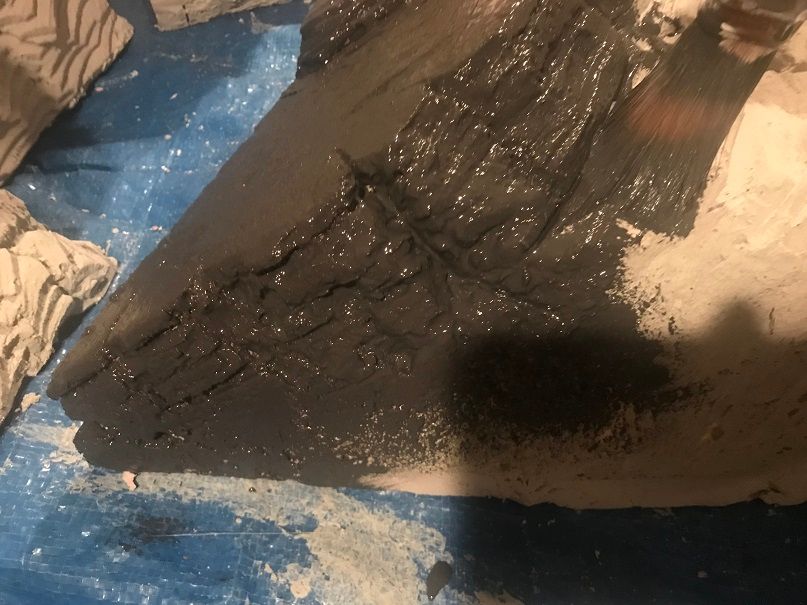
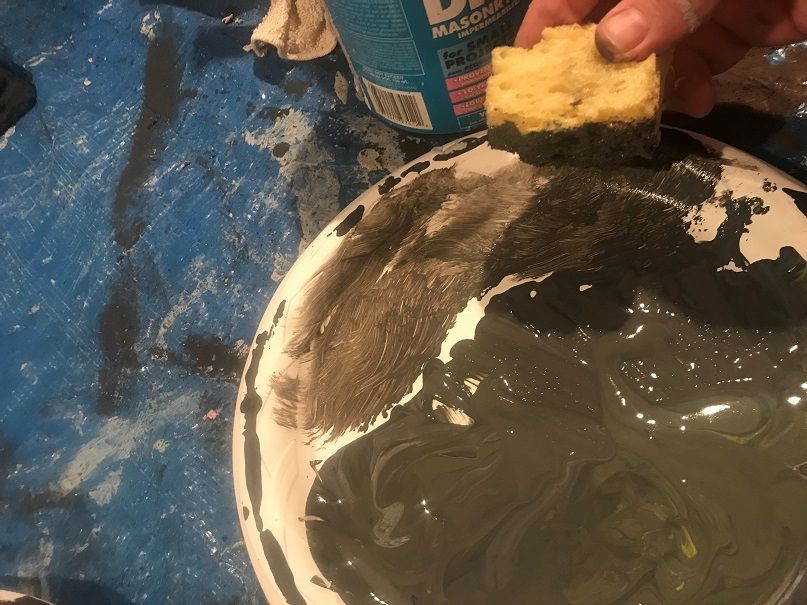
Yesterday I applied the next layer of dyed Drylok paint onto the rock wall. This is the base color that best mimics the base color of one of the rock formations found along the Upper Potomac River in Western Maryland.
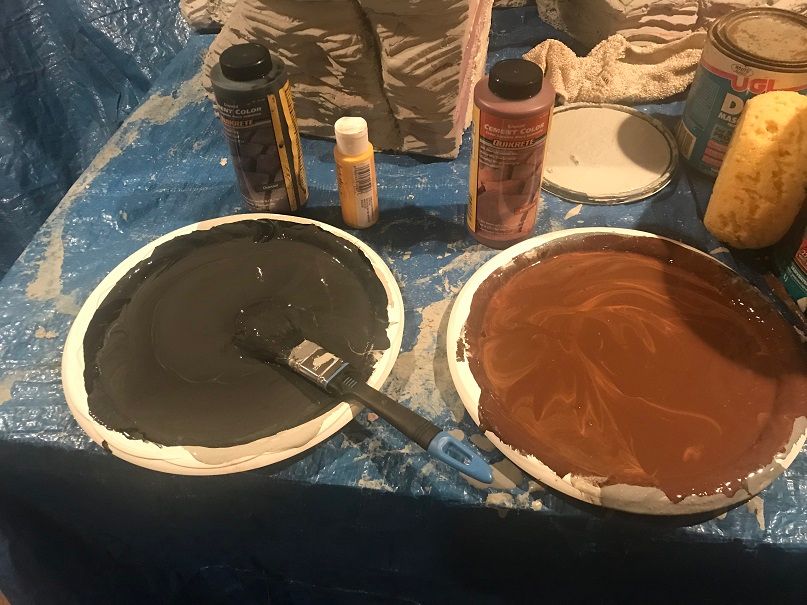
My first step was to mix the paint to match the rock. The plate on the left is what I used for this layer. The brown color on the right might be used in another layer (it was a goof up on mixing). For the base color, I used gray Drylok paint, mixed in charcoal color cement dye, and a dab of yellow acrylic paint. Why yellow? The rocks have a tint to them that makes them less gray than the paint, so this color best brings out the match to the rock formation.
I used a cheap paint brush to slap on this layer of paint. I used various smaller brushes to get the paint into every single crack, crevice, nook and crannie. This base color will give the cracks plenty of shading when the rock is done.
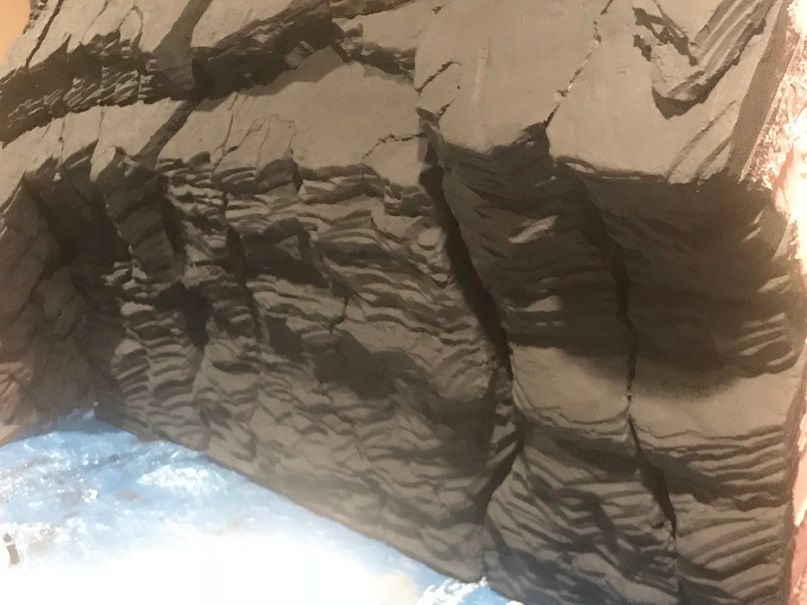
Here's a picture looking at the entire structure from the right side looking left:
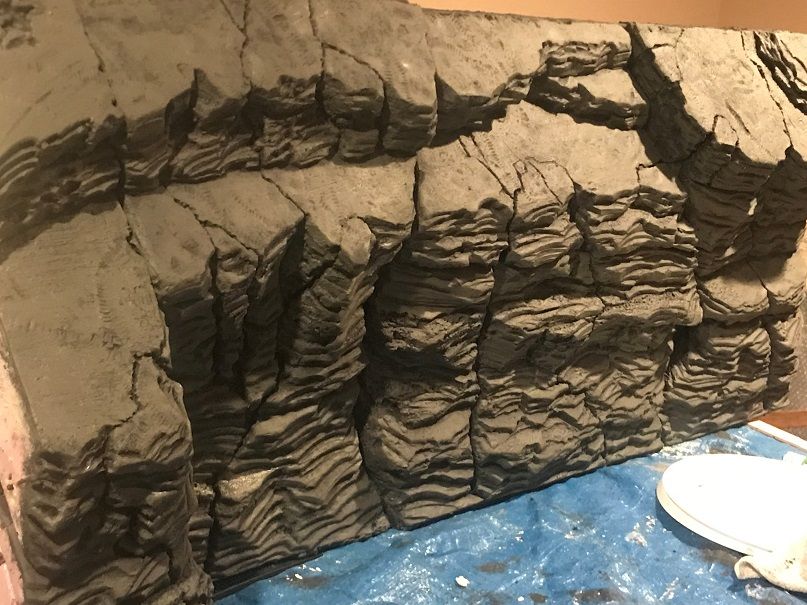
A view from the left side looking to the right:
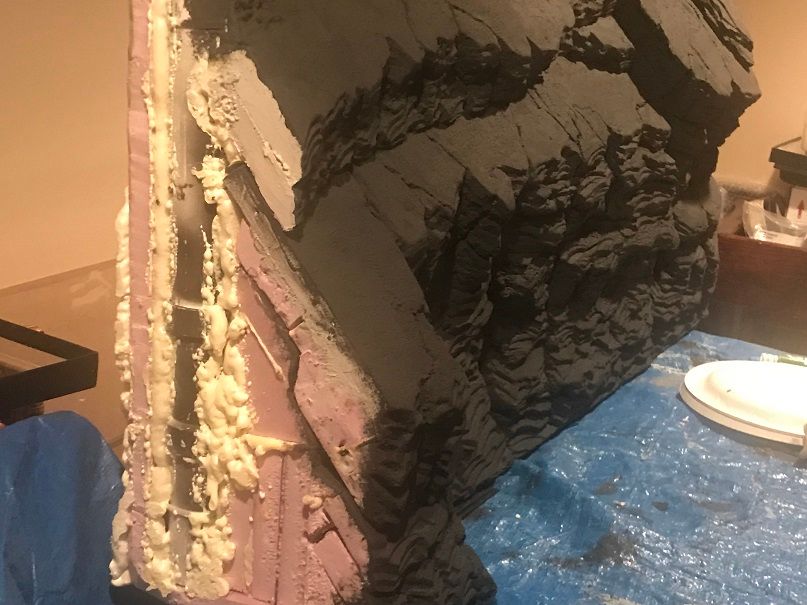
Sort of a side view that shows a hint of how it was constructed out of styrofoam foam board, foam spray, and filled with stream rocks to reduce buoyancy.
The next stips will be to to stipple several layers of paint, each layer being a mix of the same colors but a lighter shade each time. This will break up the monotone coloration and start to add some realism to the rock coloration.
Kevin Wilson
#147
Chasmodes
-
- NANFA Member
- Central Maryland
Posted 23 July 2018 - 07:34 AM
Here is a video of the same structure:
Kevin Wilson
#148
Chasmodes
-
- NANFA Member
- Central Maryland
Posted 28 July 2018 - 08:01 PM
I added another coat of Drylok paint today, the same basic charcoal color with a splash of yellow, but a little bit lighter shade. This is to enhance the cracks and bring out the rock into a 3 dimensional appearance rather than a monotone dark charcoal color. I will do this a few more times, but with a lighter shade and less paint each time. One of these coats will have a more brown tint. After that, it will be brighter colors for highlighting only, but maybe some very light red and/or green added to break up the gray. I will decide as I go based on what it looks like.
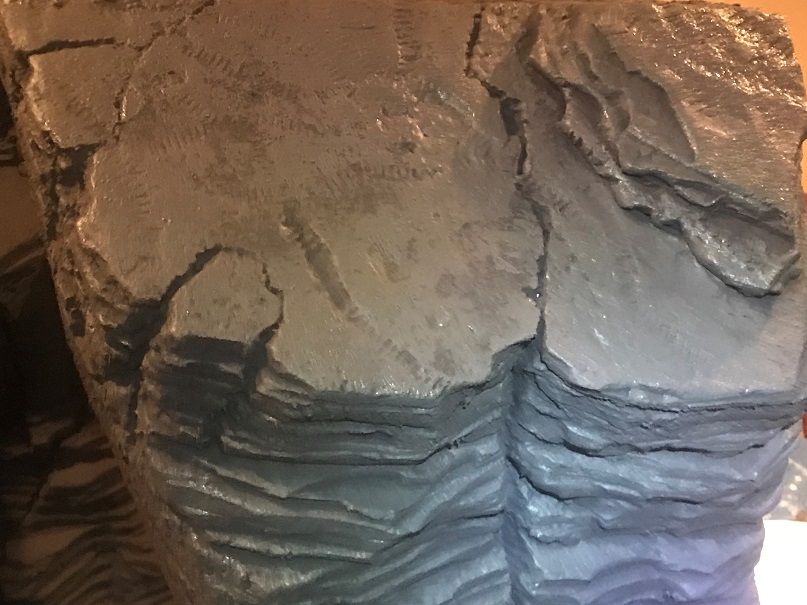
This coat was applied by stippling the paint onto the background with a sponge. The key was to not use too much paint, and try and keep the sponge somewhat dry. Also, this coat covers more surface area than future coats. The mix was Drylok gray, a dab of charcoal cement dye, and some yellow acrylic paint:
After testing on a scrap piece, I moved to the real thing and applied the paint to one section to make sure:
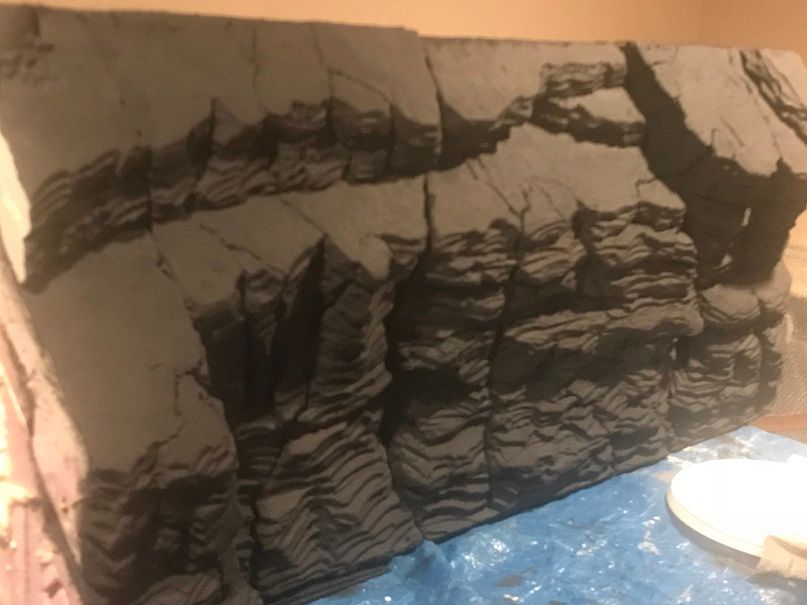
I was pleased with the result, so I stippled the entire background. All three sections completed, view from the left side:
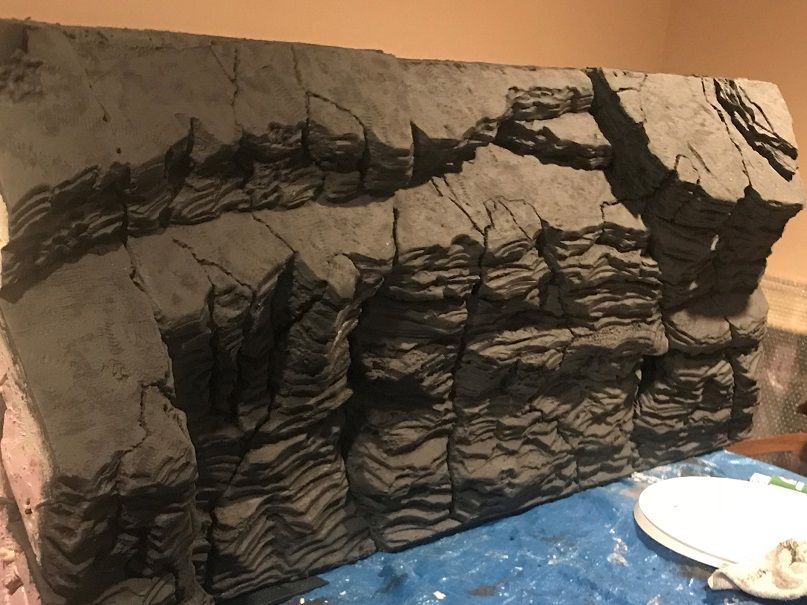
View from the right side:
Kevin Wilson
#149
Chasmodes
-
- NANFA Member
- Central Maryland
Posted 28 July 2018 - 09:27 PM
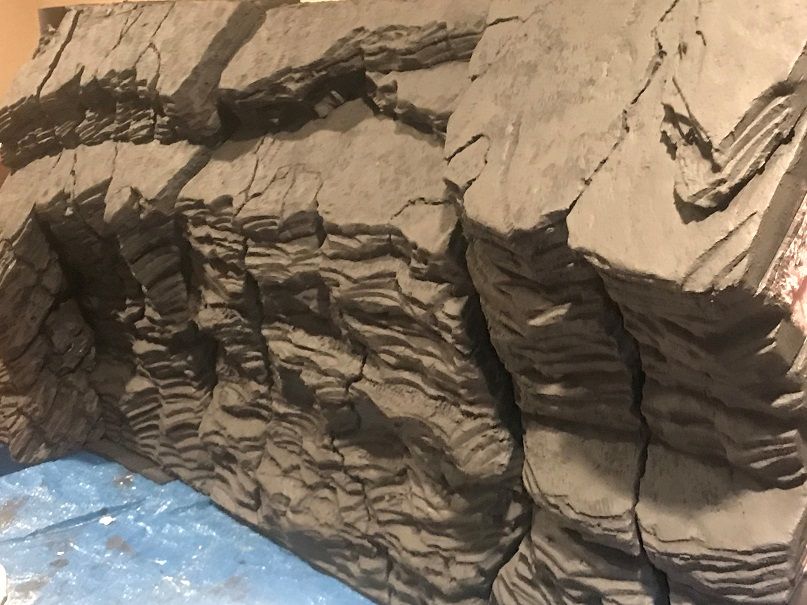
The next lighter layer added:
Kevin Wilson
#150
Doug_Dame
-

- NANFA Member
Posted 29 July 2018 - 11:21 AM
This thing is going beyond Incredible, into places where my vocabulary has no choices.
Doug Dame
Floridian now back in Florida
#151
Chasmodes
-
- NANFA Member
- Central Maryland
Posted 29 July 2018 - 12:19 PM
Thank you Doug!
Kevin Wilson
#152
littlen
-
- NANFA Member
- Washington, D.C.
Posted 30 July 2018 - 07:07 AM
Another tip of the hat your direction, Kevin. Very nice.
Nick L.
#153
Chasmodes
-
- NANFA Member
- Central Maryland
Posted 30 July 2018 - 09:15 AM
Thank you Nick!
Kevin Wilson
#154
MtFallsTodd
-

- NANFA Member
- Mountain Falls, Virginia
Posted 30 July 2018 - 07:16 PM
Wow!!! That looks so realistic. Can't wait to see this when it's finished.
Deep in the hills of Great North Mountain
#155
Chasmodes
-
- NANFA Member
- Central Maryland
Posted 30 July 2018 - 08:11 PM
Thank you Todd. Me too!
Kevin Wilson
#156
lilyea
-
- NANFA Member
- Peace River Watershed, Central Florida, USA
Posted 31 July 2018 - 11:50 AM
Kevin - this looks better and better! it appears that you have moved into the ranks of artisans! What are the plans for lighting (e.g., type, intensity, color, angle, distance from water, etc.) for this tank? -Bruce
#157
Chasmodes
-
- NANFA Member
- Central Maryland
Posted 31 July 2018 - 12:45 PM
Thank you Bruce! I'm not sure about the lighting yet. It's a 75 gallon tank. I am thinking about getting a nice LED fixture with a moonlight option, but not too pricey. I am on the fence about plants. Everything in the tank will be from the river. I am considering collecting some stargrass, so If I do that, then I'd have to make sure that the lighting will be good for growing grasses. Maybe a Finnex Planted fixture? Any recommendations?
Kevin Wilson
#158
lilyea
-
- NANFA Member
- Peace River Watershed, Central Florida, USA
Posted 31 July 2018 - 06:17 PM
Part of that decision may be based on the look that you are aiming for and you have done a great job so far so I would suggest that you continue to follow your senses. A few things to consider: choose between spot lighting and a traditional strip lighting - the spot or pendent style lighting can offer additional shadow/darker areas; adding a slight turbulence at the surface can add a shimmering effect throughout the tank (different lights will have different levels of impact based on diffusion); and the color, intensity, and placement of the lights will affect the algae growth on your aquascape. In addition to thinking about what looks the most realistic and/or pleasing, you may also keep in mind what will be most agreeable with the fishes that you are selecting for the tank. Keep up the great work!
#159
Chasmodes
-
- NANFA Member
- Central Maryland
Posted 02 August 2018 - 07:59 AM
Thank you Bruce! I want to do more every night, but work days are hectic, and by the time I get home, all I want to do is watch my fish. I hope to get more done this weekend. Of course, nice weather is coming, so I will be outdoors at least one day.
Kevin Wilson
#160
brackishdude
-

- NANFA Member
Posted 02 August 2018 - 10:57 AM
If you decide to go the live–plant route, creating small pockets in the deeper crevices where you can put substrate to allow plant growth on your wall with look cool.
I really love this project. Cannot wait to see the final layer
As your fellow, I can demand of you no more, and accept no less, than I allow to be demanded of myself


2 user(s) are reading this topic
0 members, 2 guests, 0 anonymous users

