LED Tank Lighting Experiment with 1st look at results...
Started by
Guest_Usil_*
, Sep 22 2011 05:34 PM
129 replies to this topic
#61
 Guest_EricaWieser_*
Guest_EricaWieser_*
-

- Guests
Posted 27 October 2011 - 09:45 PM
Wow that's bright. It makes me want to up the brightness of the lights in my own tank. Now I know where to get the materials and how to construct the light fixture. Thank you for experimenting with this for us 
#62
Guest_EricaWieser_*
Guest_EricaWieser_*
-
- Guests
Posted 12 November 2011 - 03:57 PM
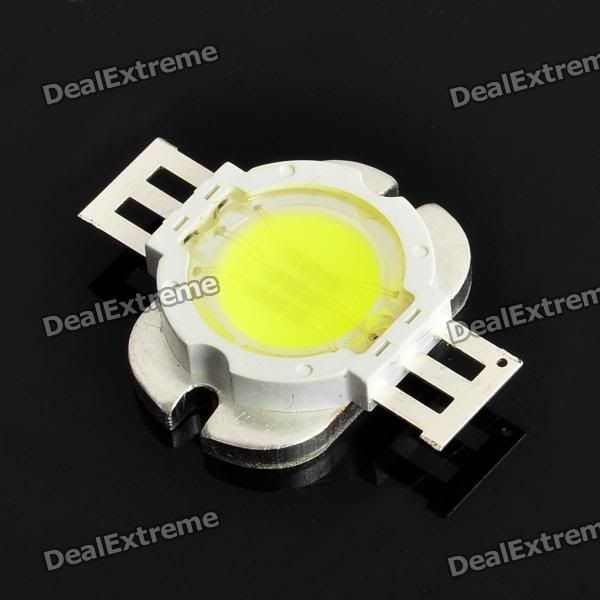
I bought the LED light that Usil linked to on the first post of this topic. It was pretty cheap, so I figured I'd try it out and see how it worked. I hooked it up to an adapter, plugged it into the wall, and took the following pictures.
Tank with only T8 lights, $30 from Home Depot (Lithonia 4 ft shop light): http://gallery.nanfa...ageViewsIndex=1
Tank with both T8 lights and LED: http://gallery.nanfa...ageViewsIndex=1
The photos were taken consecutively, with one person holding the camera and one person turning the LED off and on. I guess the only way to improve that would be to do it at night, to eliminate the exogenous light coming in from the window.
Edited by EricaWieser, 12 November 2011 - 04:02 PM.
#63
Guest_Usil_*
Guest_Usil_*
-
- Guests
Posted 12 November 2011 - 10:33 PM
Erica - I can not determine a difference between the shots but I am sure you saw one when you turn the LED on and off.
To see relative difference in a jpeg you would need to set the camera off it's auto exposure compensation settings and use full manual. If set to auto each light scenario will be compensated for by the camera to essentially the same amount of light for both pictures and thus would not be able to demonstrate pictures of different light differences. Not sure if you did that or not.
Using only the T8 - ( I am assuming that you are using a digital and getting immediate feedback), take pictures setting the aperture and shutter speeds manually until you get a slightly under exposed but good picture. Then turn on the LED with the T8 and using the same manual settings take the second picture. Then post both again. Also, show a picture with just the LED on and T8 off (using same manual settings)
What is your visible perception with LED on and off. My jpeg pictures were set up using the manual aperture and shutter method I described above.
You are right, though. Pretty cheep solution for adding more light. My plant growth has really taken off since I added my LED light system. My high power LEDs have totally replaced the fluorescents. I will post plant pictures below.
Usil
Edited by Usil, 12 November 2011 - 11:00 PM.
#64
Guest_Usil_*
Guest_Usil_*
-
- Guests
Posted 12 November 2011 - 10:59 PM
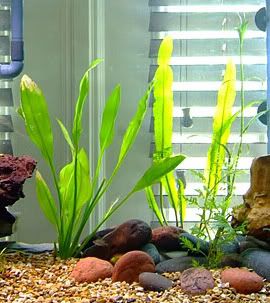
Here are a quick before and after picture of my two central plants at about the same picture size for comparison.
Before high power LED used (Prior to October 28, 2011):
After high power LED used as of today (12 November, 2011 = 15 days later):
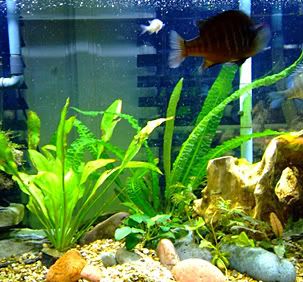
Time difference is about three weeks.
Usil
Before high power LED used (Prior to October 28, 2011):
After high power LED used as of today (12 November, 2011 = 15 days later):
Time difference is about three weeks.
Usil
#65
Guest_EricaWieser_*
Guest_EricaWieser_*
-
- Guests
Posted 13 November 2011 - 09:20 AM
Okay, so, I should explain. My camera is more than four years old and the touch screen has finally given up. I cannot adjust the settings on it, like turning off the flash or turning off auto adjust. When I tap the screen to adjust those things, it doesn't respond. (I have ordered a new camera and it should arrive next week or so.) The most I could do yesterday with the LEDs was to take two pictures consecutively. When I took a photo with the LED only, it was so dark that the camera thought it needed to use the flash, which totally negated the purpose of taking a photo.Using only the T8 - ( I am assuming that you are using a digital and getting immediate feedback), take pictures setting the aperture and shutter speeds manually until you get a slightly under exposed but good picture. Then turn on the LED with the T8 and using the same manual settings take the second picture. Then post both again. Also, show a picture with just the LED on and T8 off (using same manual settings)
My visible perception is that the LED is waaaay less bright than the T8's. If you examine the picture I posted above with both LED and T8, you the LEDs show up as tiny little pinpricks of blue in the very back top of the tank. That's where the LED strip was. It just makes the blue of the sealant at the top of the tank stand out. It's very dim.What is your visible perception with LED on and off.
Maybe I got a defective one or something. I've bought things from DealExtreme in the past that arrived broken. Three years ago I ordered a 'ninja remote' from them that's a universal remote that can control any TV. So you could walk into a bar and secretly change the channel without anyone knowing, for example. For $4.34 I thought that was a fun trick. Also, handy if you ever lose your own TV's remote. Anyway it arrived and didn't work at all. I put several different batteries in it and it never did anything. This LED light might just be another of the same thing from this company. They really don't seem to do quality control. So maybe I just got the 1/5 products that should have been trashed during the quality control stage and was instead sent out to the customer. Because I checked a few hours after I took those photos above, and the LED had stopped giving off light entirely. Lame. I could go out and plug it in now and see if it works again, here, let me check. *goes and checks* Yeah, I just plugged the LED in and it didn't turn on. Third day I own the thing, and it isn't working.
Yeah, so, I guess long story short, DealExtreme is cheap for a reason. A small fraction of their products will arrive broken. It's something I kind of expected, because that has happened to me with this company before in the past. *shrugs* I can't exactly return it and get my money back. I've tried that in the past and it just takes months and months of waiting for shipping, which costs just as much as the product they finally refund you for. *shrugs* Into the trash it goes. I guess if I want to make my tank brighter I'm going to buy new bulbs for the two T8 light housings. New bulbs have a lot nicer look than old bulbs. *nods*
#66
Guest_Usil_*
Guest_Usil_*
-
- Guests
Posted 13 November 2011 - 10:34 AM
Sorry to hear that but don't give up yet. It might be the power supply just gave up the ghost. Try another one that can provide at least 1 amp of current at 12 volts to provide enough juice to power it to full brightness. Radio Shack has them for not too much with multiple plugs that can be handy to have for other uses. I would send you my LEDs if you want to try it as I am not using the low power ones any more.
Usil
Usil
#67
Guest_EricaWieser_*
Guest_EricaWieser_*
-
- Guests
Posted 13 November 2011 - 10:57 AM
I'm good, thanks for the offer though.
I bought the power supply brand new at Best Buy for about $20. Its little red light that shows when it's plugged in is still on, so it's still working. If the power supply was not providing enough power, the LED lights would have stayed on but stayed dim. They turned off completely, which means that it was the LED fixture part that died.
I bought the power supply brand new at Best Buy for about $20. Its little red light that shows when it's plugged in is still on, so it's still working. If the power supply was not providing enough power, the LED lights would have stayed on but stayed dim. They turned off completely, which means that it was the LED fixture part that died.
Edited by EricaWieser, 13 November 2011 - 10:59 AM.
#68
Guest_Doug_Dame_*
Guest_Doug_Dame_*
-
- Guests
Posted 13 November 2011 - 03:55 PM
I was wondering about that. Seems like you tested the low-power, low-cost LED lighting, and then did a perm installation of higher-powered, significantly more expensive LEDs that I'd characterize as almost "reef-quality."... as I am not using the low power ones any more.
Did I just miss the discussion of why you went from the one to the other ?
#69
Guest_Usil_*
Guest_Usil_*
-
- Guests
Posted 13 November 2011 - 05:28 PM
The low power LED project evolved as I went forward. Certainly, both projects of using either low power and high power LEDs has proven to be beneficial for use on an aquarium. They provide all of the same benefits already mentioned in the project which were:
1. High Luminous efficiency
2. Long life -Generally recognized at least 50,000 hours (10 hrs/day = 13.7 years)
3. Low cost of operation - Low voltage operation
4. Full Spectrum white light - A full spectrum from 400 to 700 nm can easily be obtained from today's white LED lights
5. PAR light requirements - easily provided within the full spectrum
6. Color - 6500k and easily higher obtainable
7. Low cost of operation over it's lifetime compared to all other sources
The one difference is the amount of light provided to the bottom of the aquarium. Depending on what type of plants you want to grow (low to medium light needs) or (medium to high light needs) - you choice of plants would determine which light system you would choose to build.
In essence, the low power LED experiment allowed for testing and confirming that the white LEDs provide a good source of full spectrum light including all of the PAR frequencies needed for plant growth. It became a proof of concept test. I had bought a holographic diffraction grating to qualitatively confirm the frequency of light provided by the LEDs and I had also bought a spectrophotometer to measure quantitatively the actual spectrum frequencies. Both of these experiments confirmed that the LEDs would work fine for aquarium use.
When I was doing all of the research for this I noted that I could build a high power LED system for my entire 55 gallon tank for under a hundred dollars. In view that I needed to replace my two fluorescent bulbs, if I subtracted the cost of replacing those bulbs the high power LED system costs became even more attractive to consider. Finally, in view of how long the system would last and the much lower operational costs there would be, I talked myself into moving forward to the next step which was using the proof of concept information and building the high power LED system. This would allow me to not worry in the future about what kind of plants I could easily grow in my aquarium.
Both of these systems are viable for aquarium use and I think I have provided sufficient information for others to duplicate my efforts.
Erica may have gotten a bad LED string and I urge that she not give up and try the LEDs she bought with another power supply just to confirm exactly what the issue is. If the amp output of the power supply is not at least 1/2 amp or more (for the low power LED system) it might be marginal to supply sufficient power to the string. Also, they will replace the defective unit if she contacts the company.
Concerning Erica's perception of brightness - my fluorescent bulbs were much lower power than what she is using so the low power LED system was an improvement to my aquarium and maybe not so much for her system. Won't know till she gets the lights fully working as an insufficient power supply will produce reduced LED output.
Usil
Edited by Usil, 13 November 2011 - 05:39 PM.
#70
Guest_Elijah_*
Guest_Elijah_*
-
- Guests
Posted 30 November 2011 - 08:06 PM
How is the DIY LED project holding up for you? Are you still happy with it?
#71
Guest_Usil_*
Guest_Usil_*
-
- Guests
Posted 01 December 2011 - 01:35 AM
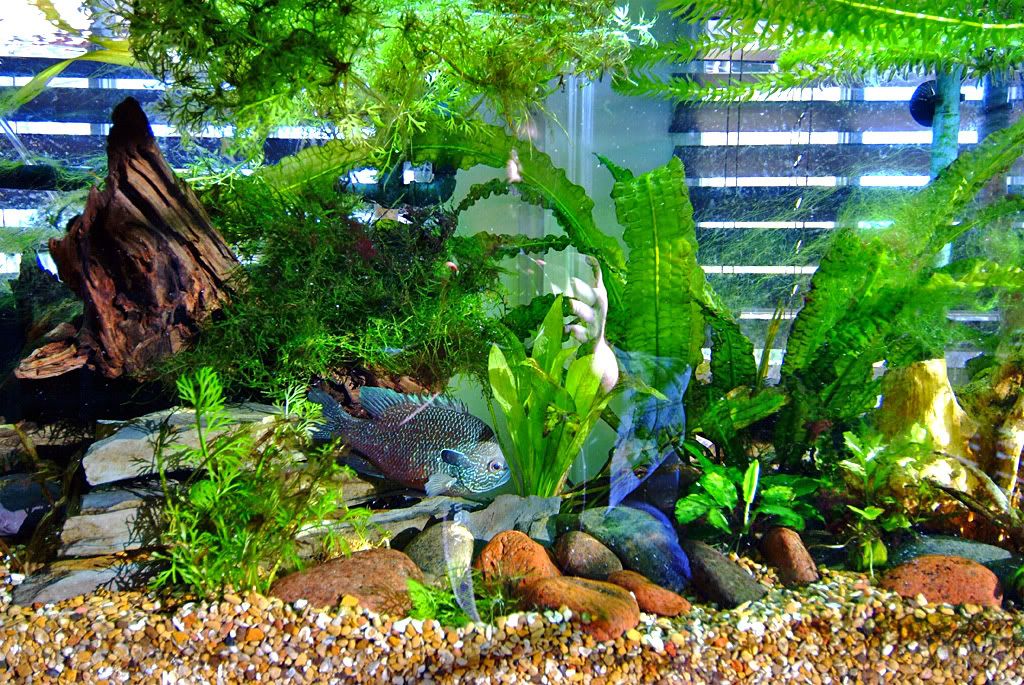
The LED system I built has exceeded my expectations. I think it has worked out perfectly, at a very reasonable cost and virtually no complexity is design or build (there are only two major components the LEDs and the LED driver). I have it on about 10 hours a day and the plants are growing like weeds. The brightness factory adds a pleasing clarity and look to the aquarium and also adds a periodic cycling light-shadow effect similar to how shade and sun effects shallow water in a creek. I will enclose a picture of it in operation I took about 10 minutes ago (Dec 1, 2011).
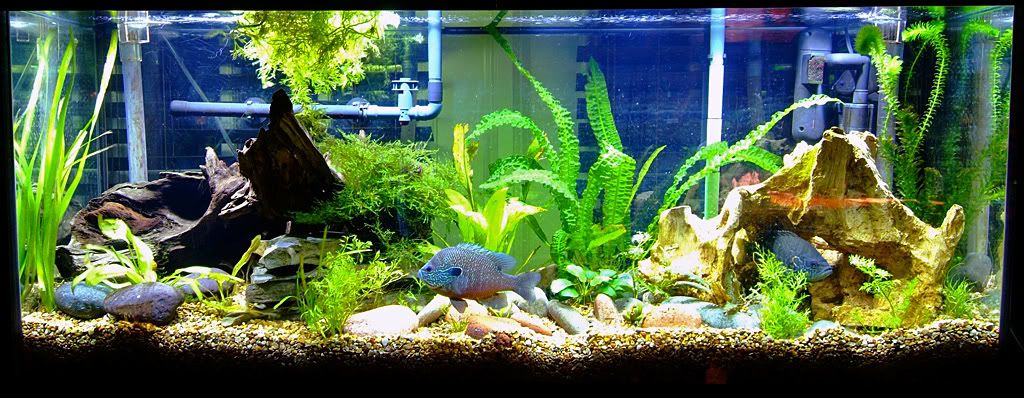
If you compare the two center plants to the pictures of them above in an earlier posting (17th November and late in October) in this thread you can see the growth in the past two weeks.
As usual the dominant Longear is front and center. The hybrid Red ear/Green is on the right in the cave. He doesn't take any crap from the Long Ear any more. Also, as usual, the Bluegill and other Longear are hiding.
For a DIY project this was a winner. (Click on the picture to see at full size)
Usil
Edited by Usil, 01 December 2011 - 02:08 AM.
#72
Guest_nativeplanter_*
Guest_nativeplanter_*
-
- Guests
Posted 01 December 2011 - 12:13 PM
Usil, that is an absolutely beautiful setup. I'm going to have to try LEDs myself at some point.
#73
Guest_Elijah_*
Guest_Elijah_*
-
- Guests
Posted 01 December 2011 - 01:25 PM
The plant growth looks great! I am wondering how the metal piece you used is working as a heat sink? I'm not sure how you would tell,but heat sinks usually have ridges. They are also expensive. I am thinking of copying your LED set up for a 30g tank. I am on the fence about the heat sink though.... I know the LED lifespan is significantly shortened by excess heat.
Also, any algae issues?
Also, any algae issues?
Edited by Elijah, 01 December 2011 - 01:26 PM.
#74
Guest_Usil_*
Guest_Usil_*
-
- Guests
Posted 01 December 2011 - 05:54 PM
The plant growth looks great! I am wondering how the metal piece you used is working as a heat sink? I'm not sure how you would tell,but heat sinks usually have ridges. They are also expensive. I am thinking of copying your LED set up for a 30g tank. I am on the fence about the heat sink though.... I know the LED lifespan is significantly shortened by excess heat.
Also, any algae issues?
I can speak to the operational temperature as I did perform a temperature study using a certified mercury thermometer. The plastic fluorescent case it is housed in never gets warmer than 32 degrees C even after 10 hours of LED operation. In addition, I measured the plastic case temperature (for comparison) while the unit was still working with fluorescents and the temperature was 31 to 32 degrees C so the plastic housing is operating in the same thermal range. There is glass under the light case which prevents splash on the lights and this is never warm to the touch even though the distance from the LED lights to the glass is only about 2 inches. This leaves the metal heat sink itself. I have measured it's operational temperature as 46 degrees C. From what I have read for 10 watt LEDs operating at 1000 ma the maximum should not exceed 70 degrees C so it looks like I am well within tolerances.
Heat sinks can be expensive which is why I looked for alternatives. There are lots of extruded aluminum items at the local hardware store that can function as a heat sink and I picked out an aluminum door jam that was 1/16 inch thick. Attachment was performed using a thermal paste (heat sink and thermal paste both noted in the write-up) which allows for a smooth secure bond to the aluminum. Everything seems to be working fine after two weeks. Weather I get 10 years or not, I won't know for a bit. But they are operating at low voltage and providing all the light the tank needs and are certainly equivalent to commercial units costing $600.00 of more. Plus - they grow plants so I am happy. I have not found any negatives for the project and it is relatively simple to put one of these together.
For a 30 gallon tank, I would use 4 of the 10 watt LEDs driven by 1 LED driver unit. That should be more than sufficient for your needs. I would still check out the hard ware store for your heat sink.
My unit has been in operation for going on three 3 weeks. Algae has not been a problem. I had brown algae growing on the glass and plastic pipes before I added the LED system. In the picture above, you can see it inside my air riser for the under gravel filter in the corner. You can also see small colonies of brown algae growing on the back glass which has never been cleaned since installed in September. So far, I have not noted any algae blooms or accelerated growth using the LEDs.
Honestly, this was a simple project with a big payoff. It just works fine.
(Thanks for the kind words Nativeplanter.)
Usil
Edited by Usil, 01 December 2011 - 06:03 PM.
#75
Guest_Elijah_*
Guest_Elijah_*
-
- Guests
Posted 01 December 2011 - 06:25 PM
Awesome! Thanks again for this very informative post. I am going to make one of these LED set ups soon!
#76
Guest_Usil_*
Guest_Usil_*
-
- Guests
Posted 01 December 2011 - 06:35 PM
Please take pictures and post of your work and operation so others can see what you have done. I encased mine in the existing plastic housings but they can just as easily be hung and suspended above the tank.Awesome! Thanks again for this very informative post. I am going to make one of these LED set ups soon!
Usil
Edited by Usil, 01 December 2011 - 06:35 PM.
#77
Guest_flatcapbrew_*
Guest_flatcapbrew_*
-
- Guests
Posted 02 December 2011 - 11:37 AM
Wow thank you for putting so much work into this project. I have just a few questions.
Are you running two or one power supplies? I feel like this was answered but I think I missed it.
I will be re doing my tank come the spring and have started looking into going a planted tank and I really like the look of your project. How many of the high powered LEDs would you recomend for a 150 gal tank 48"l 24"d 30"t? Thanks again for all this info
#78
Guest_Usil_*
Guest_Usil_*
-
- Guests
Posted 02 December 2011 - 12:16 PM
My work and experimentation is just for the specific components I listed in my post. I included the links to all the parts. So, if you use these components then you will need to use 4 LED lights per 1 power supply. This is very important as these bulbs are wired in series and allows for the proper voltage to go to each lamp. The power supply is called an LED driver. It has all the needed circuitry inside the waterproof housing to drive the LEDs. The unit I used produces too much voltage for only one LED which is why you must use 4 per power supply wired in series.
As for how many to use for the dimensions you provided; I can tell you what I used for my 55 gallon which is about 48 inches long and 12 inches wide (front to back). I used 4 LED bulbs per 24 inches of tank length. I have two sets of 4 bulbs total (one set for each side of the tank) with each set of 4 LEDs powered by one LED driver (Power supply). I am being redundant in my explanation and hope that it is clear. For your tank which is the same length but twice as wide (front to back) as mine, I would start out by using the same setup as I use. Place a set of 4 LEDs on the left and a set of 4 LEDs on the right side of the tank top with the lights positioned in mid line with the top so that the light is spread out evenly across the entire top of the tank. I can't speak to the exact needs of a tank that is twice as wide as mine so this is a starting position. Then see if that provides the amount of light you need for your plants and arrangement. I know this works for my tank which is 12 inches wide (front to back) but if it seems not enough for your tank, then just use those for the front 12 inches and build another two sets and use those for the back 12 inches of your tank. This way you progress based on needs and don't waste build time and money. Let us know your final set up and provide pictures of your build so everyone can see. Just remember to do your build based on a set of 4 LED lights per one LED driver (power supply).
If anyone buys the parts and begins a project let me know. The LED lights have a positive and negative connection but it is not clear. The positive connection for them is the side that has a small hole punched into the connection (see below). This is the only way to tell what connection is positive. The power supply is clearly marked for the positive and negative for the LEDs and the other two for the 125 v home power.
Here is a suggestion on trying out a two light set system.

Try the LEDs in the top example to see if there is sufficient light for your 24 inch width needs for the entire tank and try the second setup below to see if both sets are better (trying for half the tank). This way, you can build two and experiment to see what your exact needs are. If the second setup works best then you know you need 4 sets of lights. If the first setup works out then you are good to go. My setup for my 12 inch width is like the top example.
Usil
As for how many to use for the dimensions you provided; I can tell you what I used for my 55 gallon which is about 48 inches long and 12 inches wide (front to back). I used 4 LED bulbs per 24 inches of tank length. I have two sets of 4 bulbs total (one set for each side of the tank) with each set of 4 LEDs powered by one LED driver (Power supply). I am being redundant in my explanation and hope that it is clear. For your tank which is the same length but twice as wide (front to back) as mine, I would start out by using the same setup as I use. Place a set of 4 LEDs on the left and a set of 4 LEDs on the right side of the tank top with the lights positioned in mid line with the top so that the light is spread out evenly across the entire top of the tank. I can't speak to the exact needs of a tank that is twice as wide as mine so this is a starting position. Then see if that provides the amount of light you need for your plants and arrangement. I know this works for my tank which is 12 inches wide (front to back) but if it seems not enough for your tank, then just use those for the front 12 inches and build another two sets and use those for the back 12 inches of your tank. This way you progress based on needs and don't waste build time and money. Let us know your final set up and provide pictures of your build so everyone can see. Just remember to do your build based on a set of 4 LED lights per one LED driver (power supply).
If anyone buys the parts and begins a project let me know. The LED lights have a positive and negative connection but it is not clear. The positive connection for them is the side that has a small hole punched into the connection (see below). This is the only way to tell what connection is positive. The power supply is clearly marked for the positive and negative for the LEDs and the other two for the 125 v home power.
Here is a suggestion on trying out a two light set system.
Try the LEDs in the top example to see if there is sufficient light for your 24 inch width needs for the entire tank and try the second setup below to see if both sets are better (trying for half the tank). This way, you can build two and experiment to see what your exact needs are. If the second setup works best then you know you need 4 sets of lights. If the first setup works out then you are good to go. My setup for my 12 inch width is like the top example.
Usil
Edited by Usil, 02 December 2011 - 01:16 PM.
#79
Guest_flatcapbrew_*
Guest_flatcapbrew_*
-
- Guests
Posted 04 December 2011 - 11:56 AM
Thank you very much for the info. Unfortunately I wont be able to start on this for a few more months but when I do I will post pics and info
#80
Guest_Usil_*
Guest_Usil_*
-
- Guests
Posted 29 December 2011 - 11:44 AM
It's not been quite 4 weeks since I last posted a picture of my tank (earlier in this thread). The LED lights are working great and the plant growth is getting thick. I am also getting a bit of filamentous green algae growing in the tank but I don't mind as I think I can just keep it thinned out as needed. After all this is a native tank so what grows - grows. I have a UV light on the tank but have not cleaned the bulb since I installed it three months ago. In industry these are supposed to be cleaned monthly so I am sure it is no longer efficient.
Before the plants took off growing I measured the nitrate levels and they remained unchanged for two months reading at the 40/80 ppm level (I can not tell the difference in the colors for 40 or 80 on the color scale). On my December 2nd nitrate test I got a reading of 10-20 ppm (again, can't tell difference in colors for 10 or 20 on the scale). Today (Dec. 29, I got a reading of 5 ppm. So, the plants definitely did their job on the nitrates.
As you can see the plants have gotten big and there was a definite speedup of growth when I started using the LED lights.

I am happy with the results.
Usil
Before the plants took off growing I measured the nitrate levels and they remained unchanged for two months reading at the 40/80 ppm level (I can not tell the difference in the colors for 40 or 80 on the color scale). On my December 2nd nitrate test I got a reading of 10-20 ppm (again, can't tell difference in colors for 10 or 20 on the scale). Today (Dec. 29, I got a reading of 5 ppm. So, the plants definitely did their job on the nitrates.
As you can see the plants have gotten big and there was a definite speedup of growth when I started using the LED lights.
I am happy with the results.
Usil
Edited by Usil, 29 December 2011 - 11:56 AM.


1 user(s) are reading this topic
0 members, 1 guests, 0 anonymous users

