I got side tracked on my own project also. Need to get back to it as soon as possible.
Josh Blaylock's 125 gallon stream tank. Build and updates.
Started by
Guest_jblaylock_*
, Nov 07 2010 04:51 PM
227 replies to this topic
#82
 Guest_jblaylock_*
Guest_jblaylock_*
-

- Guests
Posted 01 May 2011 - 04:23 PM
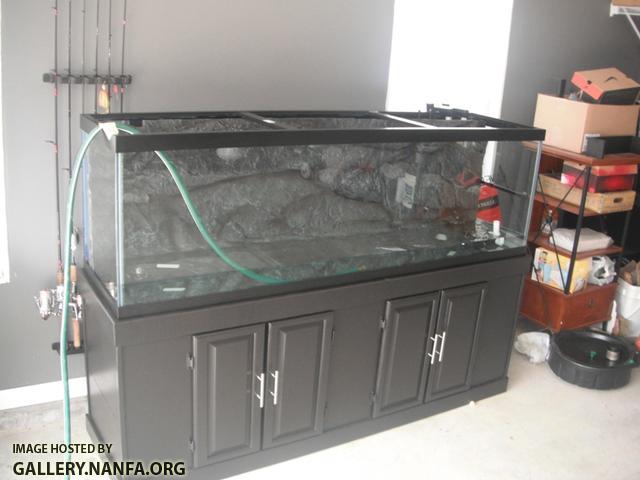
I finally reached the point of no return last night....or at least the point of no return without a lot of work.
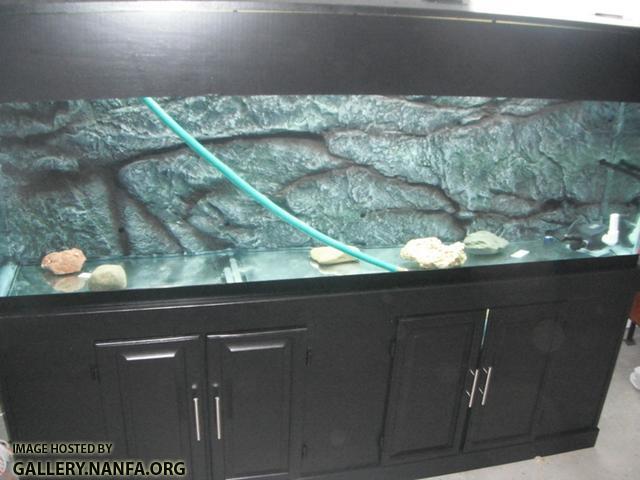
I used about an entire tube of silicone on the bottom and sides of the background. That should be plenty enough to hold it in. I then threw some black sand on the exposed silicone to help blend it in. I used another tube of silicone on the tank frame and strapped it down for the night.
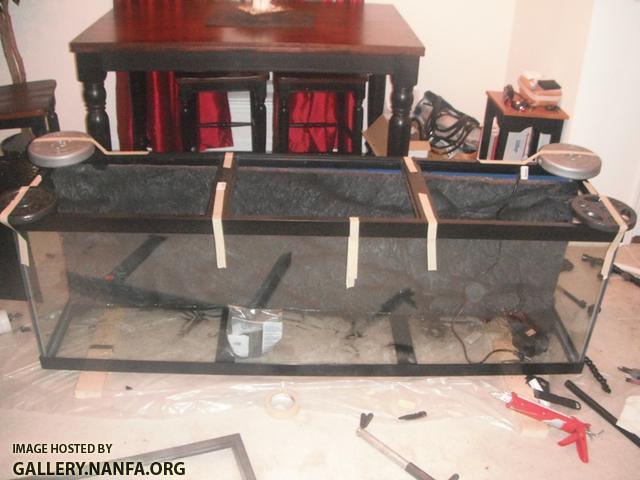
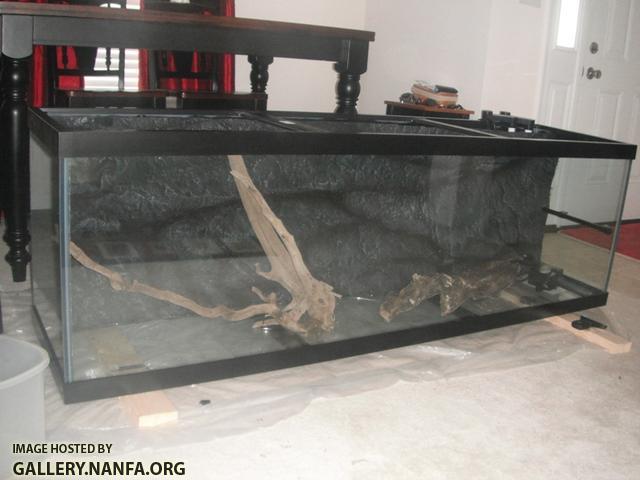
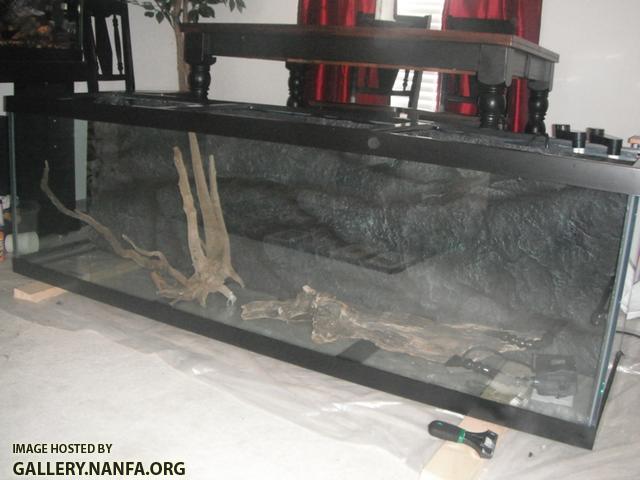
After 12+ hours I removed the tape/weights and just set my driftwood in place.
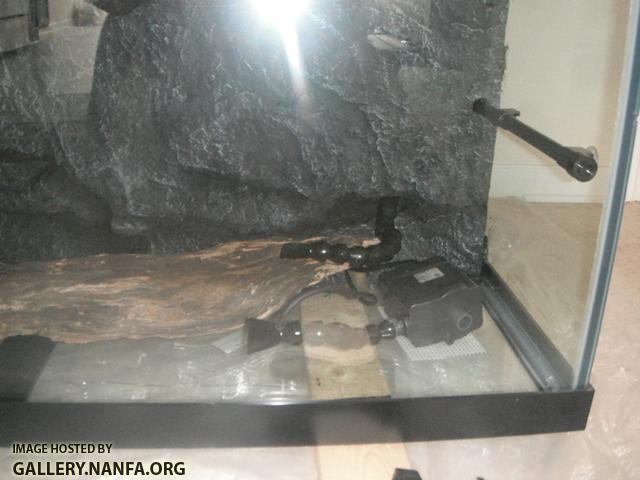
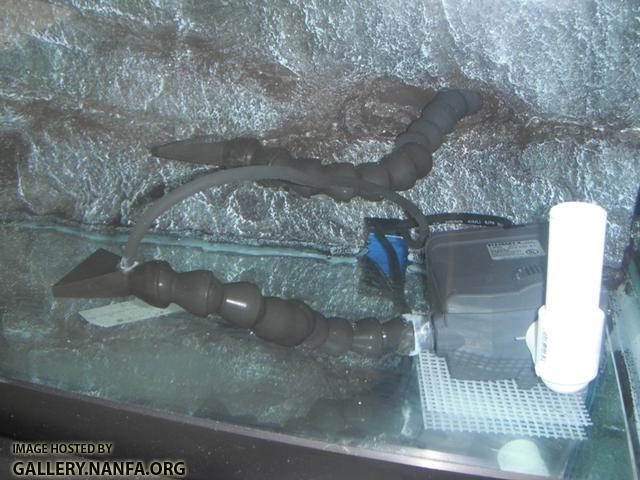
Here you can see two of the three filter returns and the water pump that will be buried. One filter return is still running on my 75gal, but will be put higher on this wall. The Loc-Line tubing is great for this setup.
This is nearing completion. I have a few small things left to do, but won't do them until setup day. I am anxious to get this done, but I will be out of town from Wed-Sat and dont want to fill this up and leave it, even though I already leak tested it. I am worried that I could have broken a seal loose when removing the upper frame, but I didn't pry against the panels or put any pressure on the sides, just pulling the frame up. I think I'm being too worrisome. I'm sure it would take a lot of force to breat the seals on the glass panels, especially with the frames on.
This project started last November, and has taken a lot longer than I expected, but I'm confident to say that it will be done before the convention, barely
I used about an entire tube of silicone on the bottom and sides of the background. That should be plenty enough to hold it in. I then threw some black sand on the exposed silicone to help blend it in. I used another tube of silicone on the tank frame and strapped it down for the night.
After 12+ hours I removed the tape/weights and just set my driftwood in place.
Here you can see two of the three filter returns and the water pump that will be buried. One filter return is still running on my 75gal, but will be put higher on this wall. The Loc-Line tubing is great for this setup.
This is nearing completion. I have a few small things left to do, but won't do them until setup day. I am anxious to get this done, but I will be out of town from Wed-Sat and dont want to fill this up and leave it, even though I already leak tested it. I am worried that I could have broken a seal loose when removing the upper frame, but I didn't pry against the panels or put any pressure on the sides, just pulling the frame up. I think I'm being too worrisome. I'm sure it would take a lot of force to breat the seals on the glass panels, especially with the frames on.
This project started last November, and has taken a lot longer than I expected, but I'm confident to say that it will be done before the convention, barely
#83
Guest_jblaylock_*
Guest_jblaylock_*
-
- Guests
Posted 01 May 2011 - 05:48 PM
Anybody think I should retest the tank for leaks? I could do it in my garage I suppose. I was as gentle as I could be while removing the frame, I'm just worried about a leak at this point.
#84
Guest_EricaWieser_*
Guest_EricaWieser_*
-
- Guests
Posted 01 May 2011 - 06:53 PM
Meh. Just fill it. Draining a tank takes all of half an hour with a gravel siphon and buckets, so unless it's leaking catastrophically, you can always empty it before it can really divulge itself on your floor.Anybody think I should retest the tank for leaks? I could do it in my garage I suppose. I was as gentle as I could be while removing the frame, I'm just worried about a leak at this point.
Edit: Although stationing a tank permanently in a room with white carpet isn't something I'd volunteer for. Might want to either double think that plan or set up an automatic water change line. They cost $50 and would spare your floor. Link: http://www.aquaticpl...nge-system.html
Edited by EricaWieser, 01 May 2011 - 07:00 PM.
#85
Guest_Doug_Dame_*
Guest_Doug_Dame_*
-
- Guests
Posted 01 May 2011 - 06:58 PM
Compared to how fast my projects move, you're a rocket-man !This project started last November, and has taken a lot longer than I expected, but I'm confident to say that it will be done before the convention, barely
Thanks for sharing.
The final touch will be a sign on a stand near your front door:
==============
This way ====>
to the Fish-Mahal.
Free admission for
children two and
under.
==============
#86
Guest_jblaylock_*
Guest_jblaylock_*
-
- Guests
Posted 01 May 2011 - 07:59 PM
Meh. Just fill it. Draining a tank takes all of half an hour with a gravel siphon and buckets, so unless it's leaking catastrophically, you can always empty it before it can really divulge itself on your floor.
Edit: Although stationing a tank permanently in a room with white carpet isn't something I'd volunteer for. Might want to either double think that plan or set up an automatic water change line. They cost $50 and would spare your floor. Link: http://www.aquaticpl...nge-system.html
I decided to test it. I moved it to my garage and put it on the stand. I will fill it up tomorrow and let it set for the next week. If for some reason there is a leak, it will be easier to fix without fish in it.
Having an automatic water change system would be nice, but not possible as I can't tap into my water line. I have a slab floor and the water comes up through the slab. But my tank is in my dining room, off the kitchen. I use a python to change the water now, works well and no buckets or mess.
Doug, I don't know about fish-mahal, but I must say it will be a good looking. The main thing I wanted was a natural rock wall that hides the tubes/hoses/etc... I think I got it with this setup. I tried to think of nearly everything I could possibly do and do it with this setup.
#87
Guest_jblaylock_*
Guest_jblaylock_*
-
- Guests
Posted 02 May 2011 - 08:33 PM
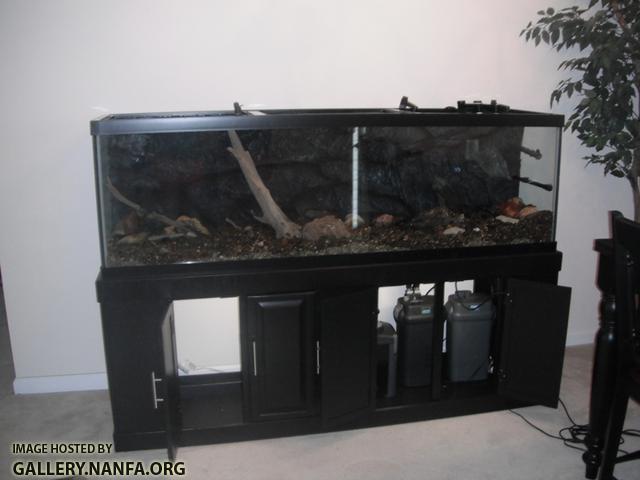
Final Fill
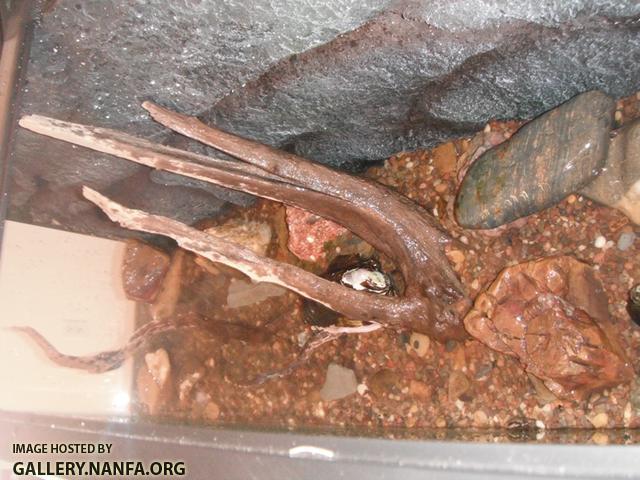
Pumps: I have a neat Geode with a hole through it and I added a screen to the inside. This will conceal the intake for the pump.
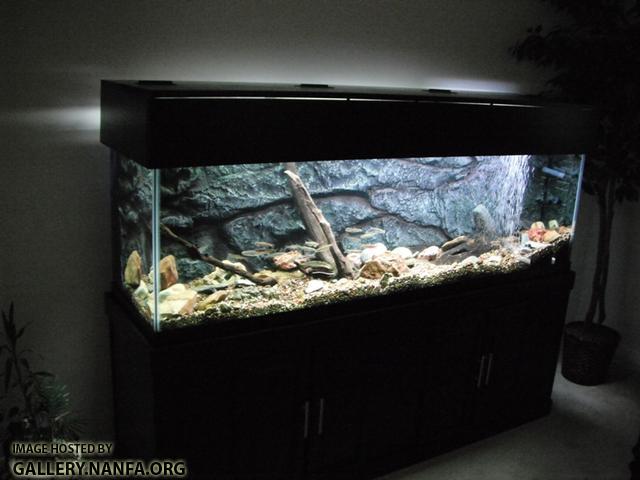
With Canopy
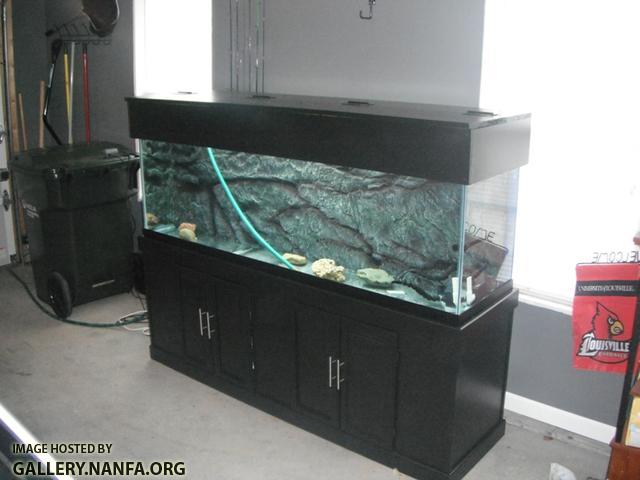
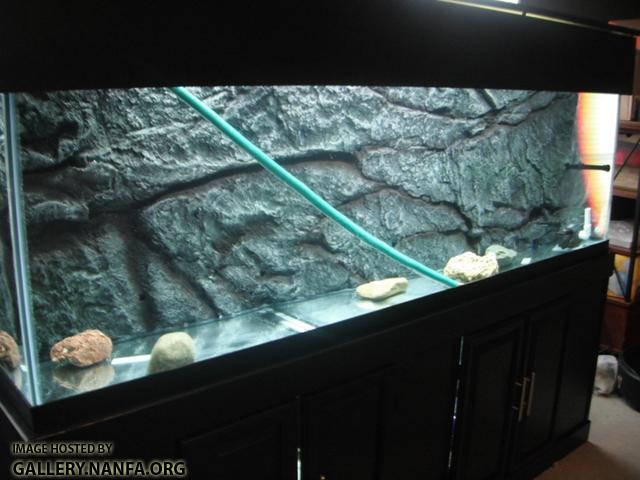
Now that it's full of water the tank looks really thin and shallow. It didn't look like that empty. Maybe it's just because you dont get the right depth perception without gravel in it. What can I do to help make it appear deeper? Larger rocks in the front and smaller in the back? The black background on my 75 adds depth just by being dark. Any tricks to make it appear deeper?
Pumps: I have a neat Geode with a hole through it and I added a screen to the inside. This will conceal the intake for the pump.
With Canopy
Now that it's full of water the tank looks really thin and shallow. It didn't look like that empty. Maybe it's just because you dont get the right depth perception without gravel in it. What can I do to help make it appear deeper? Larger rocks in the front and smaller in the back? The black background on my 75 adds depth just by being dark. Any tricks to make it appear deeper?
#88
Guest_EricaWieser_*
Guest_EricaWieser_*
-
- Guests
Posted 02 May 2011 - 09:53 PM
Slope the gravel up so that it is shallowest at the front of the aquarium and deepest at the back. Draw the observer's eye away from the front bottom of the aquarium and up into the top of the back.What can I do to help make it appear deeper? Larger rocks in the front and smaller in the back? The black background on my 75 adds depth just by being dark. Any tricks to make it appear deeper?
Here is a picture of a tank with substrate that has increasing depth the farther it goes back: http://showcase.aqua...y=0&vol=3&id=96 (119 gallons)
Now here is a U-shaped substrate. http://showcase.aqua...=0&vol=3&id=170 (423 gallons) See how closed in and small that tank looks? It's actually three and a half times bigger than the one before.
By distracting the eye up and to the back of the tank, as this person did with their white sand line, the tank space feels more open and larger. http://showcase.aqua...=0&vol=1&id=124 This tank is only 40 gallons, but it feels more open (to me) than the 423 gallon one.
Draw the eye up and to the back, and even a 48 gallon tank like this one looks spacious: http://showcase.aqua...=0&vol=1&id=135
It's all about playing an optical illusion trick on the observer so that when they look into the small box of the fish tank, it seems like they're looking through a window into a whole 'nother world. http://showcase.aqua...=0&vol=1&id=159
Edited by EricaWieser, 02 May 2011 - 10:03 PM.
#89
Guest_UncleWillie_*
Guest_UncleWillie_*
-
- Guests
Posted 02 May 2011 - 10:00 PM
Looks great. I can see why you are concerned about it - here you have a big tank that has all of a sudden gotten smaller from the background and the space behind it.
Erica's recommendation is a good one. While I have not used this on a tank the size of yours, I added significant slope to my 20 gallon long tank that makes it appears much bigger/deeper than it really is. I have the substrate shallow in the front, deeper in the back, with larger slab rocks piled up high along the back glass only. It's amazing how much better (and bigger) the tank looks. I think you could do the same with your substrate, and put those large rocks up against the background to create that depth. You almost think about how in the old western movies, set props (cactus, tumbleweed, rocks) were stacked high in the back near a painted-on background of the desert. This works similarly with aquaria.
Erica's recommendation is a good one. While I have not used this on a tank the size of yours, I added significant slope to my 20 gallon long tank that makes it appears much bigger/deeper than it really is. I have the substrate shallow in the front, deeper in the back, with larger slab rocks piled up high along the back glass only. It's amazing how much better (and bigger) the tank looks. I think you could do the same with your substrate, and put those large rocks up against the background to create that depth. You almost think about how in the old western movies, set props (cactus, tumbleweed, rocks) were stacked high in the back near a painted-on background of the desert. This works similarly with aquaria.
#91
Guest_NVCichlids_*
Guest_NVCichlids_*
-
- Guests
Posted 10 May 2011 - 04:20 PM
cannot wait for an update. I am considing one of their thin rock wall backgrounds for my 125 as I do not want to lose floor space.
Have pictures as of today?
Have pictures as of today?
#92
Guest_jblaylock_*
Guest_jblaylock_*
-
- Guests
Posted 10 May 2011 - 07:13 PM
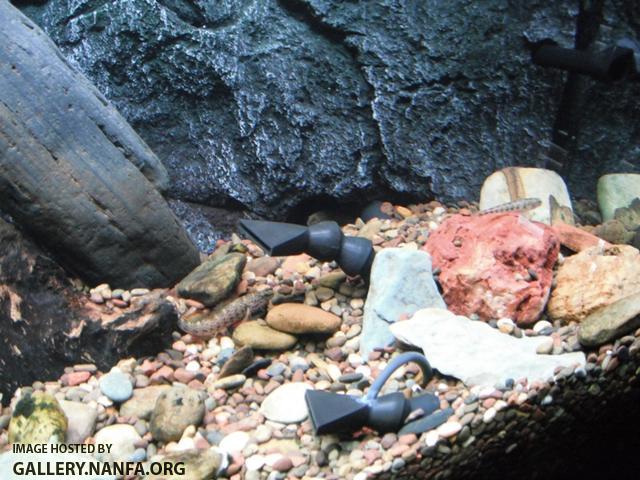
Sorry for the delay. The setup took nearly all day. I had to wait a few hours to get some help on moving the aquarium and I pulled my back carrying buckets of water, but I couldn't let that stop me.
During setup
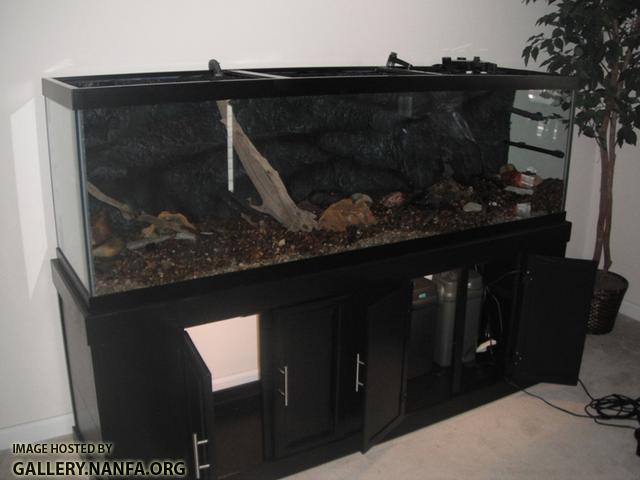
Water fill:
Driftwood:
Completed Setup:
Air:

During setup
Water fill:
Driftwood:
Completed Setup:
Air:
#93
Guest_jblaylock_*
Guest_jblaylock_*
-
- Guests
Posted 10 May 2011 - 07:23 PM
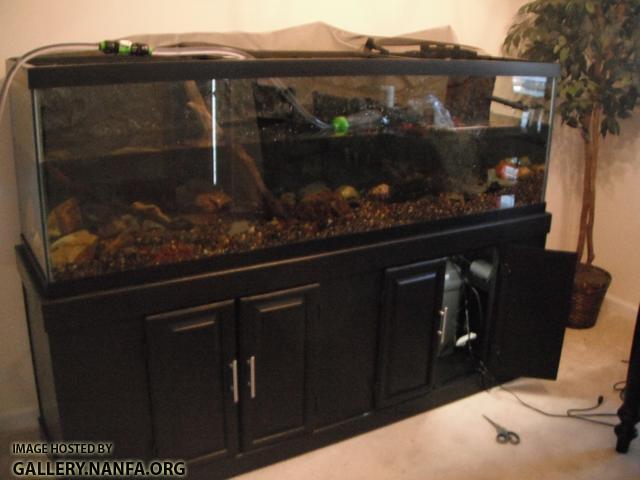
Driftwood:
Outflow:
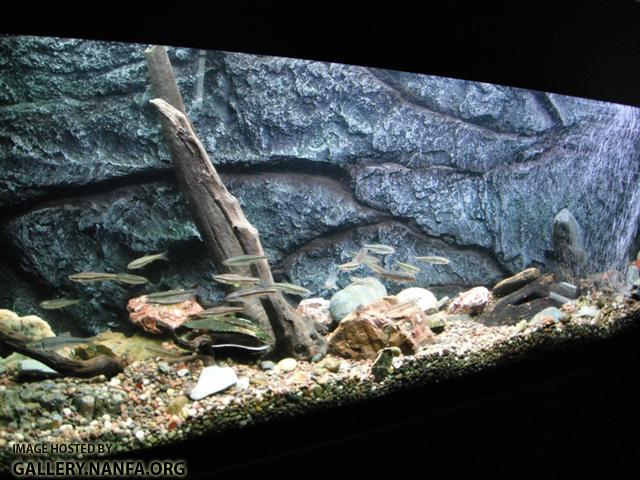
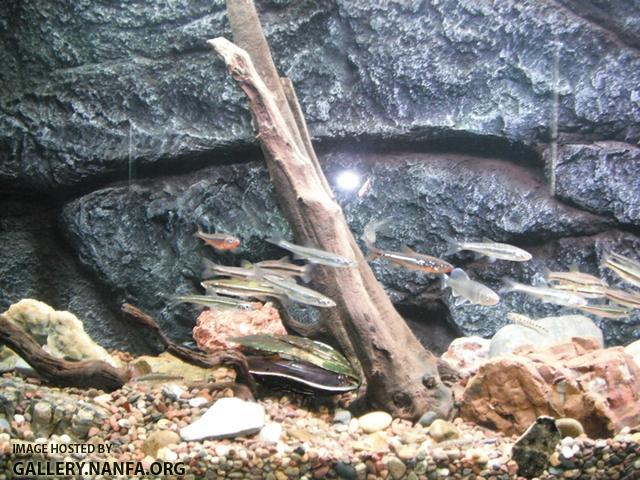
Tank shots:
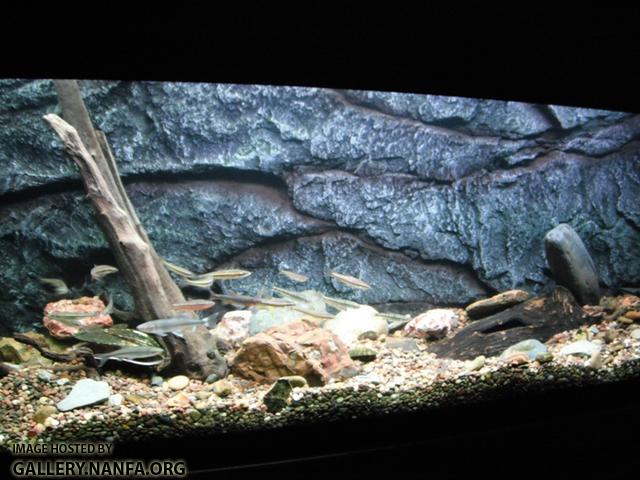
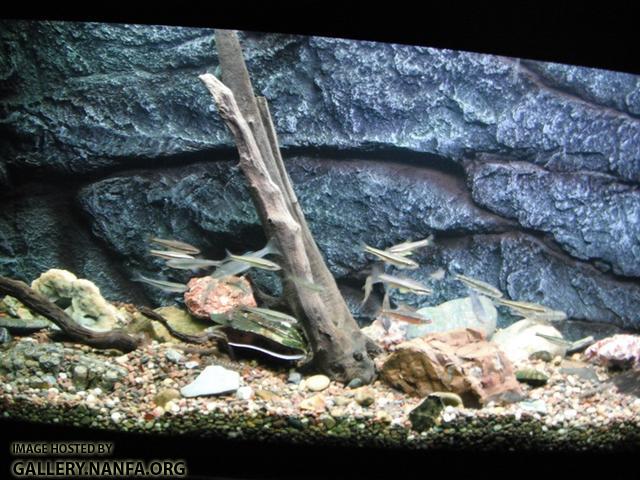
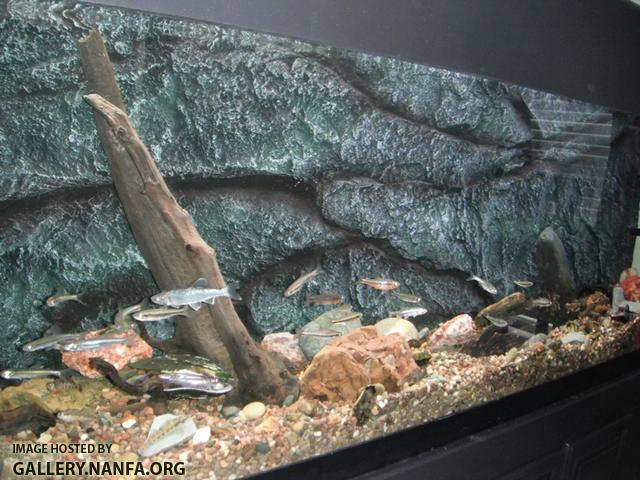
There are still a few small kinks to work out. I'm having to modify one of the filter outflows, but should be done tomorrow. Also, I was only able to save about 50 gallons of water from the old tank, roughly 1/3 of the total volume. The water is a little cloudy. I thought it was just debris that needed to settle, but it must not be. It was a little clearer today, hoping it clears up soon. I'm hoping it isn't because the filters aren't getting what they need. The outflow is strong so they must be getting enough water in. I'm thinking it's a small bacteria bloom wih all the new water.
Other than the kinks, it is all going good. The background looks great and it doesn't look shallow at all. It seems to be getting good circulation for the filters (they are running hard). The under-gravel pump is quiet and you barley hear anything. The fans are near silent and the moonlights look awesome at night. I did end up with about 75lbs of gravel not needed.
I staggered the lights on/off. I have 1 light coming on/going off about 1 hour before/after the two main lights. The 2 fans are timed with the main light set to keep them cool. The air comes on and goes off several times throughout the day. More photos to come, I would love to hear what everybody thinks.
Outflow:
Tank shots:
There are still a few small kinks to work out. I'm having to modify one of the filter outflows, but should be done tomorrow. Also, I was only able to save about 50 gallons of water from the old tank, roughly 1/3 of the total volume. The water is a little cloudy. I thought it was just debris that needed to settle, but it must not be. It was a little clearer today, hoping it clears up soon. I'm hoping it isn't because the filters aren't getting what they need. The outflow is strong so they must be getting enough water in. I'm thinking it's a small bacteria bloom wih all the new water.
Other than the kinks, it is all going good. The background looks great and it doesn't look shallow at all. It seems to be getting good circulation for the filters (they are running hard). The under-gravel pump is quiet and you barley hear anything. The fans are near silent and the moonlights look awesome at night. I did end up with about 75lbs of gravel not needed.
I staggered the lights on/off. I have 1 light coming on/going off about 1 hour before/after the two main lights. The 2 fans are timed with the main light set to keep them cool. The air comes on and goes off several times throughout the day. More photos to come, I would love to hear what everybody thinks.
#94
Guest_GreenRiverKY_*
Guest_GreenRiverKY_*
-
- Guests
Posted 10 May 2011 - 07:53 PM
Very nice man. It looks awesome and your step-by-step progression pics will be valuable to someone wanting to make a set up like this. Well done!
#95
Guest_keepnatives_*
Guest_keepnatives_*
-
- Guests
Posted 10 May 2011 - 08:16 PM
Looks awesome, I've enjoyed watching the progress. Should get lots of relaxation watching the community you can set up in this work of art.
#96
Guest_EricaWieser_*
Guest_EricaWieser_*
-
- Guests
Posted 10 May 2011 - 08:42 PM
Did you use filter media from an established tank? What's your ammonia, nitrite, and nitrate concentration in parts per million (ppm) or milligrams per liter (mg/L)?
#97
Guest_jblaylock_*
Guest_jblaylock_*
-
- Guests
Posted 10 May 2011 - 09:00 PM
Did you use filter media from an established tank? What's your ammonia, nitrite, and nitrate concentration in parts per million (ppm) or milligrams per liter (mg/L)?
I did use the 3 existing filters. What's my what.....measuring levels, I don't.
I'm assuming a mini-cycle due to 2/3 new water and moving the gravel.
#98
Guest_mywan_*
Guest_mywan_*
-
- Guests
Posted 10 May 2011 - 09:15 PM
Very nice looking. I like the way the bubbles shower in one of those pics.
#99
Guest_RichardSFL_*
Guest_RichardSFL_*
-
- Guests
Posted 10 May 2011 - 09:27 PM
Wow, that looks really good. I've been tempted by those backgrounds in the past - maybe one day. Nice work.
#100
Guest_Doug_Dame_*
Guest_Doug_Dame_*
-
- Guests
Posted 10 May 2011 - 09:40 PM
You have a chair you can park front & center, I hope, and watch your fish.
Super job !
Super job !


0 user(s) are reading this topic
0 members, 0 guests, 0 anonymous users

