Jump to content


Josh Blaylock's 125 gallon stream tank. Build and updates.


  • Please log in to reply
227 replies to this topic

#41 Guest_jblaylock_*

Guest_jblaylock_*
  • Guests

Posted 23 January 2011 - 05:32 PM

I got a little more work done on this over the weekend. I have actually had the cabinet doors since last weekend, but due to a back injury I haven't been able to hang them yet. I went to Lowes and they were out of the hinges I need in black. I'm going to get the hinges somewhere else this week and hopefully have the stand completely done by the end of next weekend.

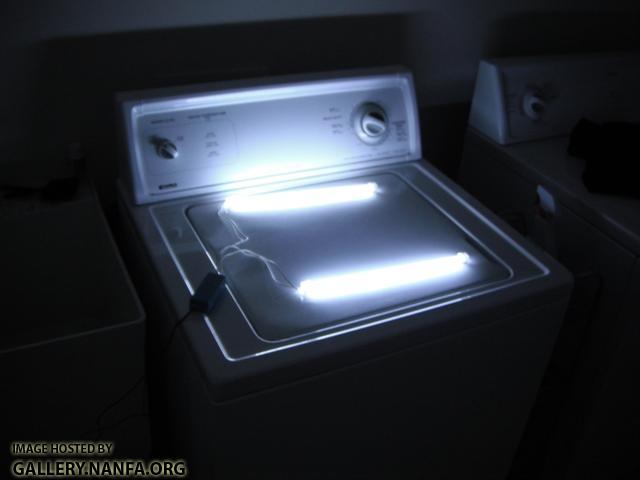
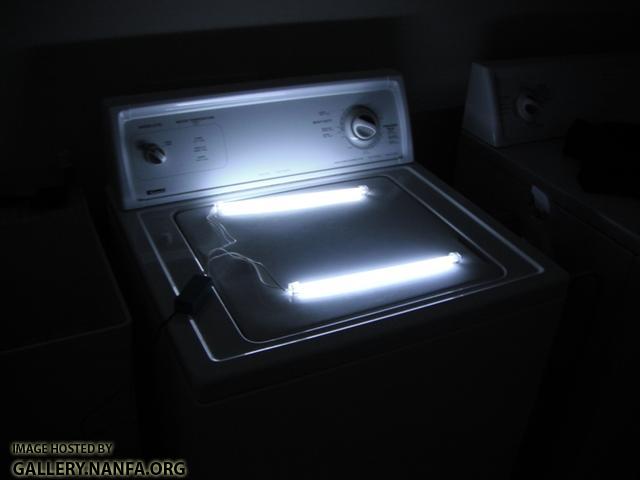
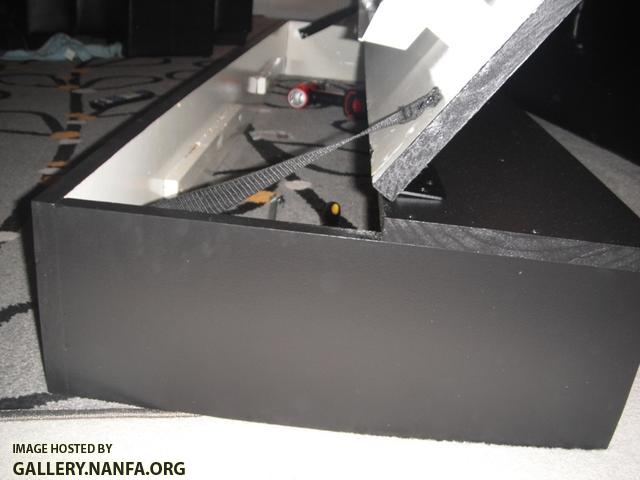
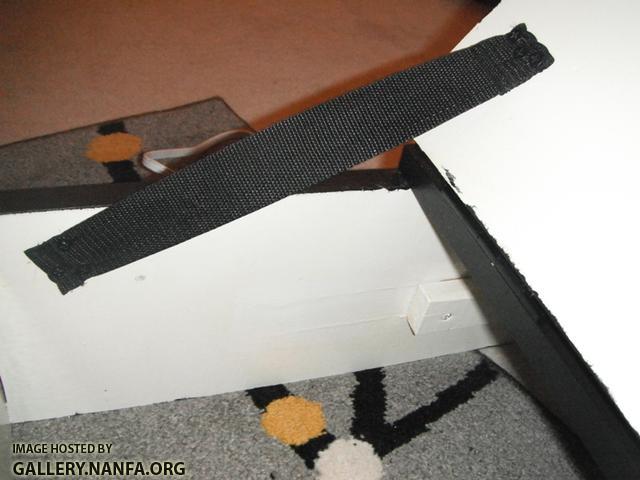
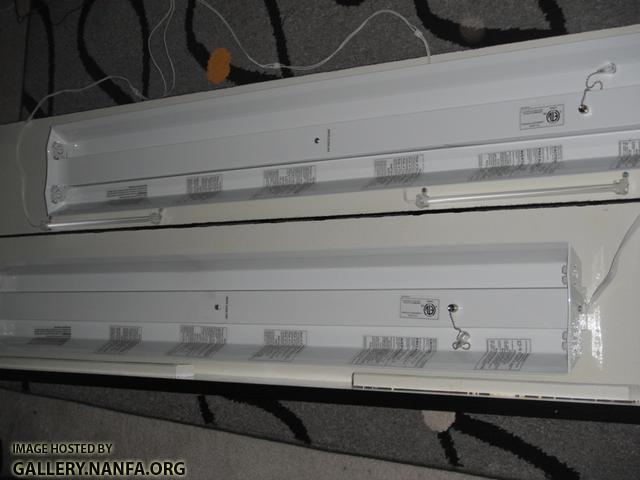
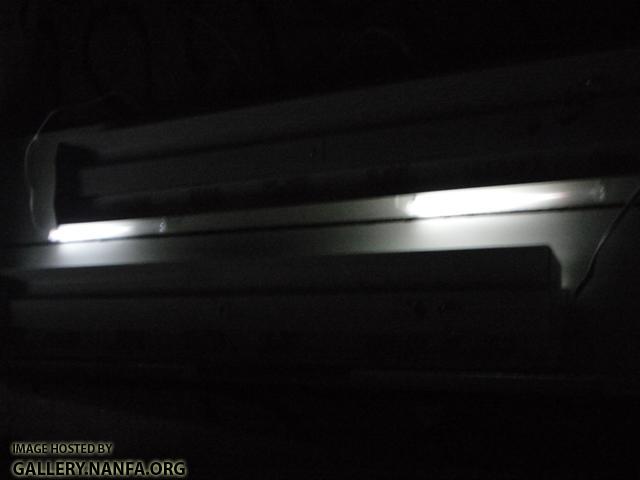
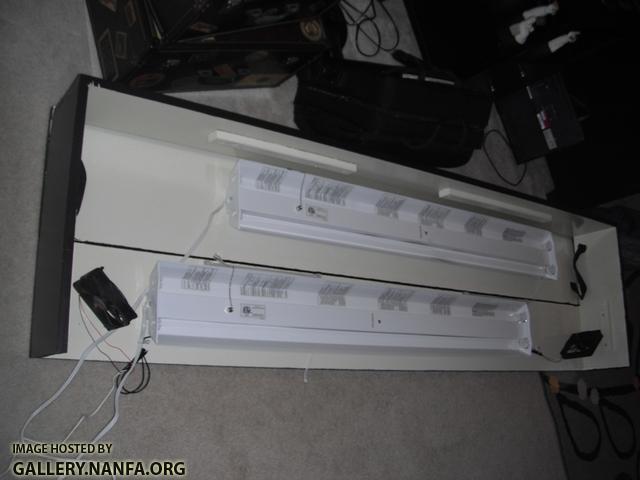
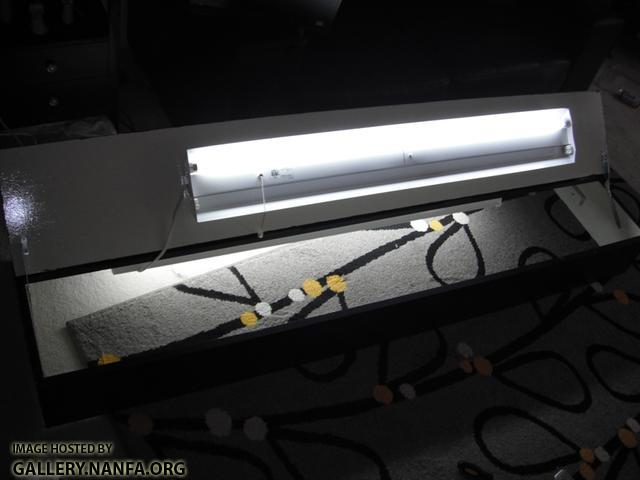
I did get the canopy 1 step closer this weekend. Maybe you could tell from my last posts, but I wasn't happy with the angle the lid opened, so I changed all of that. I moved the side braces back so the lid-stay could be moved to another position. I repainted and repolyurethaned the inside. The polyurethane turned the white paint kinda yellowish, but it is on the inside and is still very reflective...though I don't think it's a big deal. All black wouldn't hurt the amount of light actually in the water that much. I finally decided on some lights and got them mounted. I was going to use a fluorescent wrap but, I didn't like the idea of adding a plug to a hardwire light, so I went with a shop light. These have a pull-chain, but I'm going to cut that short.

Posted Image

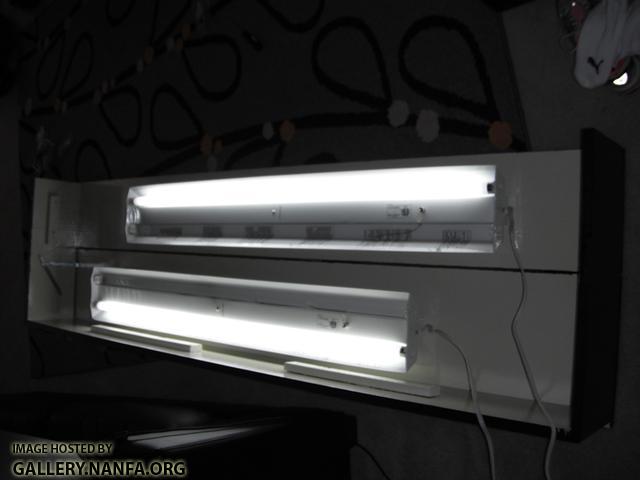
2 Dual T-8's, each offseat from center opposite from each other to distribute the light equally.
Posted Image

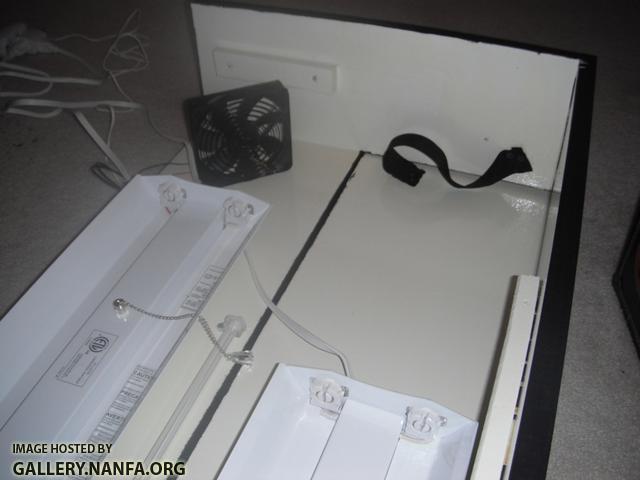
As you can see, the lid leans back much farther now. I'm much happier with this now.
Posted Image

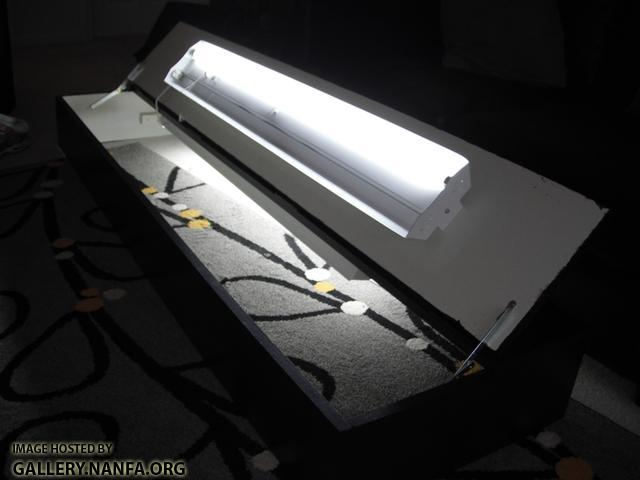
I will be adding two more bulbs to the lights. A 10K and a more full spectrum bulb, maybe an 18k full spec aqua-glo. I have also ordered two cpu case fans that I will be adding to the rear of the canopy to help vent it.

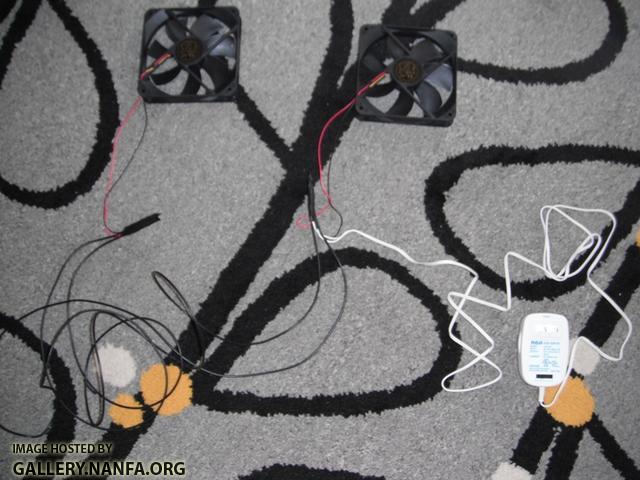
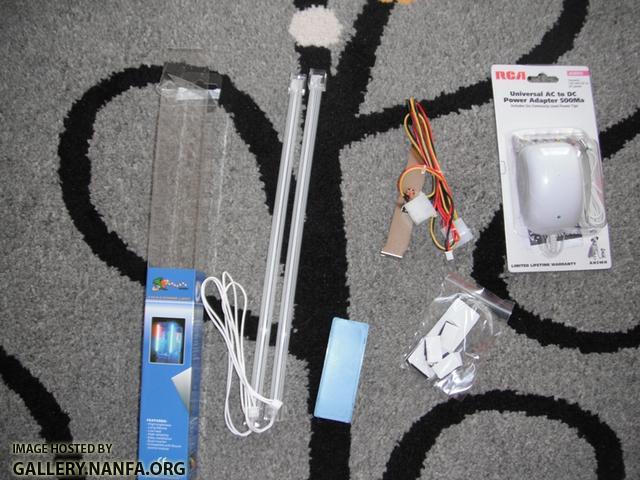
One of my favorite things is the aquarium at night. I love my moonlights, but CurrentUSA are now making a different kind of lunar light and I dont really like the looks of it. Using THIS DIY I am going to try Cold Cathode for lunar lights. I am going to get THESE and try it out. However, I am afraid that they may be too bright. I am going to wire it up on an adjustable DC adapter so I can change the voltage and dim them. I have found a dual 4in strips, I wonder if they would be better? I hope to get the fans and moonlighting done this week too.

To Do: that I can think of.
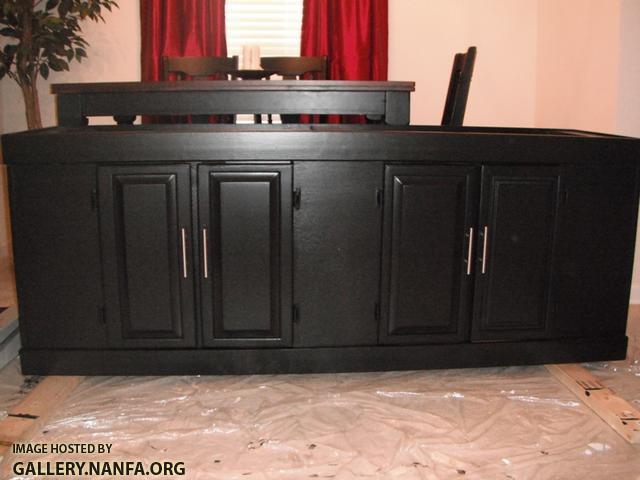
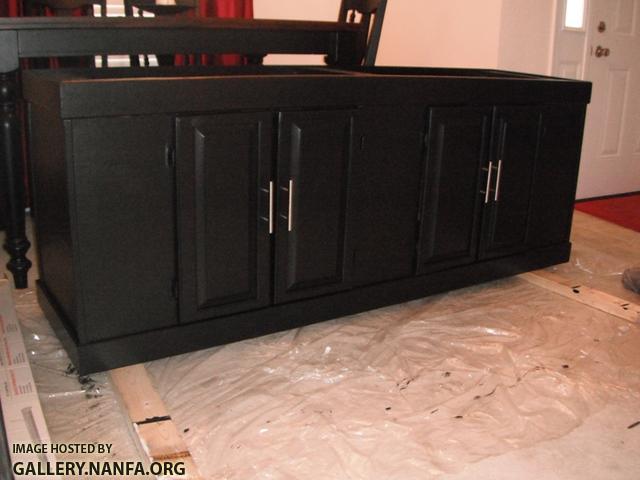
Stand - Hang the doors, paint them.
Canopy - moonlights, fans, screen
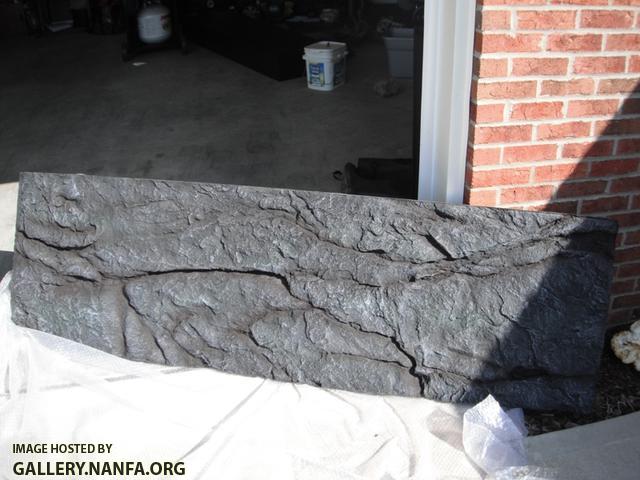
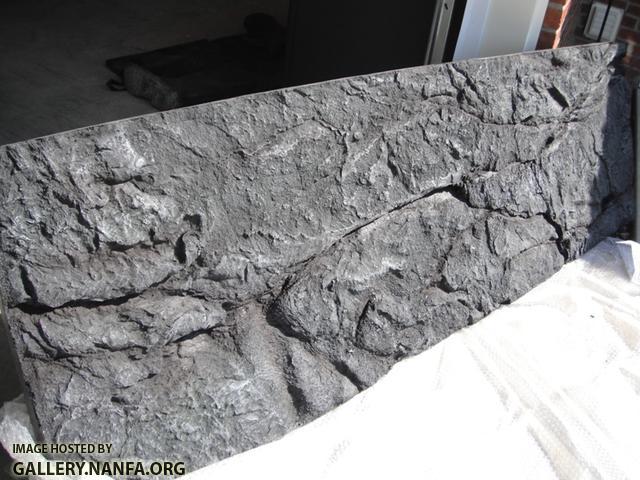
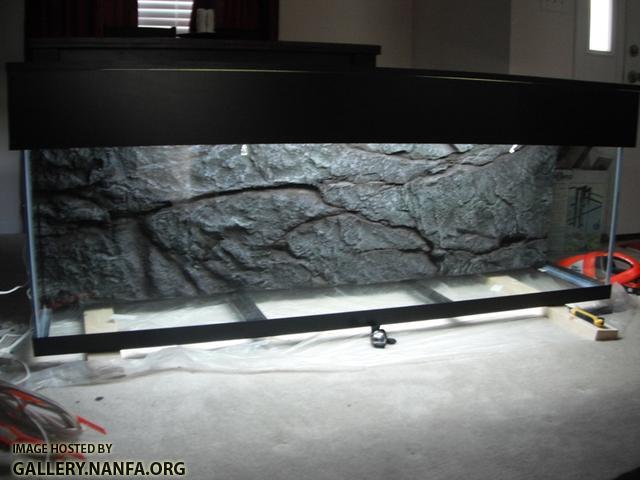
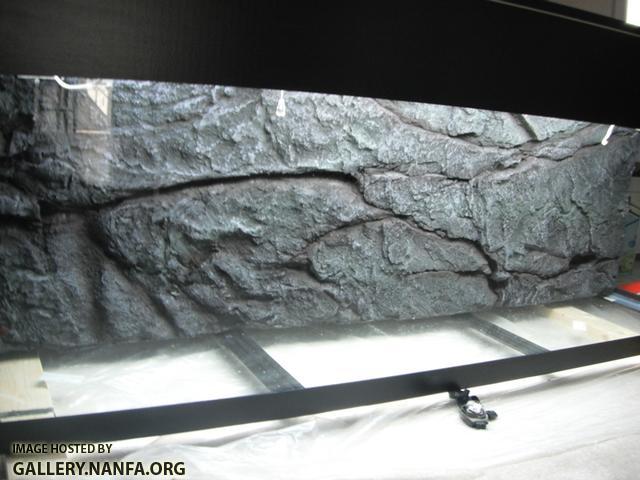
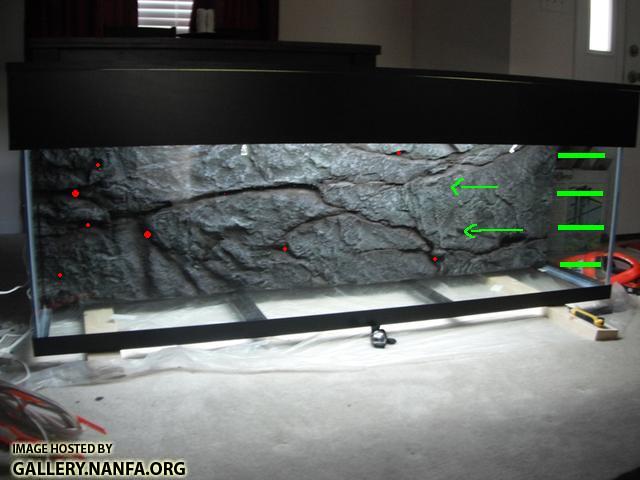
Tank - Background, tubing mock up, anchor the driftwood, fill'er up

Edited by jblaylock, 23 January 2011 - 05:59 PM.


#42 Guest_EricaWieser_*

Guest_EricaWieser_*
  • Guests

Posted 23 January 2011 - 08:56 PM

Oh, I really like the idea of a moonlight light setting. That's awesome.

Would a dimmer switch help at all? http://www.amazon.co...95834071&sr=1-1
http://www.homedepot...catalogId=10053

Edited by EricaWieser, 23 January 2011 - 09:04 PM.


#43 Guest_jblaylock_*

Guest_jblaylock_*
  • Guests

Posted 23 January 2011 - 09:39 PM

I have moonlights on my tank now. In the photo of my 75 on the last page you can see three lunar lights. They are small dual led's mounted next to the lights. I LOVE watching the fish at night under the moonlight.

That dimmer may work. I am going to use an adjustable DC adapter and I will be able to dim it by turning down the voltage.

#44 Guest_jblaylock_*

Guest_jblaylock_*
  • Guests

Posted 29 January 2011 - 12:24 PM

I got my fans and lights this week and hooked them up this morning.

Fans: This took about 20-25 minutes to do. It wouldn't have taken that long but the wires on the fans are really small and I had to peel the cover off with a knife. I also added a few feet of wire so I can attach a fan on each end. I bought low speed fans for this. I don't need a lot of movement, just enough to circulate the air. The adjustable adapter will allow me to fine tune the speed. Also these fans, even on 12V, are really quiet, I can barely hear them...even when I'm holding them. The cost for this was about $25, 12 for the adapter and 12 for the fans with screens.

Parts Needed: fan screens not shown
Posted Image

Assembled:
Posted Image

Cold Cathode Moonlights: This took me about 5 minutes to do. I have ordered some wire extenders so I can mount the power inverter in the stand. I don't think it needs to be exposed to water. The cost is about 35, $10 for the lights, $10 for the coming cord extenders, and 12 for the adjustable power adapter. I plan on attaching these with the zip-ties that you can screw down. I'm glad I'm using an adjustable adapter. These are rated for 12V, but they would be way too bright. I will likely run them at 6V or 7.5Vs.

Parts Needed:
Posted Image

Assembled:
Posted Image
Posted Image

12V: Too bright
Posted Image

7.5V: Closer
Posted Image


I put the canopy back on the tank yesterday. More probems. I was happy with the open position of the lid, but now the lid stays hit the tank rim when trying to close it and it doesn't close. I'm at my wits end with this....

#45 Guest_jblaylock_*

Guest_jblaylock_*
  • Guests

Posted 05 February 2011 - 02:03 PM

Finally, the cabinet is 100% completed. Hopefully the Canopy will be 95% done this weekend.

Posted Image

Posted Image

You may be able to tell, one door is a little different. But, I can't complain for freebies.

#46 Guest_GreenRiverKY_*

Guest_GreenRiverKY_*
  • Guests

Posted 10 February 2011 - 08:34 AM

That cabinet came out nice, I really like it. Could you use some small blocks of wood to offset the lid stays so that it folds down beyond the inside the edge of the aquarium?

#47 Guest_jblaylock_*

Guest_jblaylock_*
  • Guests

Posted 10 February 2011 - 11:56 AM

Dang, that would have been an easy fix, but I didn't think about that. Actually, I took your advice from earlier. I replaced the lid stays with nylon straps from an old duffle bag. The straps are screwed to the lid and into the side of the canopy. Those straps are strong and do the job. I wish I would have done that sooner. I also mounted the moon lights. I need to mount up the fans and the canopy is nearly completed. I may try to get that done tonight.

My sources indicate that Designs by Nature will have a new shipment of backgrounds this weekend. I hope to find one I really like and get it in soon. It's looking like 1st of March on getting this all together, just in time for spring collecting.

#48 Guest_EricaWieser_*

Guest_EricaWieser_*
  • Guests

Posted 10 February 2011 - 07:00 PM

My sources indicate that Designs by Nature will have a new shipment of backgrounds this weekend. I hope to find one I really like and get it in soon. It's looking like 1st of March on getting this all together, just in time for spring collecting.

If I had the chance, I've love to make my own background. There are some pretty neat ideas on youtube.
Background ideas:
youtube.com/watch?v=qIN7L092R84&feature=related
youtube.com/watch?v=Es76DnaQDwI
youtube.com/watch?v=BrSdYK5El_8
youtube.com/watch?v=95HShae6x2E
youtube.com/watch?v=zEO64JqhjRE <- I like the caves on this one.
http://www.cichlid-f...6f675397658df8b
http://badmanstropic.../article90.html

There are literally hundreds of DIY designs, all of which cost next to nothing compared to the pre-made backgrounds.

Edited by EricaWieser, 10 February 2011 - 07:10 PM.


#49 Guest_jblaylock_*

Guest_jblaylock_*
  • Guests

Posted 18 February 2011 - 11:42 PM

Erica, I have built a couple of small backgrounds for a ten gallon. I have watched tons of videos and even saved every piece of styrofoam I could get my hands on...sadly, I'm not that artsy, I'm better off to buy one if I want it to look good.


The canopy is 99% done. I can't do anything else until it's on the tank for good.

Straps that hold the lid.
Posted Image

Posted Image

Mounted Moonlights:
Posted Image

Posted Image

Fans: I decided to have them both blowing in on an angle. I thought that if I had one blowing out, the mosture could cause a problem blowing directly on the wall. These are just ment to just move a little air to keep the lights/water cooler. The fans will blow in and the air will circulate through the middle.
Posted Image

Posted Image

Next up, background and filter plumbing.

Edited by jblaylock, 18 February 2011 - 11:43 PM.


#50 Guest_jblaylock_*

Guest_jblaylock_*
  • Guests

Posted 15 April 2011 - 09:25 PM

Things have been slow going on this, but I hope to have it done before the NANFA convention. Last weekend I leak tested the tank, after 3-4 days full, no leaks were found.

I got the background in on Thursday. To fit the background in the tank I have 2 options. 1-cut the background and silicone it back together, or 2-remove the upper frame and put it back on. I didn't want to comprimise the background, so 2 weeks ago I ordered a new tank frame set. If the rain stops long enough I will have the tank in tomorrow, remove the old frame, cut the background to fit, and begin mock-up. Anyone have any tips on removing the frame? Though I have a new one coming, if I can salvage the old one...even better.

It's hard to tell, but there is dark gray, light grays, brown, and greens in this. The background looks good in the daylight, but a little dark in regular lighting. I hope my tank lights will be enough to make it pop.

Posted Image

Posted Image

#51 Guest_jblaylock_*

Guest_jblaylock_*
  • Guests

Posted 16 April 2011 - 10:50 PM

Before:

Posted Image

I was really hoping to get the top frame off without busting it. After cutting the silicone I tried for a while to pry it off, but no luck. It finally split in the corner and I broke out the Dremel. Here's hoping there is no problems with the new frame. As long as it fits correctly, all I will have to do is lay down a generous bead of silicone around the frame and install.

Posted Image

Tomorrow cut and fit the background

#52 Guest_jblaylock_*

Guest_jblaylock_*
  • Guests

Posted 17 April 2011 - 08:05 PM

Well, I got the background cut, trimmed, and fitted to the tank today. It will still have to be siliconed to the glass, but this won't be done until the frame is in and everything has been mocked up. I couldn't help but to put the lid on it and see how it would look. I like it so far. It is pretty bright, but I may have to get another 10K bulb. I will wait to see how it looks with water in it.

Posted Image

Posted Image

The manufacturer suggests to silicone a brace in the middle of the background to support the pressure of the water. Any ideas on what I could use?

This week I am going to start figuring out where all the return pipes will go. As I said before, I will have 3 filters and the return pipes will all be on one side creating a directional flow. These pipes will be ran though the wall. Also, I will be drilling holes to allow the water to flow behind the background. I will likely drill 1-2in holes, with black mesh backing to keep the fish out. Does anyone have an idea on how many holes I should make to allow for proper flow? I appreciate all the views on this, but I would LOVE some feedback/suggestions.

#53 Guest_jblaylock_*

Guest_jblaylock_*
  • Guests

Posted 19 April 2011 - 08:31 PM

All these views and nobody has a suggestion on how many holes to make for proper circulation, or what to use to brace the center of the background?

#54 Guest_mywan_*

Guest_mywan_*
  • Guests

Posted 20 April 2011 - 06:43 AM

Something is likely wrong with the picture I have in my head, because I am not sure why a brace would be needed. Water does not add weight to the background, it effectively reduced it unless the water level drops below the top of the background. However, a 1/2 or 3/4 piece of PVC pipe should work with a bead of silicone down each side to hold it in place. Perhaps cut in half lengthwise if it is too thick. Being siliconed to the background will prevent it from bending sideways where it is weakest. Not terribly stiff but plenty of compression strength for the intended use.

The number and size of the holes needed for water flow behind the background depends on the amount of circulation you want and whether or not any water will be pumped from or behind the background. Presumably you just want to avoid anaerobic conditions behind the background. If you have any forced flow, such as water jetted directly at the holes or far better water pumped from or into the background, as little as a 1/4 inch hole could be enough. Just depending on normal water circulation I would think about 3 to 5 square inches of flow on each side for good circulation. Putting a bubbler behind the background would also effectively kill any potential anaerobic conditions in minutes.

If you placed the filter intake behind the background and the output into the main tank, then drill and screen 1/4 to 3/8 inch holes about an inch apart up the ends of the background, then you could guarantee the water quality behind the background is essentially the same as what is in the tank. The number of holes would then be more for protecting fish from getting sucked against the holes than for providing sufficient water flow.

Thinking about this there is no reason a background could not also operate as the filter itself, with a removable pump built in. It could even be designed to provide the flow patterns for a range of different fish needs simply by choosing which plugs are removed and attachments used for the flow characteristics of choice. The filter media(s) could be removed/replaced from the top without removing the background. Perhaps in pairs so replacing one will not remove all the biologically active media. It would make a decent commercial product anyway.

Anyway, just preventing anaerobic conditions would not take a lot of water exchange as almost any oxygen input would effectively kill it. Such conditions requires essentially zero oxygen. The 1/4 to 3/8 inch holes and inch apart up each end should be more than sufficient with or without the pump intake behind the background. Placing the background against a permeable mesh around the edges might accomplish the same thing without drilling holes. Just have spacer prongs that prevent the mesh from being pinched too tightly.

#55 Michael Wolfe

Michael Wolfe
  • Board of Directors
  • North Georgia, Oconee River Drainage

Posted 20 April 2011 - 06:57 AM

All these views and nobody has a suggestion on how many holes to make for proper circulation, or what to use to brace the center of the background?

If it were me, I would use PVC lumber... I bought some at home depot to make photo tanks from... it is 100% PVC so being underwater for ever will not be a problem and it is easy to cut and treat much like wood (which I have the tools to deal with... so I like it). You could cut it to any size you need (I think I bought a 1 x 8 that was 8 feet long) and drill big holes in it (like you would for installing a door knob) without it loosing much of its strength. In fact, if you are looking to space this off the back wall of the tank this mught be a good material to use on both sides as well as the middle...
Either write something worth reading or do something worth writing. - Benjamin Franklin

#56 Guest_mywan_*

Guest_mywan_*
  • Guests

Posted 20 April 2011 - 07:27 AM

If it were me, I would use PVC lumber... I bought some at home depot to make photo tanks from... it is 100% PVC so being underwater for ever will not be a problem and it is easy to cut and treat much like wood (which I have the tools to deal with... so I like it). You could cut it to any size you need (I think I bought a 1 x 8 that was 8 feet long) and drill big holes in it (like you would for installing a door knob) without it loosing much of its strength. In fact, if you are looking to space this off the back wall of the tank this mught be a good material to use on both sides as well as the middle...

Years ago I bought some PVC lumber, 4x8 sheets used in place of luan, in north Arkansas. Very cost competitive to, less than $10 dollars before tax. I doubt it is still that cheap. But I have never seen it in this area or anywhere else for that matter. I would love to find a local source.

#57 Michael Wolfe

Michael Wolfe
  • Board of Directors
  • North Georgia, Oconee River Drainage

Posted 20 April 2011 - 07:46 AM

Years ago I bought some PVC lumber, 4x8 sheets used in place of luan, in north Arkansas. Very cost competitive to, less than $10 dollars before tax. I doubt it is still that cheap. But I have never seen it in this area or anywhere else for that matter. I would love to find a local source.

This was at Home Depot... was not in plywood sizes... only board sizes... sold supposedly for facia and soffets (never have to paint, never rot)... and it was not cheap... I think I paid $30 for a 8ft long board. But you saw the durability and strength of the material in the field (it was my phototank material and it not only survives in the backpack, but also survived the college students and the boyscouts).
Either write something worth reading or do something worth writing. - Benjamin Franklin

#58 Guest_mywan_*

Guest_mywan_*
  • Guests

Posted 20 April 2011 - 09:12 AM

This was at Home Depot... was not in plywood sizes... only board sizes... sold supposedly for facia and soffets (never have to paint, never rot)... and it was not cheap... I think I paid $30 for a 8ft long board. But you saw the durability and strength of the material in the field (it was my phototank material and it not only survives in the backpack, but also survived the college students and the boyscouts).

I just looked it up at Lowes online. I did not see the 4x8 luan sizes but lots of PVC lumber choices. But when I put in my zip code it was unavailable at any store in this region. Tried the area in Arkansas where I bought it years ago and it was available.

#59 Guest_jblaylock_*

Guest_jblaylock_*
  • Guests

Posted 20 April 2011 - 11:49 AM

I have never heard to PVC lumber, but that sounds like the way to go. I will probably get some this weekend.

Here is what I was thinking on the flow:
Red is intake to go behind the filter. Large holes are 1/4-3/8, and then on down depending on the area the hole is. There will also be 4-6 small holes in the ridge in the middle of the background (you cant see the dots in the photo now). I am going to try to hide the holes in with the background as best I can. Also, on the upper left there will be a 2-3in notch off the top for an overflow incase things get clogged up. Green is the flow provided by 3 filter returns all on one end, and a water pump buried in the gravel.

Posted Image

Do you think this will be enough intake holes to provide good circulation and filtration?

#60 Guest_mywan_*

Guest_mywan_*
  • Guests

Posted 20 April 2011 - 05:16 PM

That should be enough. The only thing really worth being concerned about is enough oxygen in the water back there to prevent anaerobic conditions. That can result in nitrates and such being converted back into ammonia. However, even small amounts of oxygen is enough to prevent that. Even in fairly dense soil it still requires a significant depth before anaerobic conditions set in, unless the nitrates are so bad that it locally consumes all the oxygen in the breakdown process. That would be bad for your tank all the way around, with or without the background.


0 user(s) are reading this topic

0 members, 0 guests, 0 anonymous users