This is awesome and we're glad to see it come to fruition! Just a word to the wise, stock slowly! Just to reiterate something I'm sure you know--with a new tank and higher pathogen loads in/on fish during the summer months the stress of collecting could be hard on the new fish in a new tank. But very excited to see it up and running. Congrats, Kevin
75 Gallon Native Stream Tank Build
Started by
Chasmodes
, Oct 24 2016 09:04 AM
392 replies to this topic
#222

Chasmodes
-
- NANFA Member
- Central Maryland
Posted 29 July 2019 - 10:46 AM
Thank you Nick. Will do. My plan is to take it slow. As you can see, I'm not one to rush things with this build! 
Kevin Wilson
#223
Chasmodes
-
- NANFA Member
- Central Maryland
Posted 30 July 2019 - 07:04 AM
I am nearly done. Last night, I tried to apply epoxy to the last bit of rock wall on the right side of the tank. I thought that I was done, until this morning, when I discovered that there are a couple spots that need some that I missed. So, I'll mix up a small batch tonight and finish the job. But, essentially, I'm done and ready to set the tank up.
Next steps, rockscape with the river rocks that I collected and washed. Add sand/gravel that I still need to collect. Then, fill and cycle the tank. Purchase my new light fixture.
And, finally, collect fish. It should be up, running and cycling next week.
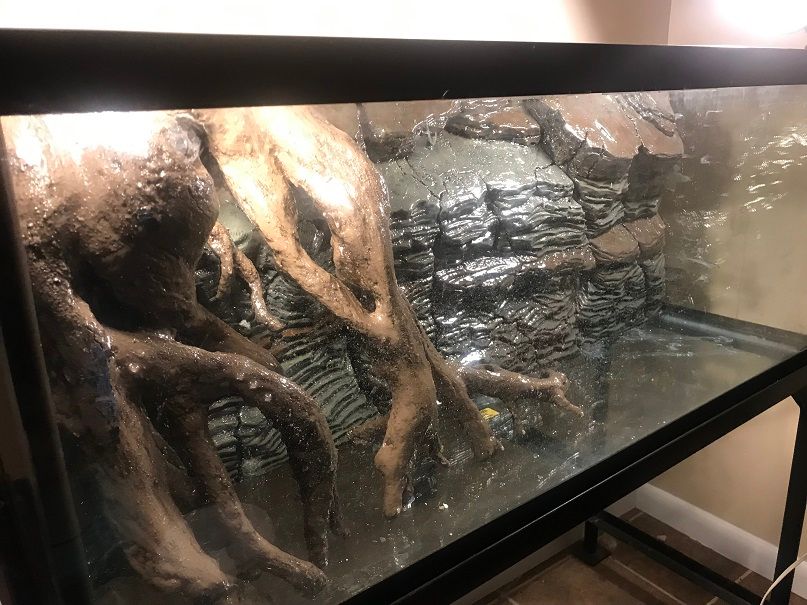
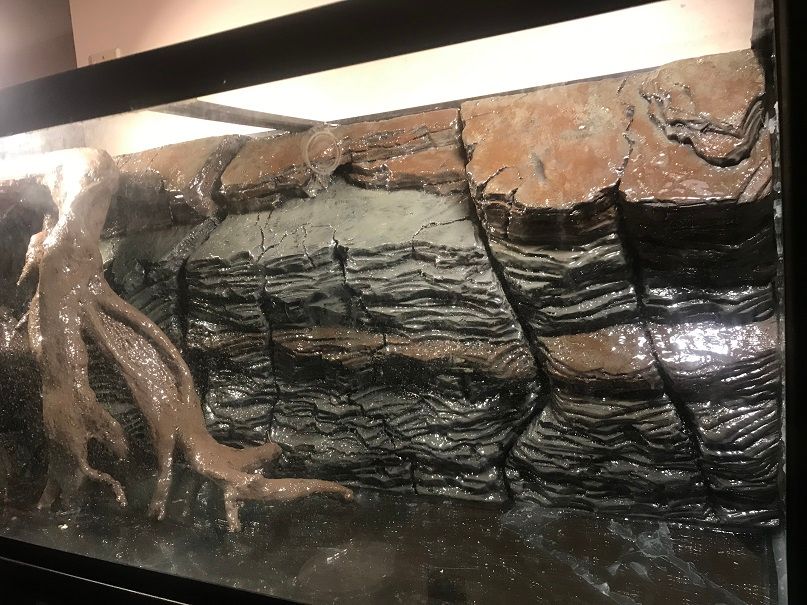
Two things to notice, the bright shiny reflections are annoying to me, but, apparently, they disappear under water. I hope that's the case. On the roots, there are three or four "drops" that dried on the front when I finished the back side that are pretty obvious. I think that I will try and sand or grind them down. Other than that, I'm pretty happy with how they turned out.
I'm a little nervous, because this is the scary part, adding water. Will the rock wall hold up? It fits tightly into place, and is heavily attached with silicone. Will the roots float with the little bit of foam in them? Or, are they heavy enough to stay on the bottom? We will see when I add water...the final test.
Here are some pics of the wall and roots as they look now in my tank:

Kevin Wilson
#224
sbtgrfan
-
- NANFA Member
- Charleston, SC
Posted 30 July 2019 - 09:30 PM
Is this 3 years in the making? Hurry up and add water already! 😆😆
Looks great man!
Looks great man!
Stephen Beaman
Freshwater Aquarist
South Carolina Aquarium
Charleston, SC
Freshwater Aquarist
South Carolina Aquarium
Charleston, SC
#225
Matt DeLaVega
-

- Forum Staff
- Ohio
Posted 31 July 2019 - 06:31 PM
It really is awesome looking!
The member formerly known as Skipjack
#226
mattknepley
-

- NANFA Member
- Smack-dab between the Savannah and the Saluda.
Posted 31 July 2019 - 07:44 PM
Nice!
Matt Knepley
"No thanks, a third of a gopher would merely arouse my appetite..."
"No thanks, a third of a gopher would merely arouse my appetite..."
#227
Chasmodes
-
- NANFA Member
- Central Maryland
Posted 01 August 2019 - 06:46 AM
Thank you Stephen. Yes, 3 years  . Also, thank you Matt D and Matt K.
I'm excited that water will be in it very soon. Last night, I finished the last touch up of the epoxy. According to Polygem, they recommended that I don't add water for a week to give the epoxy a full cure. I still have a couple things to do this weekend prior to that. First, finish scraping off the silicone that went on the side glass when I pushed the third wall section back during installation. I did some last night, and man, that wasn't easy. I collected some rocks from the upper stretches of our river a few weeks ago and washed them, so I'll be rock scaping it soon, probably Saturday. I also need to collect some sand. I could use play sand, but, I want a more natural look. I will sift it to get nasty stuff out of it prior to adding to the tank. I will also paint Drylok on the sides of the tank to hide the silicone/foam bond. It looks pretty ugly. I'll dye the Drylock in the dark charcoal color. I will purchase a light for the tank on the next paycheck. I picked the one I want, just need to pull the trigger. I'm looking at the Fluval Planted 3.0. Also, I changed my mind about how I want to add the spray bar from my canister filter on the side. I still want it on the side, but, since I'll be using glass tops, I will need to find another way to add it to the tank. That shouldn't be a big deal. After that, time to collect some fish!!!
I really hate the reflection from the epoxy. So, I really hope that what they say is true, that it will disappear when underwater.
Kevin Wilson
#228
WheelsOC
-

- NANFA Member
Posted 06 August 2019 - 07:41 AM
If it's still too glossy underwater, a couple of light passes with clear Plasti-Dip might take some of the shine off. Supposedly it's inert once dry.
#229
Chasmodes
-
- NANFA Member
- Central Maryland
Posted 07 August 2019 - 10:58 AM
If it's still too glossy underwater, a couple of light passes with clear Plasti-Dip might take some of the shine off. Supposedly it's inert once dry.
I'm praying that I won't have to do that, but, at least there is another option. Thank you for the tip!
Kevin Wilson
#230
9darlingcalvi
-
- NANFA Guest
- Northern Minnesota
Posted 18 August 2019 - 01:20 PM
We need H20 in this tank 
Sent from my iPhone using Tapatalk
Sent from my iPhone using Tapatalk
#231
Michmass
-

- NANFA Guest
- Grass Lake MI
Posted 20 August 2019 - 07:28 PM
Yeah what he said. Are you having to mix the hydrogen and oxygen yourself? If so, I can understand the time gap but if you're gonna' say something about real life getting in the way, no. Just no. Get back to work.
Truths are mutable, facts are not. Unless of course we're talking about the definition of mutable, then the fact is in fact mutable.
#232
Chasmodes
-
- NANFA Member
- Central Maryland
Posted 29 August 2019 - 07:36 AM
I'm working on it LOL. I was on vacation for the last two weeks. I guess it's good to be back, but, the beach was better!
Kevin Wilson
#233
9darlingcalvi
-
- NANFA Guest
- Northern Minnesota
Posted 30 August 2019 - 01:39 PM
I'm working on it LOL. I was on vacation for the last two weeks. I guess it's good to be back, but, the beach was better!
l was Just giving crap
#234
Chasmodes
-
- NANFA Member
- Central Maryland
Posted 03 September 2019 - 06:57 AM
l was Just giving crap
No problem Calvin, LOL, that's the way that I took it!
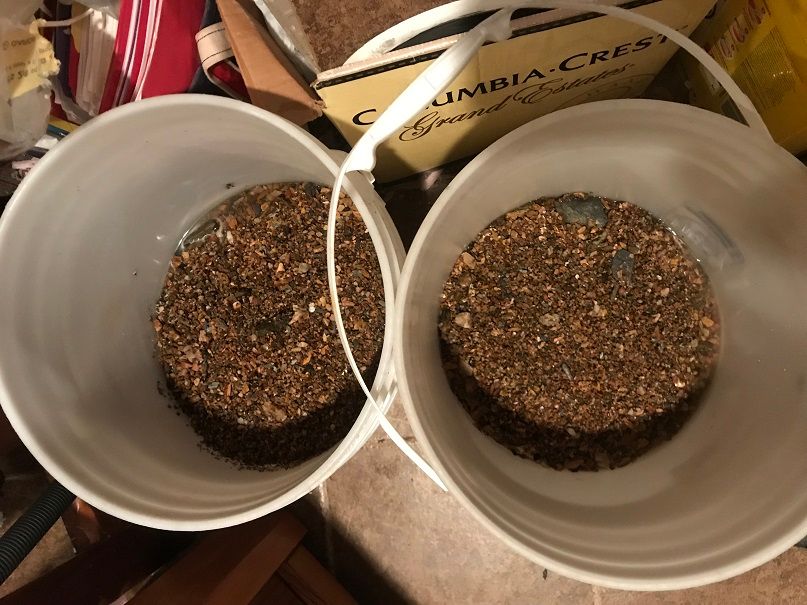
I made progress, but... A couple days ago, I remembered that there is a stream close to my house where I could drive up and park right next to the water. So, I went and checked it out, and sure enough, there was a gravel/sand bar that looked great. The colors and size were perfect. Then, yesterday, I screened, washed and sifted the gravel. Here's a tip though. When you have to carry a 5 gallon bucket worth of wet gravel or rocks to your house from the vehicle, and then downstairs, it's much easier to divide it into two 5 gallon buckets and carry it in balanced. A month ago, when I collected the rocks, I carried the full 5 gallon bucket down and it wasn't fun. Also, washing creek gravel took a lot more time than washing store bought gravel. It seemed like it took forever. I think that I spent a good 3 hours or more washing it. Anyway, here it is divided into the two buckets:
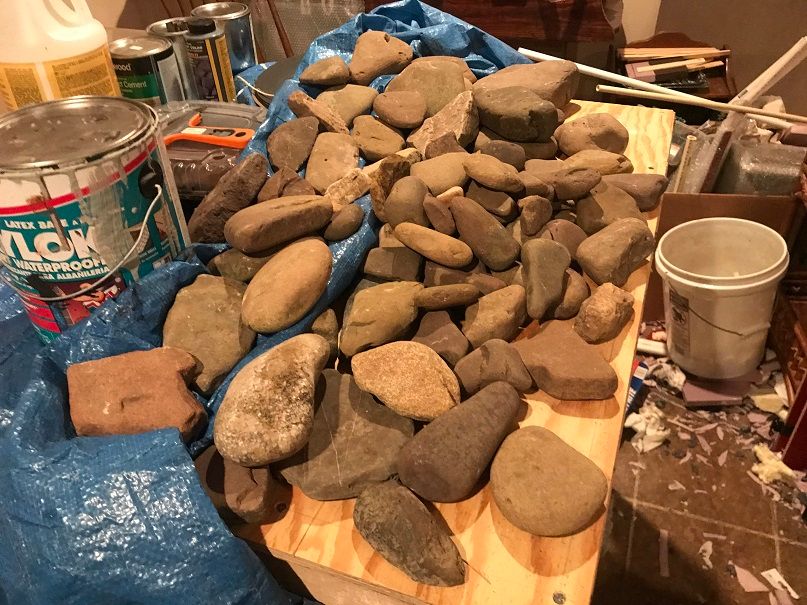
Then, I took the rocks out of the bucket and sorted them out by size and shape, and set aside the ones that I wanted to be seen the most and arranged them on my workbench (which is the stand that I built for my 100g oyster reef tank).
After that, I went ahead and rockscaped the tank, then filled it with water. This was a test run, to see if the wall held up and the roots didn't float. I also set up the powerhead and checked out the current. It ran perfectly. I didn't use this design to achieve unidirectional flow. Rather this current, along with the spray bar, should simulate a stream side eddy and undercut bank. I didn't take a picture because the water was still cloudy, and, I didn't have my canister filter set up. I will have that done tonight.
I also received the light that I ordered, a Fluval Planted 3.0. I'm really happy with it. I plugged it in, downloaded the phone app, and configured and previewed it. It's really cool. And, the best part is that, remember the shiny look of the epoxy after it finished drying, and I was worried about it? Well, what they advertise is true. It really does disappear underwater. Everything should look great when I'm finally done.
However, and now the but... I noticed that the roots stuck out of the water about 1/4", which is no big deal, but, it would have affected my ability to run the spray bar and shoot water over them to simulate the stream. I thought that maybe, when scaping the sand and rocks, that I just needed to adjust it, so, I pulled out the roots, moved the sand and rocks to the right side of the tank, and stuck the roots back in. And...they float. It isn't bad, but, it's enough to mess with my design concept. So, I unplugged everything and will work on fixing that asap. I pulled the roots out and set them in a container to drain them as water does get inside them. I'm not too worried about that because everything is inert that I used, and it enters very slowly. Although, I'm considering another coat of epoxy on areas where water might seep in, just in case.
The roots float at the top of the fixture, moving it away from the wall and up over the water surface. The bottom of the roots seems to stay down, somewhat because of sand and rocks, but, more because there was less foam used there. So, I think that I can leave the bottom alone, and design some sort of hook and latch system at the top, in the back, out of sight, that will hold the roots down.
Next steps include fixing the roots, draining the tank, scooping out the rocks, sand and gravel, add sand and gravel again, rescape the tank, refill it, cycle it, add fish.
The good news is that the back wall held in place, and is firmly attached. I don't think that it's going anywhere. And, the tank doesn't leak. I was worried about spray foam expansion damaging the glass seams, but, they're OK. And, the epoxy shine disappears underwater.
I'm almost there folks. There will be fish in it soon!
Kevin Wilson

#236
Chasmodes
-
- NANFA Member
- Central Maryland
Posted 11 September 2019 - 07:38 AM
Thank you Toad Drool!
This past weekend, between fishing trips, I made some progress on the 75g stream tank. First, I drained the tank, took out the rocks, scooped out the gravel and cleaned out the silt. When I put the gravel in the first time, even though I sifted it for a couple hours while running a hose through it, it still had a bunch of silt in it.
When everything settled, the silt created a layer of scum that covered everything, including the roots and wall. It actually looked like what you'd see in a real creek. But, I cleaned it off with my hand and a sponge and cleaned the glass as best I could. Some of the silt made it's way into the crevices of the rock wall and root. It actually looks pretty realistic, so I may or may not try and clean them out. I'll wait until I fill the tank again.
I took the gravel and divided it up into two buckets, and decided to clean half at a time. It took me three hours to clean the first half, and it's not perfect, but much, much better. I think that I'll divide the other half in half again, and clean each of those 1/4 amounts one at a time. Maybe it will go faster.
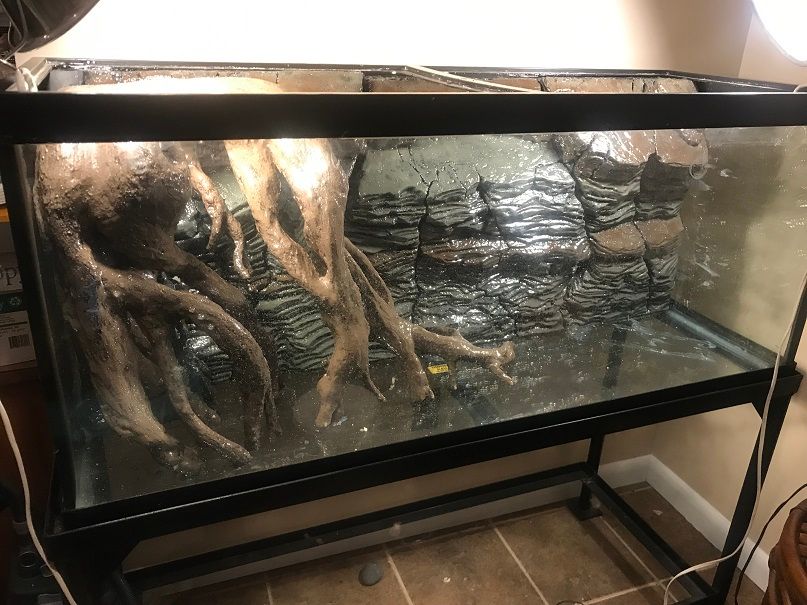
Once I had everything out of the tank and finished cleaning the scum, I put the roots back in, measured where to anchor them, and zip tied them to the stand pipe (picture below). It's really secure now, won't budge, and certainly won't float again. The stand pipe is wedged in there tight to the tank and secure in the wall. I'm really happy how it turned out. There is plenty of room for my standpipe and over the roots current.
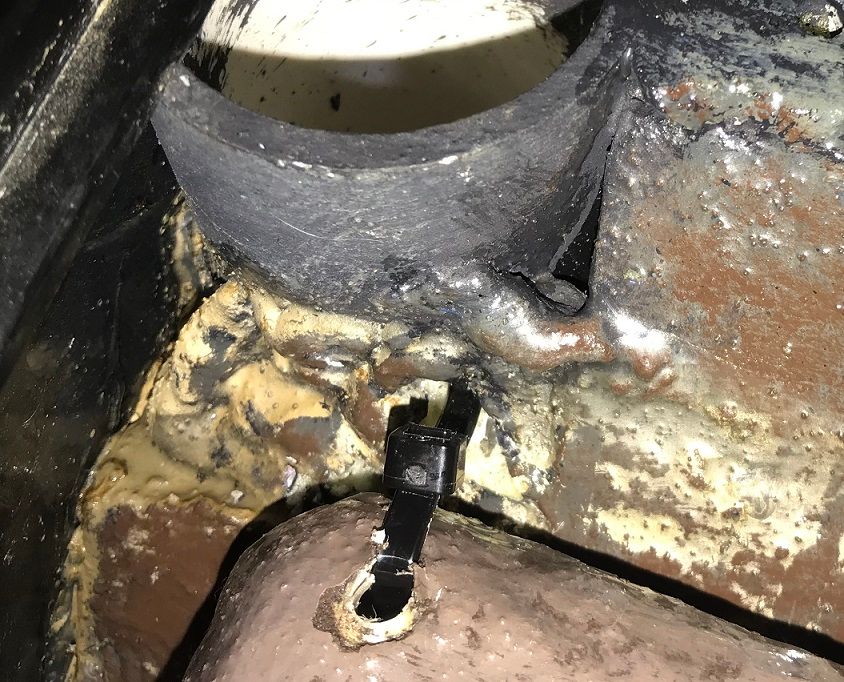
If I want to do maintenance to clean out the stand pipe, I need to remove the roots. The zip tie is easy, just cut, take the roots out, clean the standpipe, put everything back together and in, and then use another zip tie. Easy peazy.
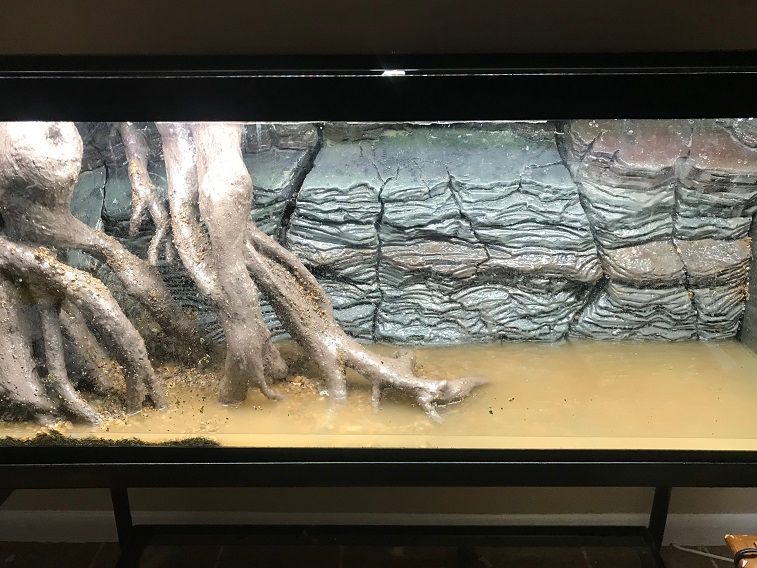
After that, I put the mostly clean gravel into the tank, then snapped a pic. Under water, the glare from the epoxy completely disappears. This is the first pic with the new light fixture:
Next steps this weekend (hopefully, I can get them all done)
-wash the rest of the gravel and put in the tank
-redo the rockscape
-fill the tank and reset the circulation pump
-redo my spray bar for the canister filter
-set up and test the canister filter
The only thing else after that is to buy a glass top, cycle the tank, and then catch some fish for the tank.
Kevin Wilson
#237
littlen
-
- NANFA Member
- Washington, D.C.
Posted 11 September 2019 - 09:28 AM
Looks great. Sometimes all that fine silt can really be a PitA. I'd personally fill it up and let the filter(s) run. Even if you add a temporary H.o.B. or small canister. They'll catch it (if you put in some really fine filter floss/felt in there) and keep rinsing them frequently to remove it from the system. But it looks like you've got a solid game plan and should be ready for fish soon. Nice to see this all come together after all this time 
Nick L.
#238
Chasmodes
-
- NANFA Member
- Central Maryland
Posted 11 September 2019 - 04:02 PM
Thanks Nick for the tips and compliment. I realize now that it may be impossible to get it all out of there. I wondered if I was creating more due to friction while washing.
I think that my canister filter will be the key. I purchased some media for it, but I think I will wait until I can get the water cleared before using it. I think that I'll use charcoal, plus some layers of cheap filter floss to try and catch the silt. This will be a good test for my standpipe and hidden intake. I was relieved when I filled the tank the first time that the standpipe filled with water at the same rate that I filled it.
I can't wait get to the point where I can start collecting and keeping fish in it!
Kevin Wilson
#239
Aquatopes
-

- NANFA Guest
- Bemidji, MN
Posted 26 September 2019 - 11:59 AM
Thanks Nick for the tips and compliment. I realize now that it may be impossible to get it all out of there. I wondered if I was creating more due to friction while washing.
I think that my canister filter will be the key. I purchased some media for it, but I think I will wait until I can get the water cleared before using it. I think that I'll use charcoal, plus some layers of cheap filter floss to try and catch the silt. This will be a good test for my standpipe and hidden intake. I was relieved when I filled the tank the first time that the standpipe filled with water at the same rate that I filled it.
I can't wait get to the point where I can start collecting and keeping fish in it!
Its finally coming together...I loved watching this come together over the couple years I've been following
"No man ever steps in the same river twice, for it's not the same river and he's not the same man"
-Heraclitus
#240
Fleendar the Magnificent
-
- NANFA Guest
- Ohio
Posted 26 September 2019 - 01:28 PM
Looks awesome and very realistic! I think that whatever fish you have in there will be happy with their environment. Cannot wait to see this when it's done!
Chris M.


1 user(s) are reading this topic
0 members, 1 guests, 0 anonymous users

