Jump to content


Photo

75 Gallon Native Stream Tank Build


  • Please log in to reply
392 replies to this topic

#181 Fleendar the Magnificent

Fleendar the Magnificent
  • NANFA Guest
  • Ohio

Posted 27 December 2018 - 11:53 AM

That's what I said about doing a water change yesterday. It'll wait till tomorrow. Just finished it 5 mins ago and it needed it. Nitrates were a bit higher than I like.


#182 Chasmodes

Chasmodes
  • NANFA Member
  • Central Maryland

Posted 02 January 2019 - 07:55 AM

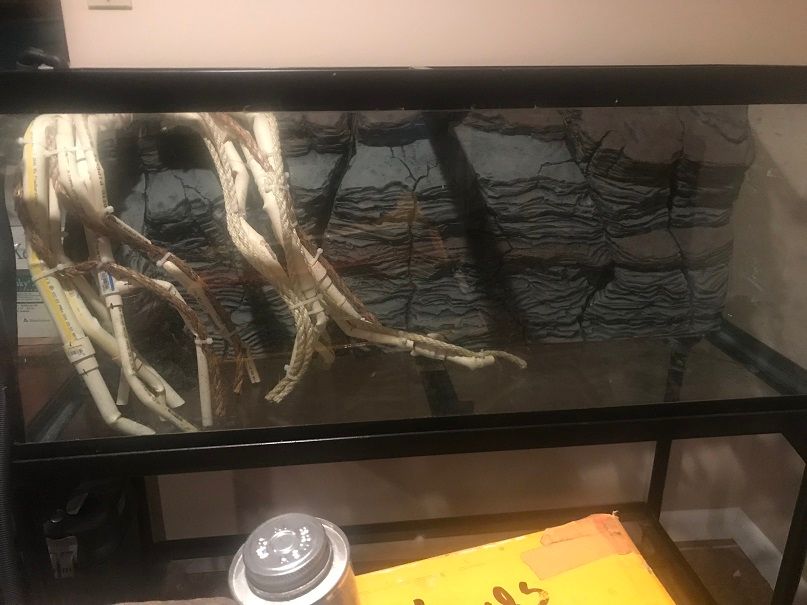
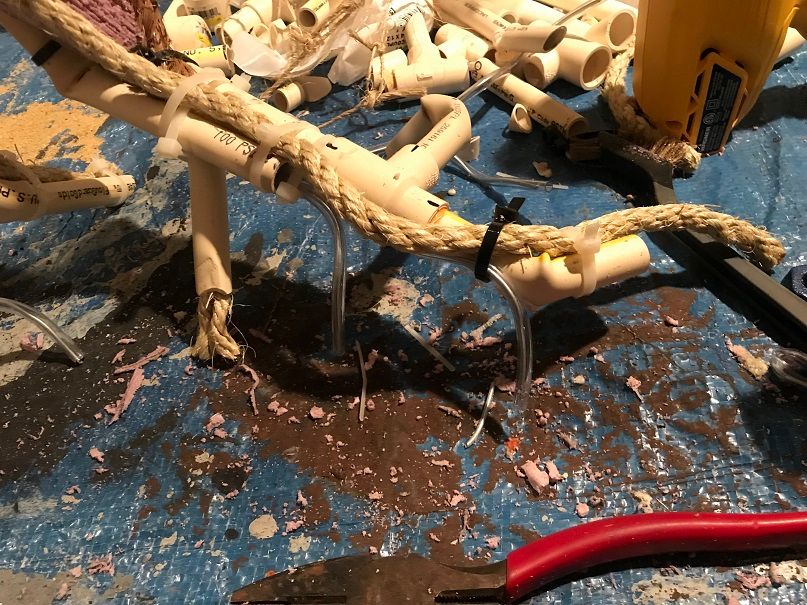
Hey everyone.  I made more progress yesterday.  First, I glued all of the PVC joints.  I tweaked a little bit by bending some more of the existing pipe, then bent and added another pipe.  After that, I zip tied it and a couple different thicknesses of rope to help break up the straight edges and give the main roots more bulk.  Next, I'll use a hot glue gun to affix the rope a little more in strategic places, maybe add some more, to create more knots and ridges and stuff, and add more detail.  I may add some smaller "twigs" as well in strategic places.  Once I'm done with that detail, it will be time to foam, to get rid of straight edges and evidence of pipe fittings, and to consolidate the pipe and rope into the overall shape of each root.  I'll have to do some carving and sanding after that to finalize the shape.  Once that's done, I'll coat it with grout to give the entire structure rigidity, weight, form, and bulk, and hopefully the overall smooth texture characteristic of sycamore roots.  The final step will be to paint the structure with Drylok mixed with cement dye to seal everything in and give it a final touch of realism.


The issue that I'm struggling with now, although I'm not near that step, is what color to paint the roots.  Should I paint them to look like the roots would look like if not yet submerged?  Or, should I paint them to look like they've been underwater a long time.  What do you think?  I'm leaning toward the latter.  Eventually, stuff like algae will build up on them, but I don't think it would look like they do in the wild for years, and I want that realism right away. 


Pics of my progress:


I also glued my DIY spray bar for my canister filter together.  This will channel water over the top of the roots, while a large powerhead, hidden within the roots, will push water through the roots and the tank and provide most of the flow.  I figured that this current arrangement would best mimic current through a natural undercut root against a cliff.  I had to trim the root structure and inch or so to get it to fit correctly.  Here is what it will look like from above the tank:
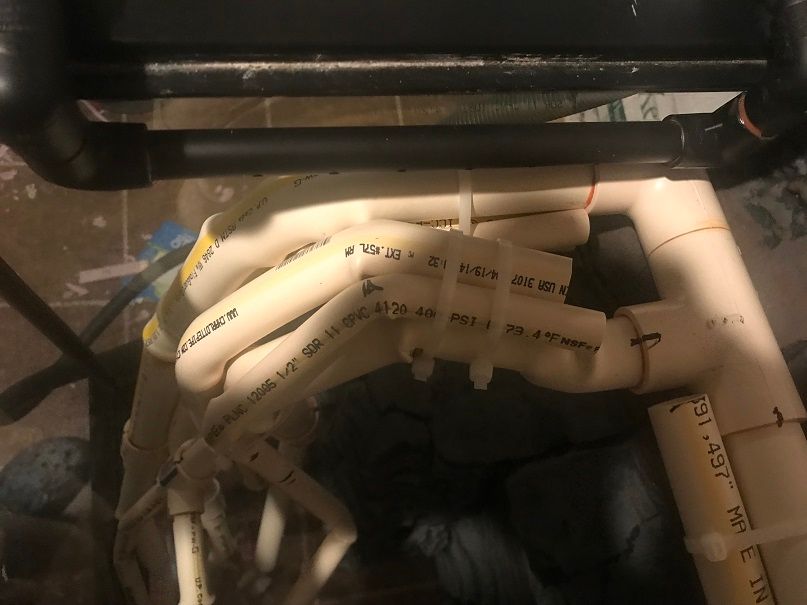
IMG_0449_zpsmwcn7c68.jpg


The root structure as it looks like today:
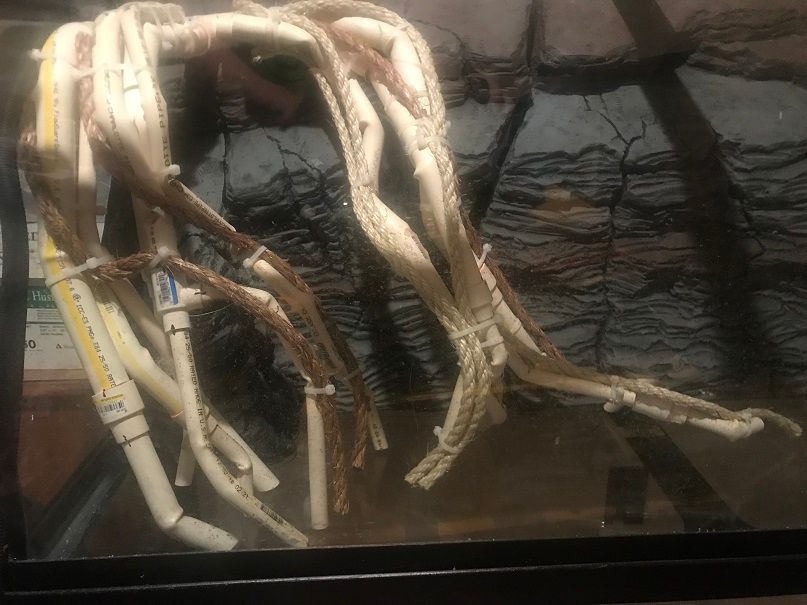
IMG_0455_zpsnwljfjmv.jpg


Full tank shot:

IMG_0456_zps137w7yyw.jpg


Kevin Wilson


#183 Chasmodes

Chasmodes
  • NANFA Member
  • Central Maryland

Posted 07 January 2019 - 08:08 AM
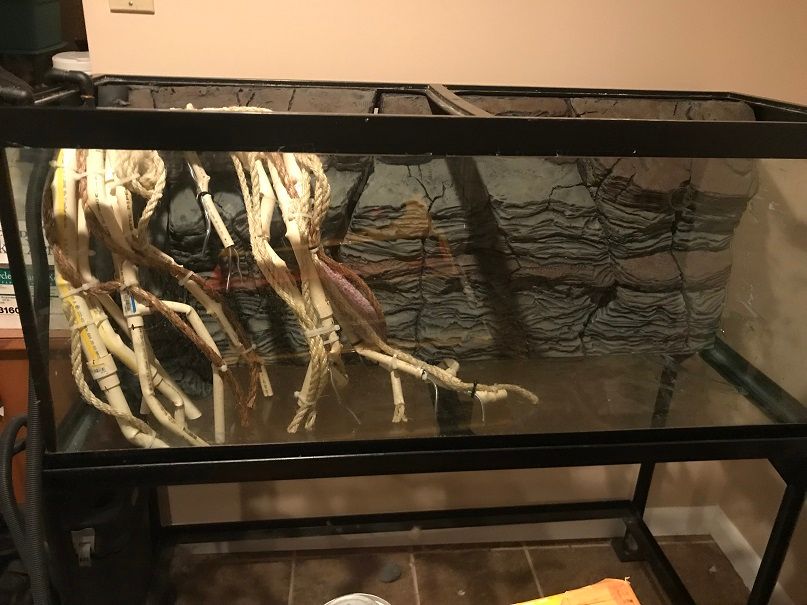
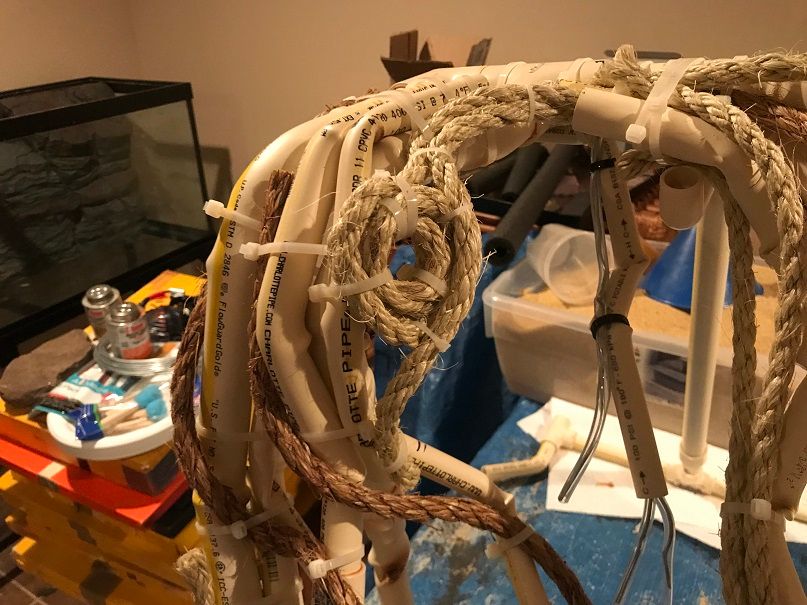
Hi everyone.  I added more structural detail including a tree root knot and an area where bark wore away, and some twig like roots.  I also added one more small root to break up the large open space a bit.  I was going to apply some hot glue on some key spots so it holds tightly during the foaming step, but, I'm out of hot glue sticks, so I'll have to pick some up tonight.  After I hot glue everything in place, then it's foaming time.  Here are some pics of the progress:
 
Some detail added to the long root:
IMG_0469_zpspouokugu.jpg
 
The knot:
IMG_0468_zpscgcyrgke.jpg
 
The worn spot:
IMG_0467_zpslftkd3ov.jpg
 
The overall structure:
IMG_0466_zpsi0oszujn.jpg
 
Fitted in the tank and a close up in the tank:
IMG_0465_zpst4liouh6.jpg
IMG_0464_zpsvedbp3ws.jpg

Kevin Wilson


#184 Fleendar the Magnificent

Fleendar the Magnificent
  • NANFA Guest
  • Ohio

Posted 07 January 2019 - 04:02 PM

This will be very cool when finished!


#185 Chasmodes

Chasmodes
  • NANFA Member
  • Central Maryland

Posted 16 January 2019 - 11:12 AM

Thank you Chris!  Progress is slow, but steady now.
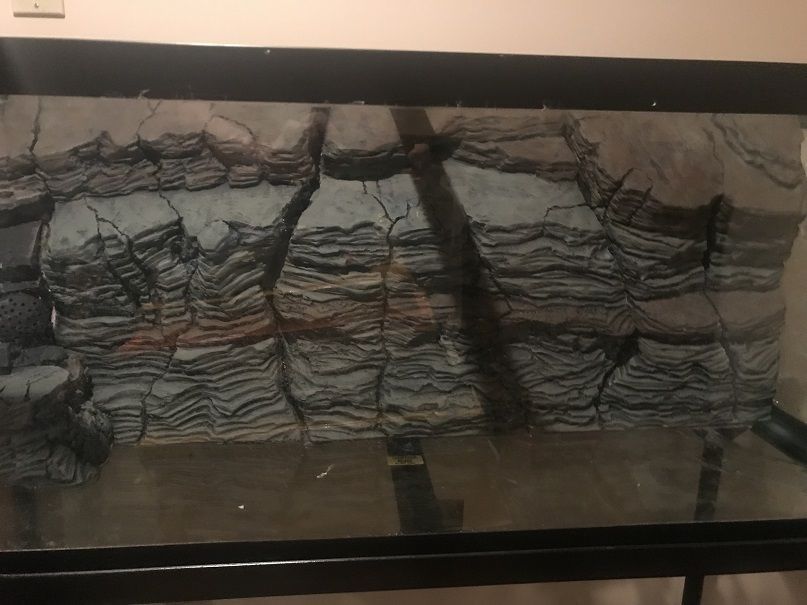
 

I was able to work on my background and roots again this past weekend.  First, I used a hot glue gun to secure all of the root structural pieces and fill in some of the smaller gaps.  I may do more of this in the future.
 
After that, I used Beckett's Pond Foam to fill in the gap in the background between the center and left piece.  It turned out well, so I'm pleased.
IMG_0482_zpsbpy6telz.jpg
 
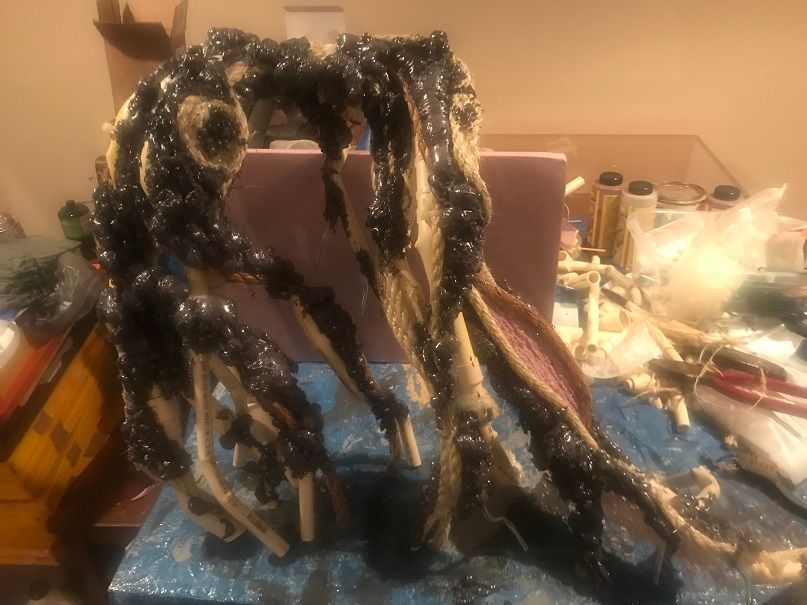
Then, I used the spray foam on the roots to fill in gaps and add some bulk to the root structure.  It was a messy process, and it expanded a lot more than what I think the directions stated, so I'll have plenty of carving and sanding to do to transform the structure from a bunch of pipe with blobs to a more realistic root structure.  Overall, I'm pleased with the result.  I've never carved this stuff before, so I'll have to experiment on what tools to use.  Below are some pics of the roots after foaming.
 
The foamed root structure:
IMG_0483_zpsd5lqrowm.jpg
 
The knot:
IMG_0485_zpsha9yrrwg.jpg
 
The eroded root:
IMG_0484_zpsb8uzzwxe.jpg

Kevin Wilson


#186 Fleendar the Magnificent

Fleendar the Magnificent
  • NANFA Guest
  • Ohio

Posted 17 January 2019 - 04:31 PM

You have SOOOO much more patience and sticktoitness than I do. I bought a kit to motorize my mountain bike back in the summer of 16'. A 6 hour job at most. There's still 3 hours of work left and I haven't touched it since that day in 16'.

Your tank will be beautiful when done!


#187 Chasmodes

Chasmodes
  • NANFA Member
  • Central Maryland

Posted 28 January 2019 - 08:40 AM

I hear ya Chris.  I'm a huge procrastinator and tend to overthink barriers.  Once I get down and dirty with the work, I tend to overcome those barriers.  But, I'm slowly but surely making progress.  
 

My root build is moving along, slow but steady.  I used spray foam to fill in some gaps and add some bulk (posted last time) and have since carved and sanded the foam.  I got rid of a good bit of the expansion, to improve the look and texture, and to reduce the amount of foam overall to help keep them from floating.  
 
Here is a before carving/sanding pic:
IMG_0483_zpsd5lqrowm.jpg
 
Here are some pics after carving/sanding:
IMG_0499_zpsfuh6yhn8.jpg
IMG_0502_zpsapfhcxj7.jpg
 
Fitted in the tank:
IMG_0495_zpslhslwfgc.jpg
 
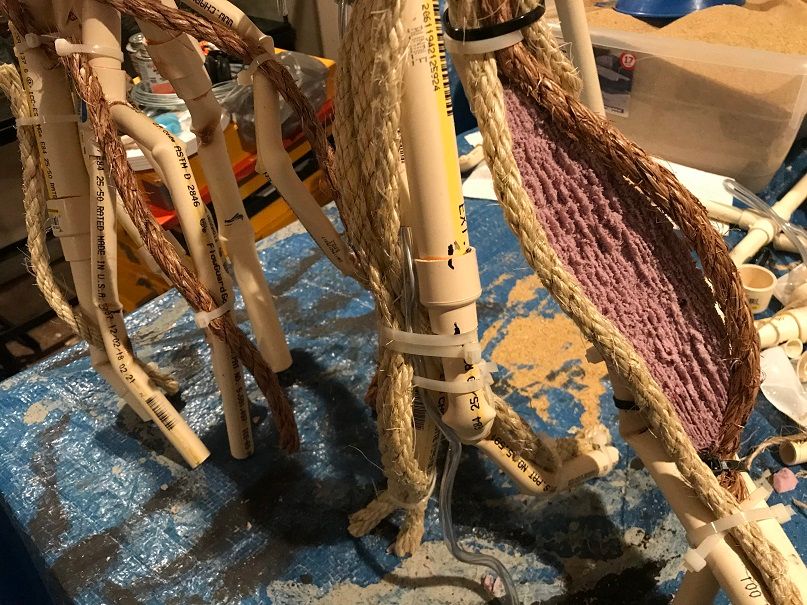
The next steps will be to first, cover the pipe with plaster wrap to give the grout something to hold on to.  Then, apply the grout for the final bulk and root shaping, including more carving for realism.  After that, I'll paint the structure with Drylok mixed with cement dyes to get the coloration that I want.

Kevin Wilson


#188 Fleendar the Magnificent

Fleendar the Magnificent
  • NANFA Guest
  • Ohio

Posted 28 January 2019 - 02:21 PM

That will be an incredible tank once finished! Of course we'll expect photos! :D


#189 Chasmodes

Chasmodes
  • NANFA Member
  • Central Maryland

Posted 25 March 2019 - 07:34 AM

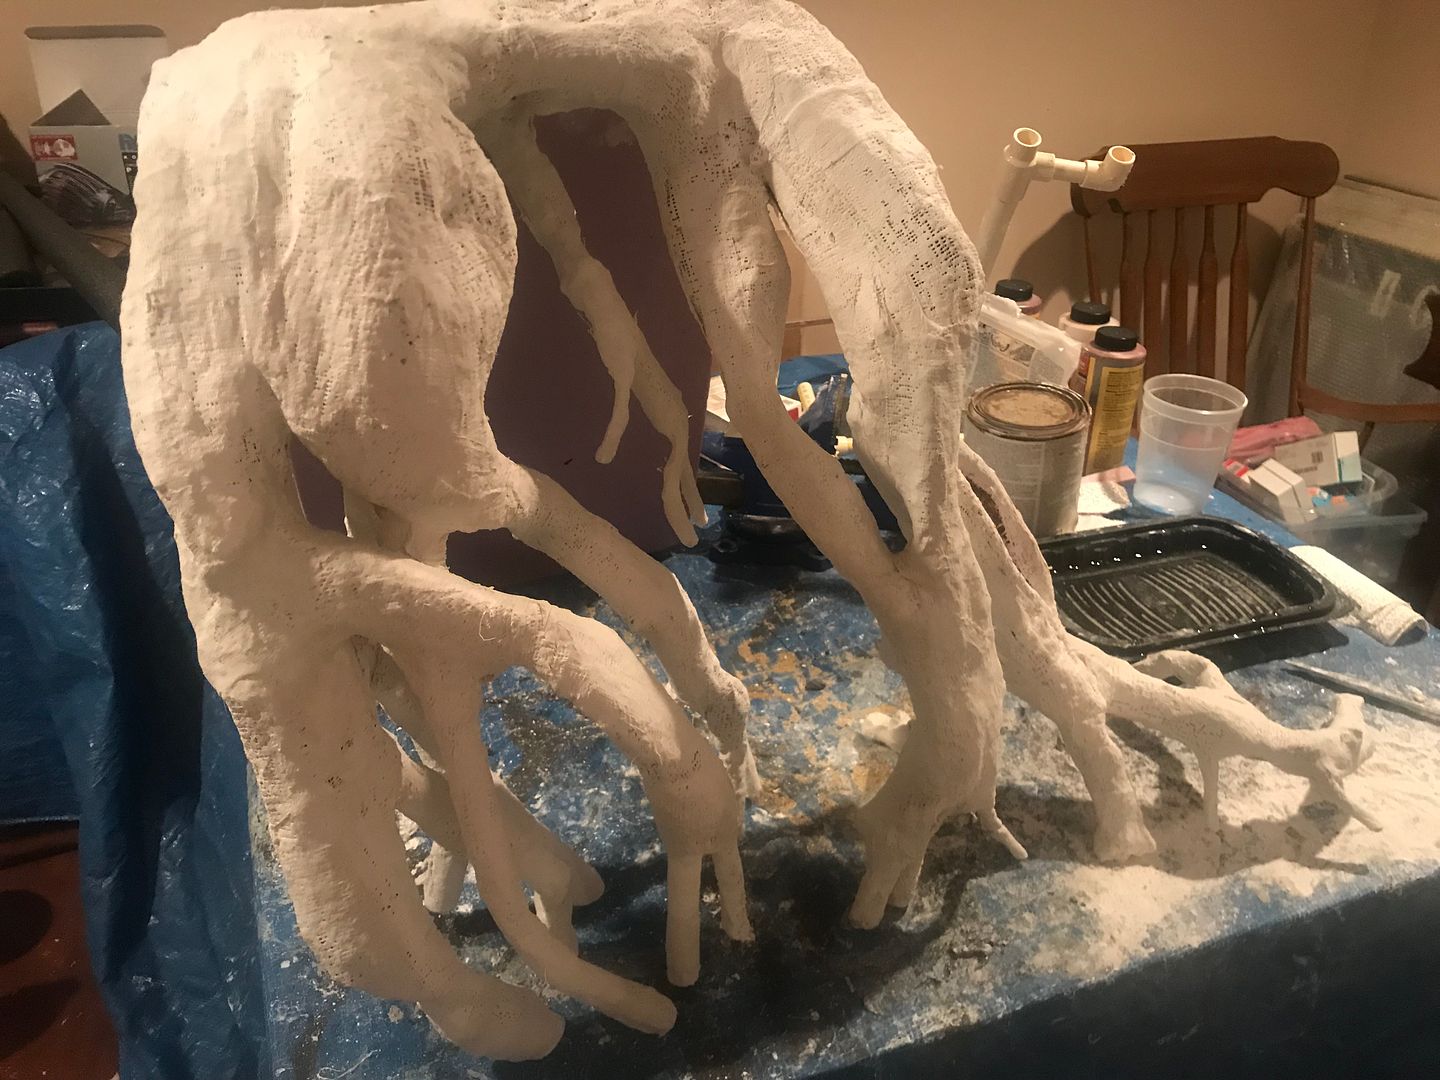
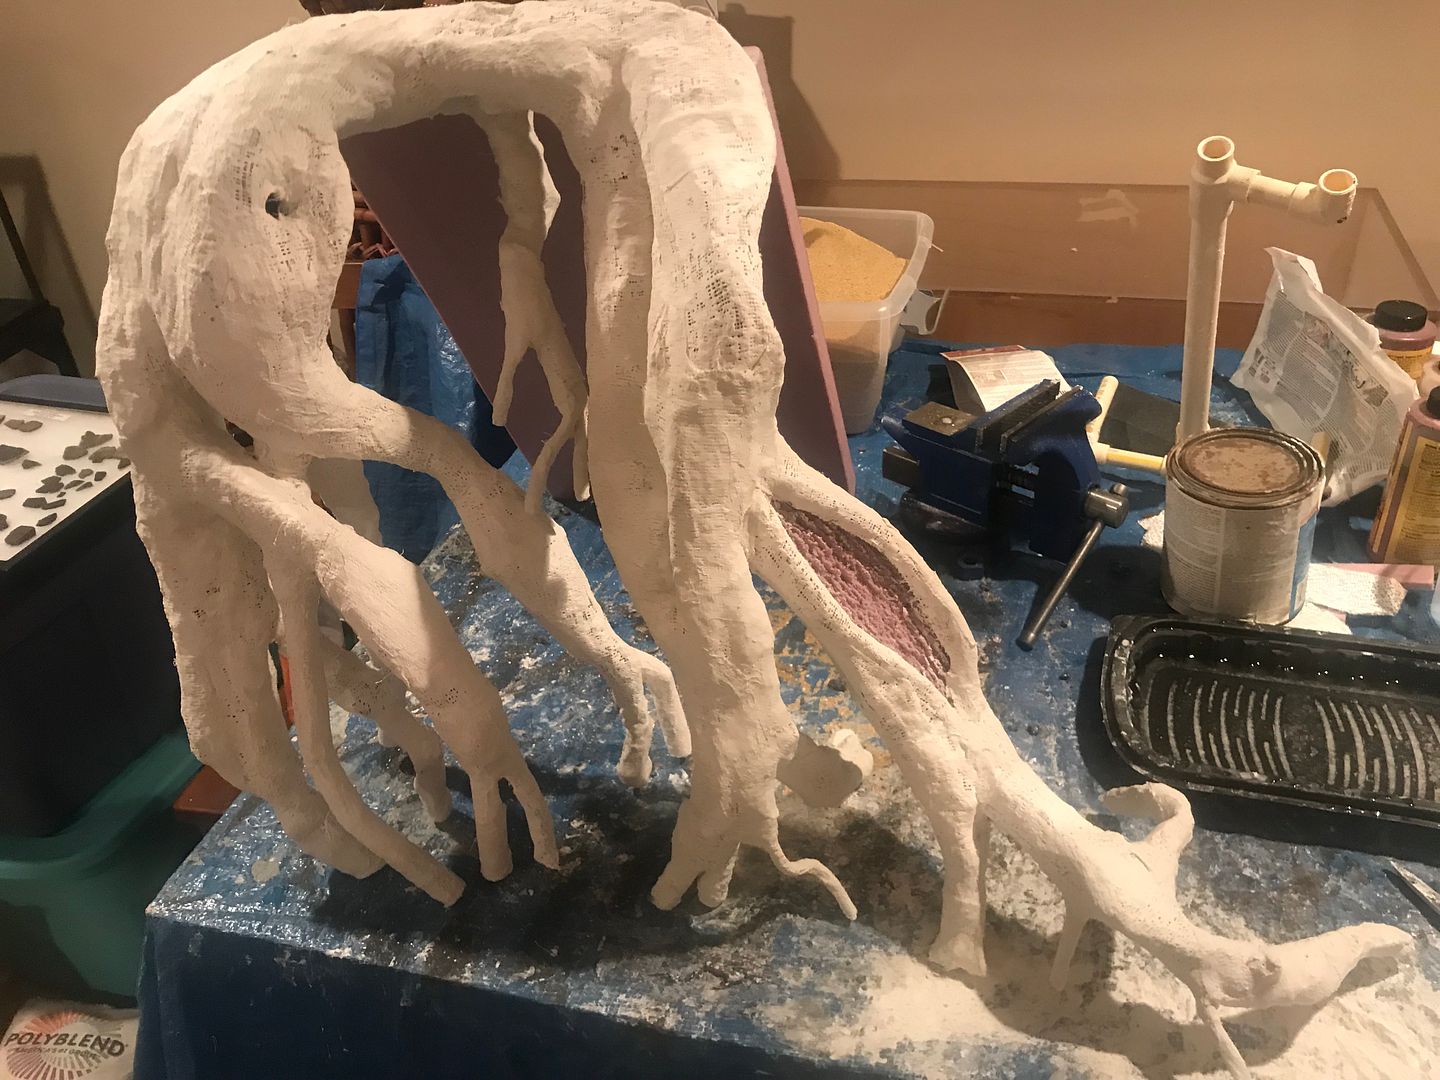
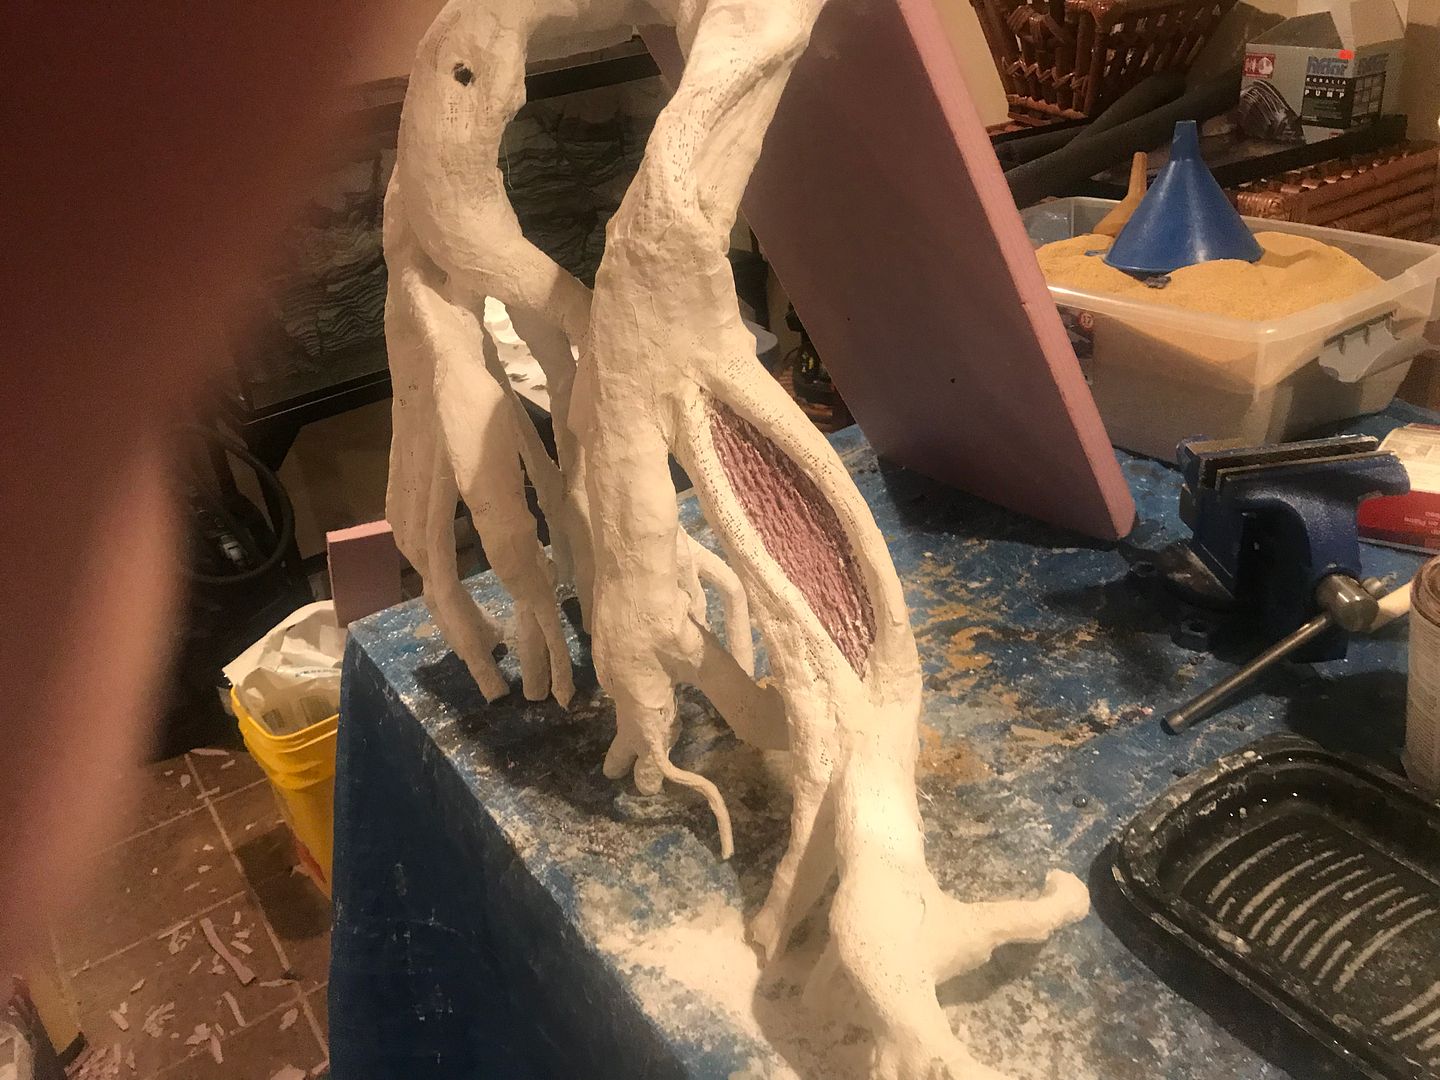
I made substantial progress on the faux sycamore roots for my 75g FW stream tank this weekend.  I put about two hours of work on it Friday afternoon, and another couple hours on Saturday morning.  I applied plaster cloth to give the structure some more form, and to provide something for the grout to adhere to other than just smooth PVC pipe.  I struggled mentally with how this might work and when first working with the plaster cloth, I found it not as easy to work with as I had hoped.  However, once I figured out the best way to get it done, I made the best out of the situation that I could, and it worked out well, I think.  What was the problem?  Basically, the wet plaster cloth losed rigidity fast, as expected, but likes to stick to itself sometimes better than what you're applying it to.  Also, it is difficult to work with in tight spots, in this case, between roots.  And finally, gravity works against you if you try and work under the structure. To solve the last problem, I simply worked on the front/top first, and then flipped it over to work on the back/bottom of the structure.  After that, I flipped it back over, and put the finishing touches on.  
 
In this pic, my first attempt at application, you can see what I'm working with, as I place the wet plaster cloth onto the structure.  Basically, you drag a strip of the cloth across a pan of water, and then apply it to your structure.  Then, use your fingers to spread the plaster around a little bit.  This becomes the base for the next strip, as you have to overlay the next strip in some way over part of the first one.  As I said earlier, it sticks best to itself.
IMG_0771_zpsacq71fhp.jpg
 
After I was done with it, I took a few photos off the work bench.  This first one is a front view:
IMG_0776_zpsu3ksu6qi.jpg
 
Front, sort of off to the right:
IMG_0775_zpsv3i7wo5n.jpg
 
Right side view:
IMG_0777_zpsvxumayqq.jpg
 
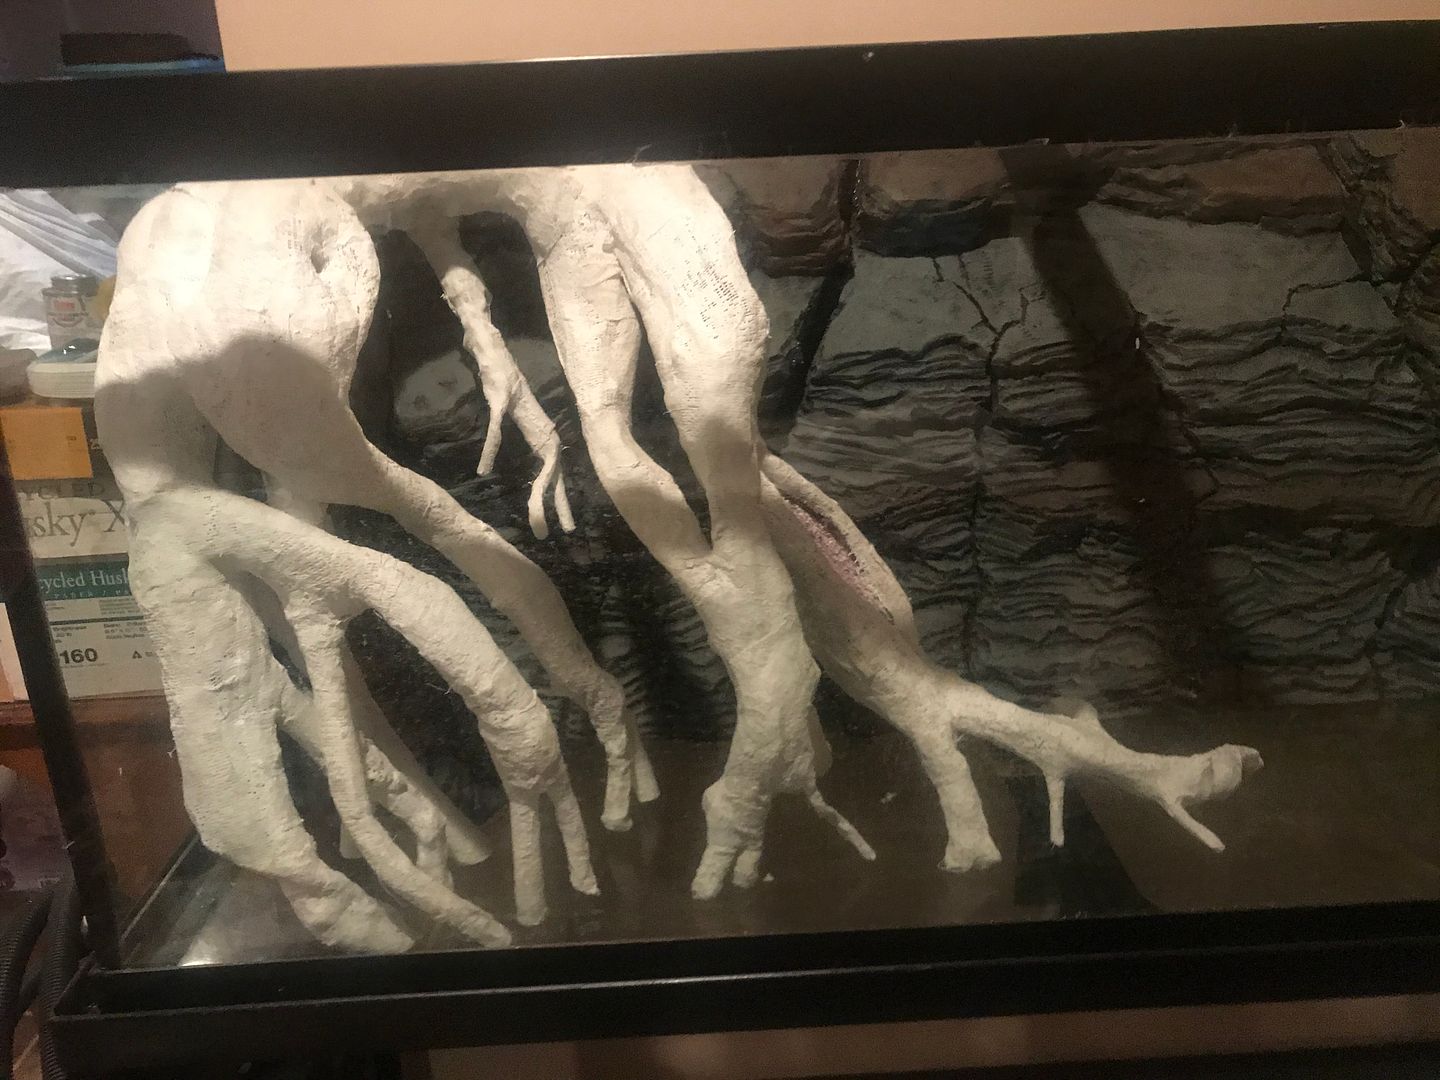
After that, I fitted it into the tank.  The first pic is what it looks like today, the last pic is what it looked like prior to the application of the plaster cloth:
IMG_0778_zpstbpenrul.jpg
IMG_0495_zpslhslwfgc.jpg
I'm fairly happy with it, but, a few things bug me.  The hole in the "knot" that I tried to create became much smaller than I had hoped.  I may have to drill or cut it out, the reapply some plaster again, or maybe skip the plaster and just coat it with grout.  The small root coming down out of the middle looks like ET's hand, asking the viewer if he could "phone home".  I think that I can live with that.  There are a couple other flaws that I don't like, but will have to live with, that maybe nobody but me would worry about.
 
The next steps:  apply grout and final form, to supply the structure with some weight and durability, and to hide any of the pipe look and get rid of straight lines.  After I'm happy with that, then I'll paint it with Drylok mixed with cement dye to give me the colors and realism that I want, as close as I possibly can.  This should also seal in the grout and plaster and prevent water from seeping in, preventing pH spikes from happening and also from plaster getting into the tank.  I will apply several layers of Drylok.

Kevin Wilson


#190 brackishdude

brackishdude
  • NANFA Member

Posted 25 March 2019 - 02:41 PM

Is there any concern that upon re-wetting, the plaster will simply dissolve?  Even the tinyest flaw in your dry lock could result in the whole thing becoming water logged and deteriorate.

There was a guy on Reef Central who did something similar using a concrete mix and cloth to create some interesting shapes


As your fellow, I can demand of you no more, and accept no less, than I allow to be demanded of myself

#191 Chasmodes

Chasmodes
  • NANFA Member
  • Central Maryland

Posted 26 March 2019 - 06:47 AM

I don't think it will be a problem, because the entire thing will be covered in grout, and then several coats of Drylok,  For most of the structure, I will use a pretty thick coat of grout, maybe 1/4" or so.  That should seal everything in.


Kevin Wilson


#192 Chasmodes

Chasmodes
  • NANFA Member
  • Central Maryland

Posted 26 March 2019 - 07:09 AM

I got the plaster idea from the "Vlekkie" blog.  These guys amaze me, and what they have done with their tanks.  They built a couple different DIY backgrounds, DIY rocks and roots, etc.  They use plaster around various types of tubing and pipe.  I believe that they use cement over the plaster, if I remember correctly.  Here's a search for roots on their blog that I used today (I couldn't find the original posts, or perhaps the pictures are not available any longer).  You have to scroll down a few posts to see their work.  Make sure you click on translate, unless you can read their language.  https://dirkgonthier.../search?q=roots


Kevin Wilson


#193 brackishdude

brackishdude
  • NANFA Member

Posted 27 March 2019 - 03:59 PM

Just making sure you did your homework.  They look beautiful, and it would be a shame to do all the work still left to do and end up with something that was less-than-permanent.  I love this project!


As your fellow, I can demand of you no more, and accept no less, than I allow to be demanded of myself

#194 Chasmodes

Chasmodes
  • NANFA Member
  • Central Maryland

Posted 27 March 2019 - 04:01 PM

Thank you Andy.  Yeah, I think that I over-did my homework, LOL.  That's one reason it took me so long!


Kevin Wilson


#195 Chasmodes

Chasmodes
  • NANFA Member
  • Central Maryland

Posted 17 June 2019 - 07:50 AM

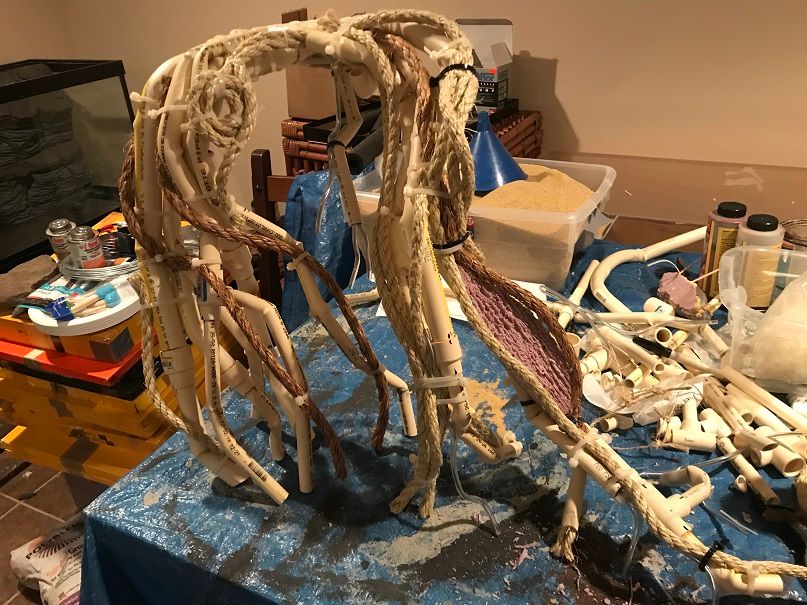
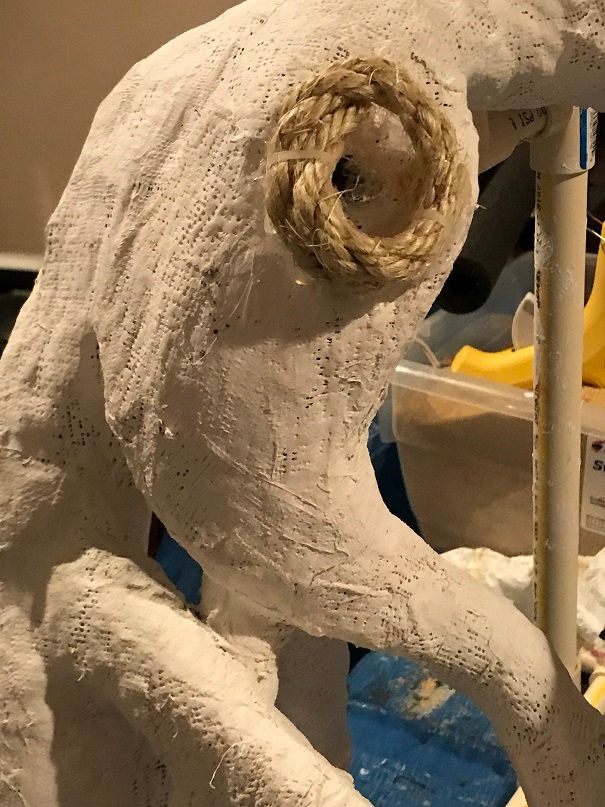
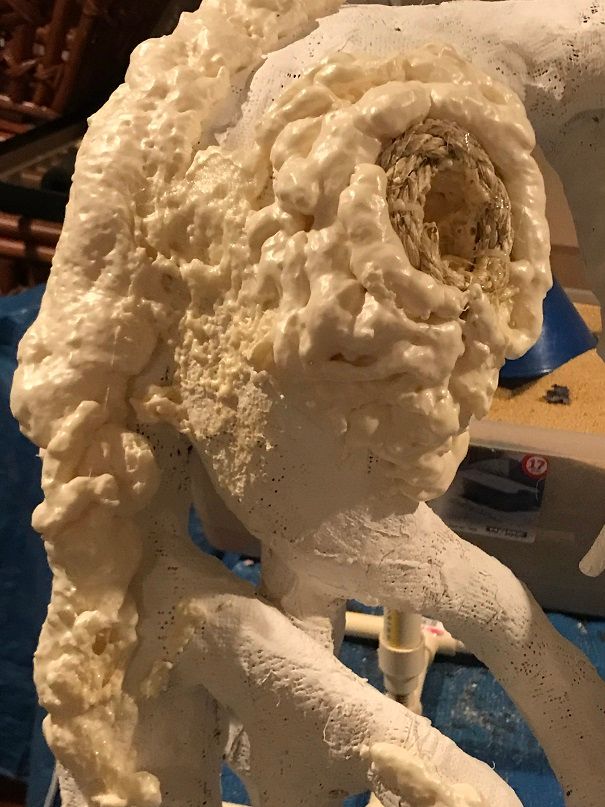
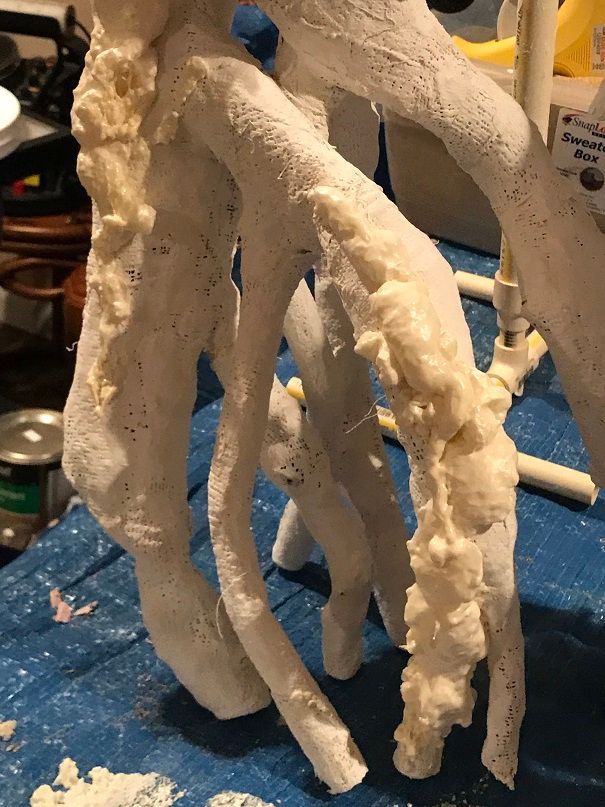
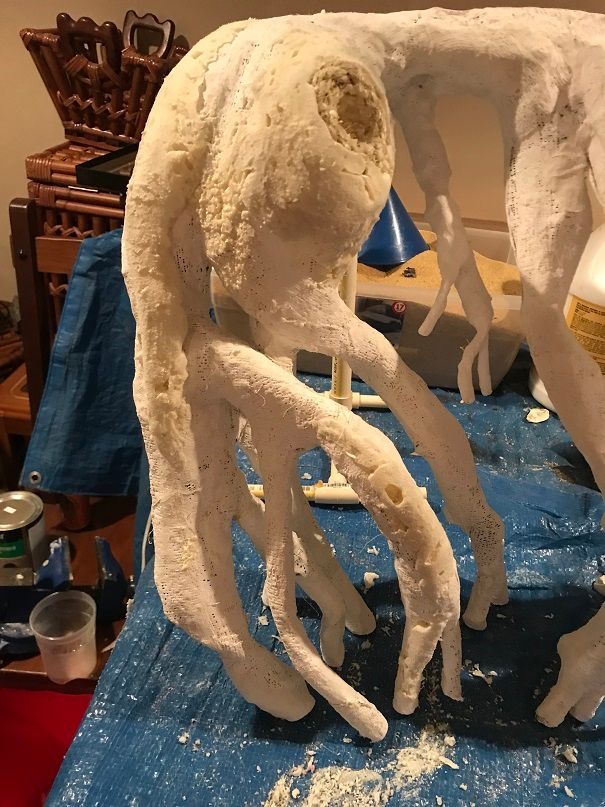
Finally made more progress.  I wasn't happy with the hole and knot.  The plaster application made the hole too small, so, I decided to enlarge it by gluing rope onto the structure, then adding a little spray foam to even it out.  I also applied some foam to add a little bulk on a couple of the roots.
 
Gluing the rope on to make the hole.
IMG_1209_zpstqyjppyi.jpg
 
Foam for bulk.
IMG_1210_zpsltjqvvfk.jpg
IMG_1211_zpsqfnsur1q.jpg
 
Carved and sanded.
IMG_1211_zpsqfnsur1q.jpg
IMG_1214_zpslj8ioxhn.jpg
 
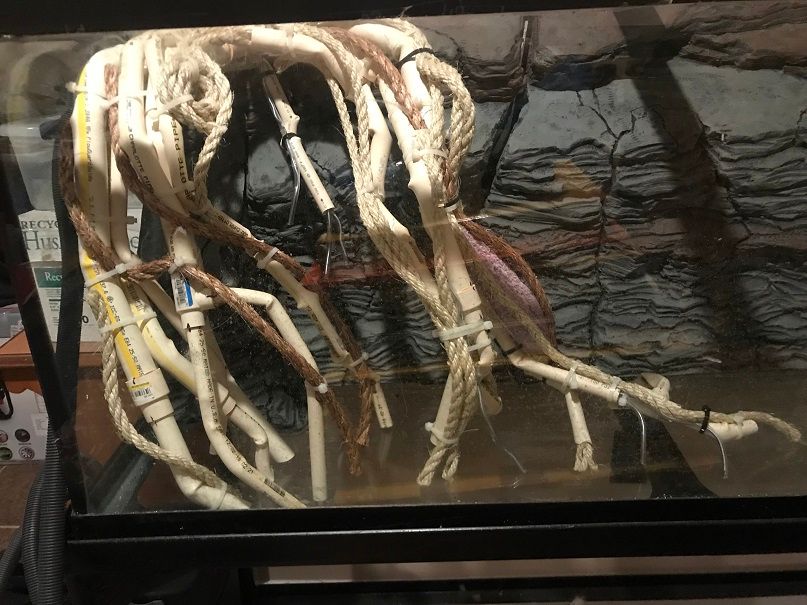
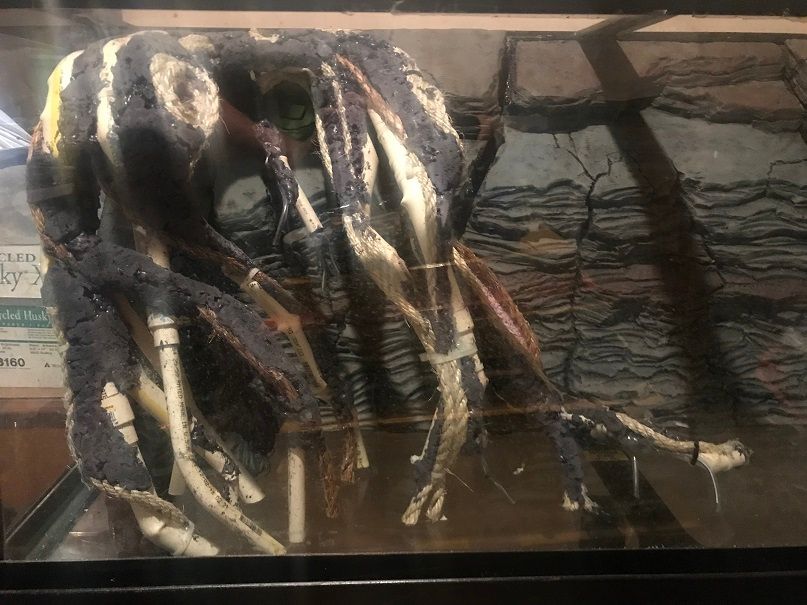
Placed in the tank.
IMG_1216_zpsbxt9xz63.jpg
 

Kevin Wilson


#196 Chasmodes

Chasmodes
  • NANFA Member
  • Central Maryland

Posted 17 June 2019 - 08:18 AM

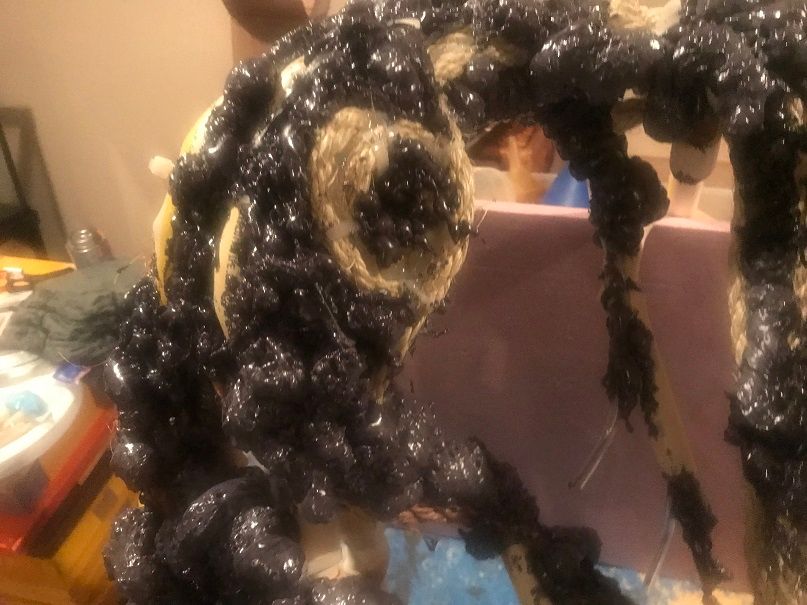
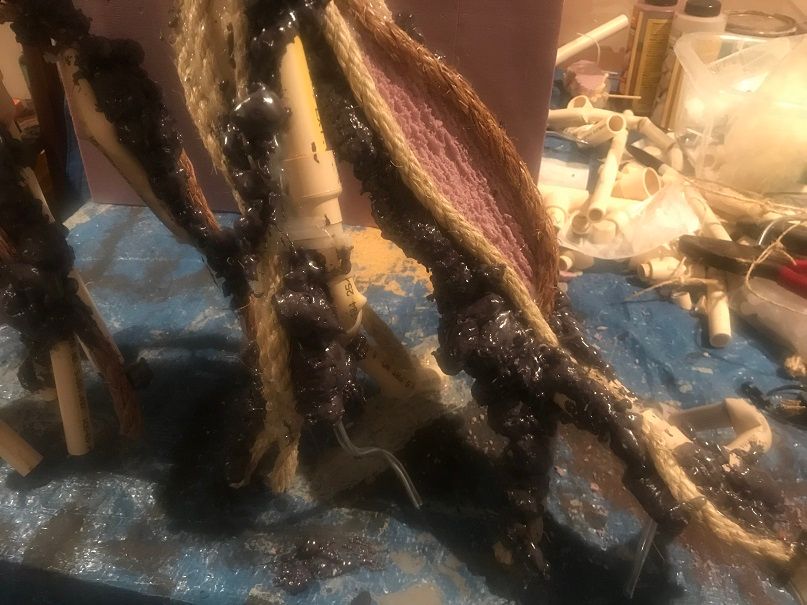
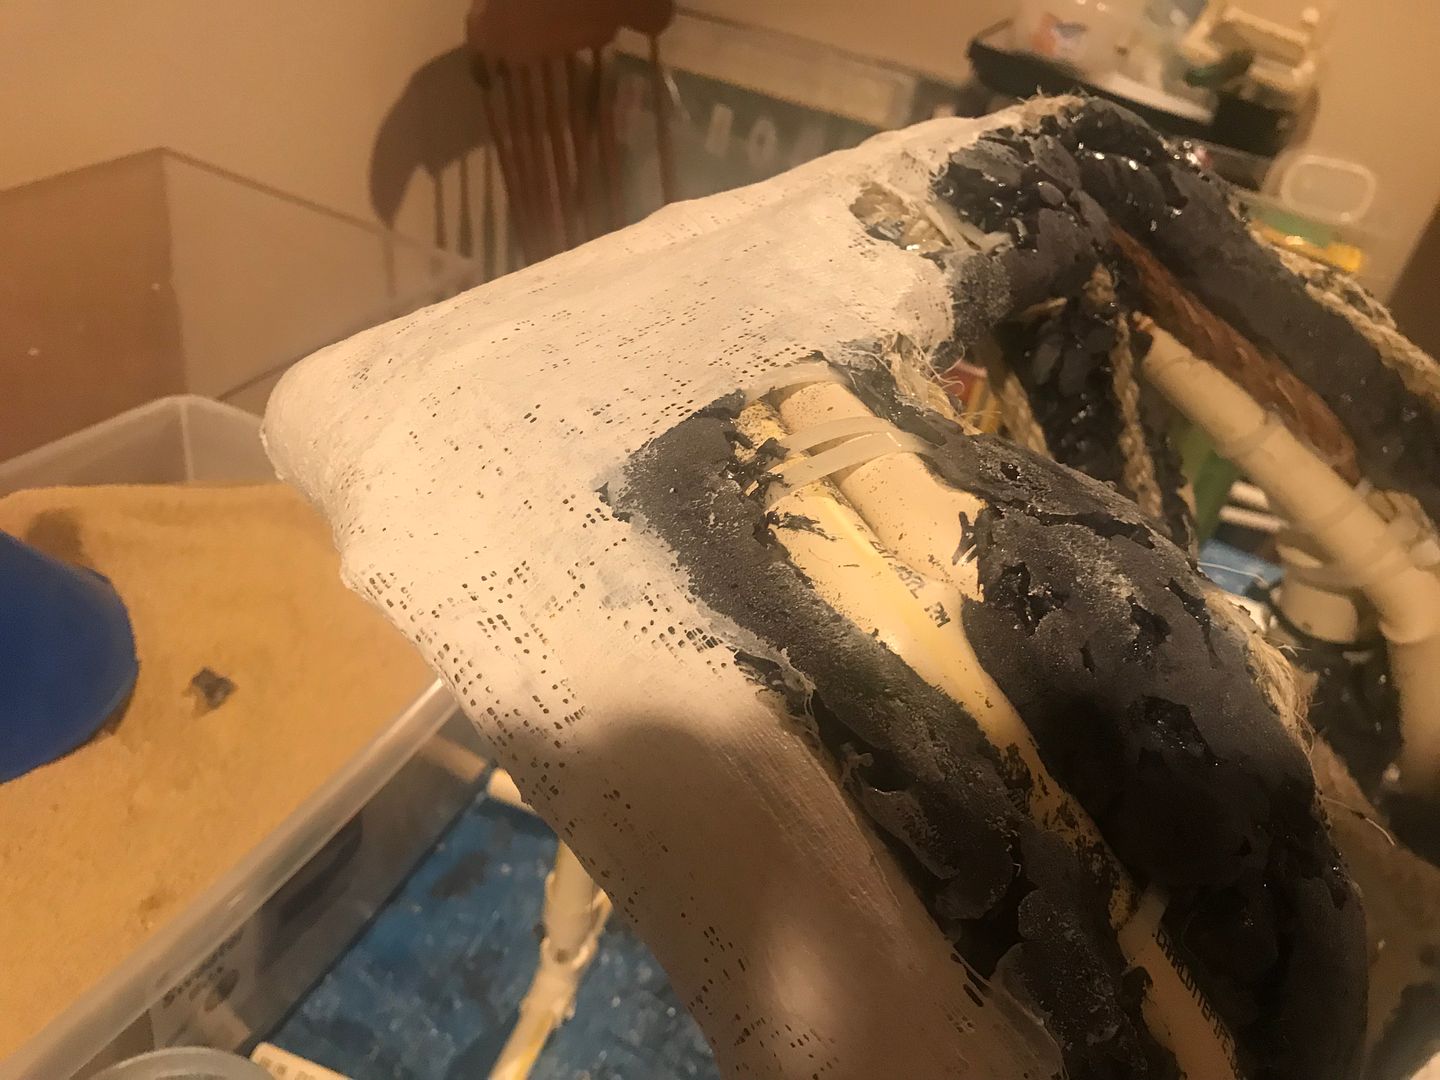
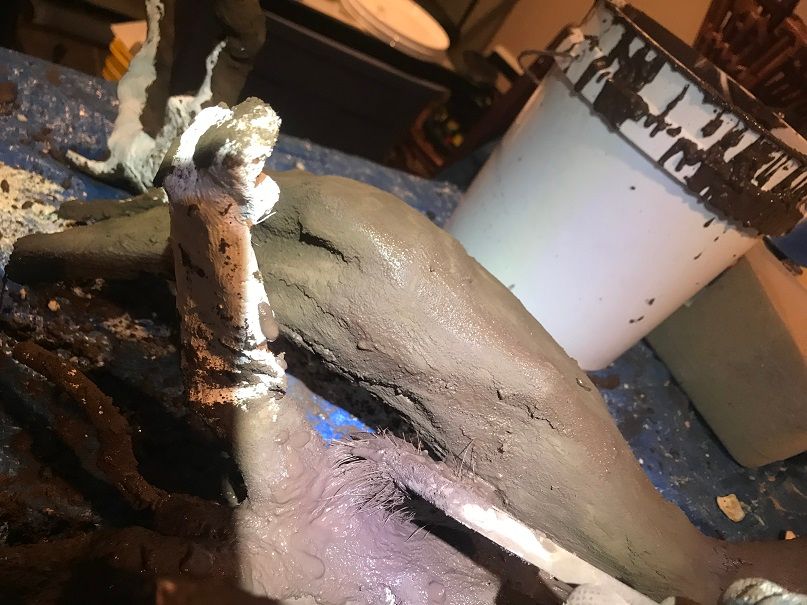
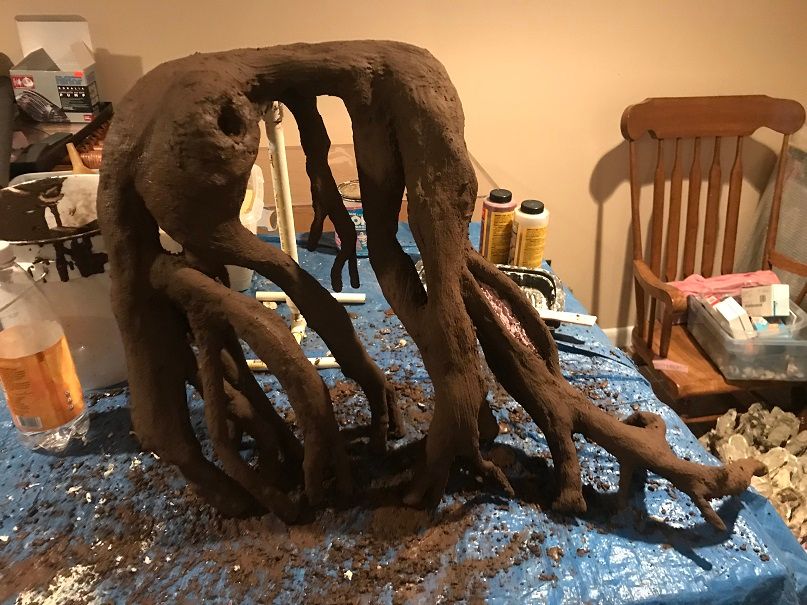
The next day, I applied brown grout to the root structure.  This adds bulk and durability.  I'm going to give this until next weekend to cure properly, then I will paint it with Drylok tinted with cement dye to seal everything in.  The Drylok will allow me to use it in the tank and not have to worry about pH issues from the grout.  Once I'm done with that, it will be time to set up the tank and get it running.  I will collect gravel and rocks, then cycle the tank.  After the tank is cycled, I will collect and stock my tank with native darters, shiners, and minnows.
 
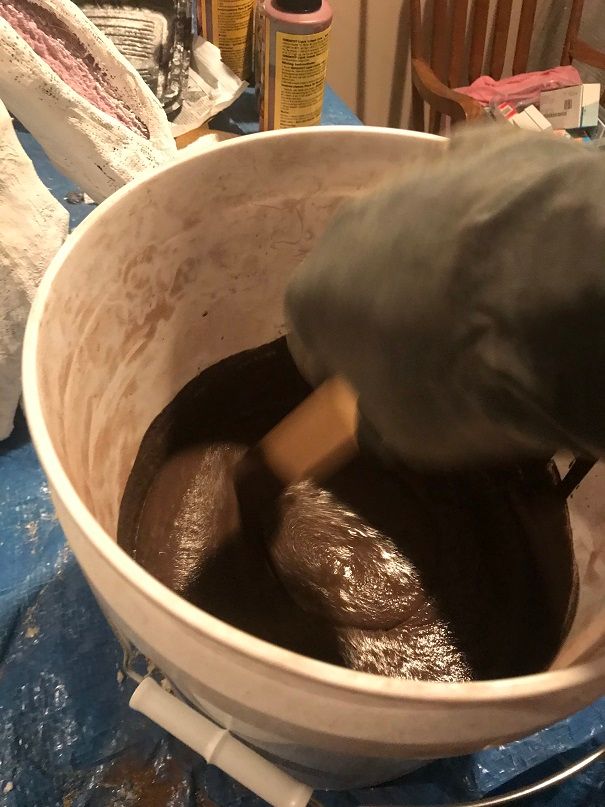
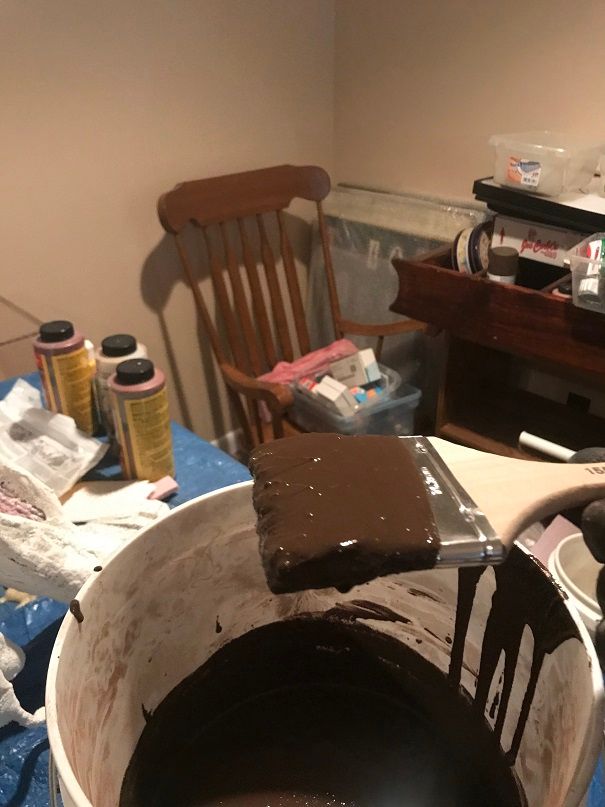
I used regular grout, with no mold inhibitors.  To apply the grout, I mixed the grout with a concrete bonding adhesive/fortifier to about the thickness of a milk shake and applied it with a paint brush.
IMG_1217_zps9vlp0ub9.jpg
IMG_1219_zpsc1q3da0e.jpg
 
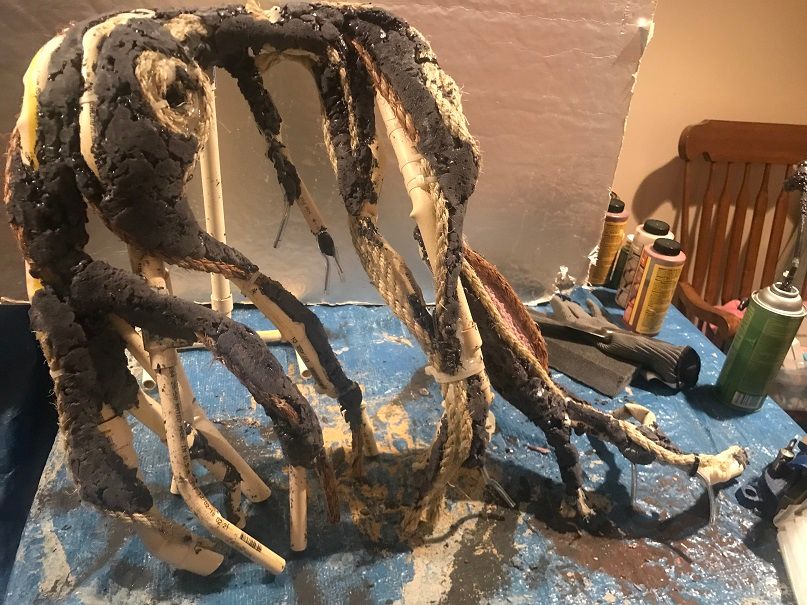
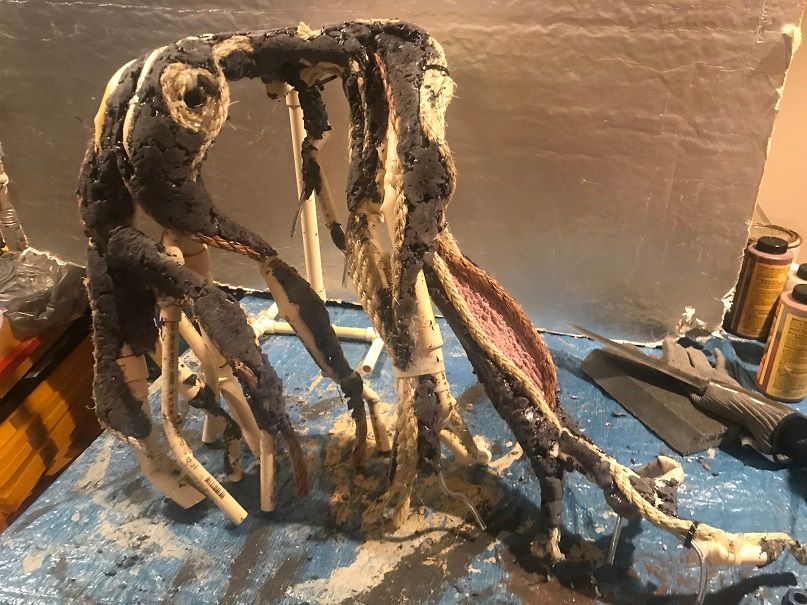
I had to coat it to cover all of the white plaster to seal it in.  The roots, for realism, were designed to intertwine and, well, look like roots.  Getting to some of the spots wasn't easy.  There were a few times that I had to use my finger to spread the grout to some hard to reach spots.
IMG_1221_zpsvyqzcs1n.jpg
 
Here's what it looks like today.  It's starting to look like real roots now.
IMG_1226_zpsmzyqghfz.jpg
 
Next week, I'll paint it with Drylok to really seal it in.

Kevin Wilson


#197 Chasmodes

Chasmodes
  • NANFA Member
  • Central Maryland

Posted 17 June 2019 - 08:31 AM

Here's a video update that I did also:

Kevin Wilson


#198 Michmass

Michmass
  • NANFA Guest
  • Grass Lake MI

Posted 17 June 2019 - 04:17 PM

Great work sir!  I have the time and knowledge, youtube really has the knowledge, to do this sort of thing but not the gumption.  I applaud you and the quality of your root system. Very well done!


Truths are mutable, facts are not.  Unless of course we're talking about the definition of mutable, then the fact is in fact mutable.


#199 Chasmodes

Chasmodes
  • NANFA Member
  • Central Maryland

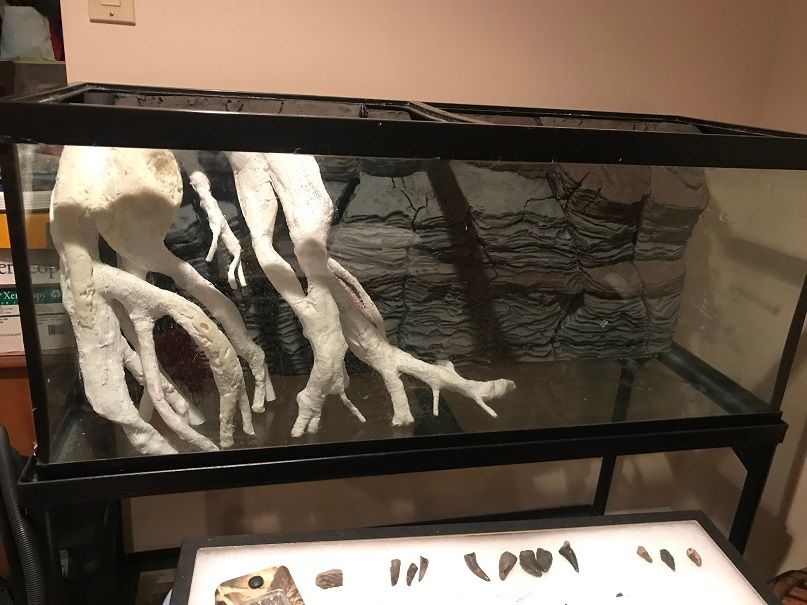
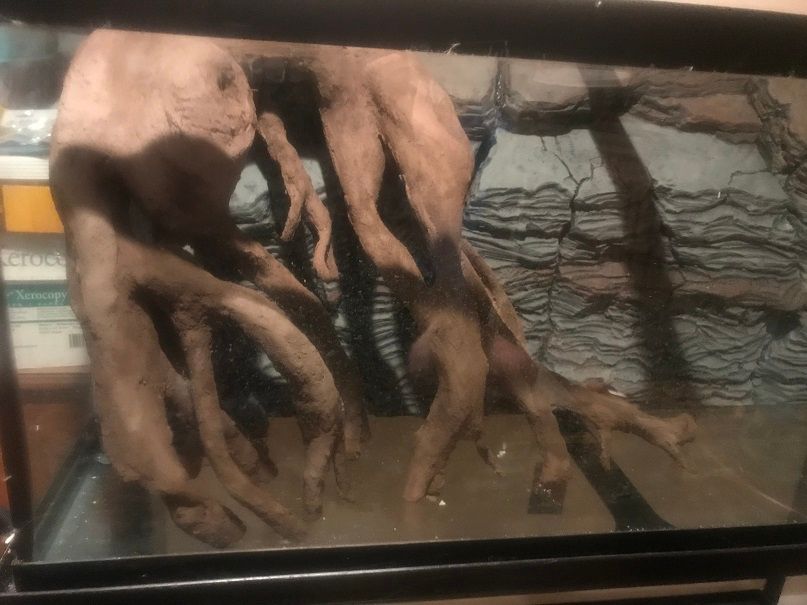
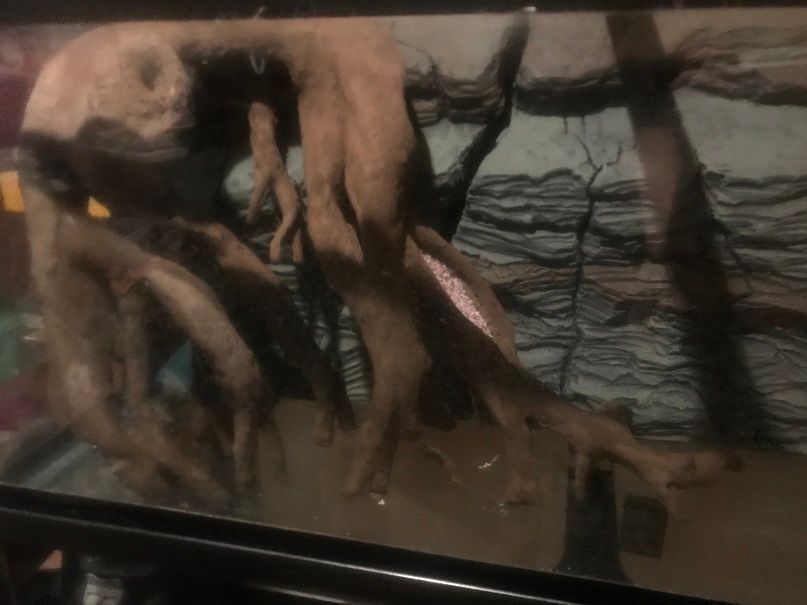
Posted 17 June 2019 - 04:34 PM

Thank you Mich!


Kevin Wilson


#200 Chasmodes

Chasmodes
  • NANFA Member
  • Central Maryland

Posted 18 June 2019 - 07:33 AM

I took a few pics of the latest version of the roots in the tank, to get a sense of what the roots and rock wall will look like.  Sorry that the pics look a bit blurry.
 
IMG_1232_zpsuyh3smz0.jpg
IMG_1231_zps9mwionhs.jpg
 
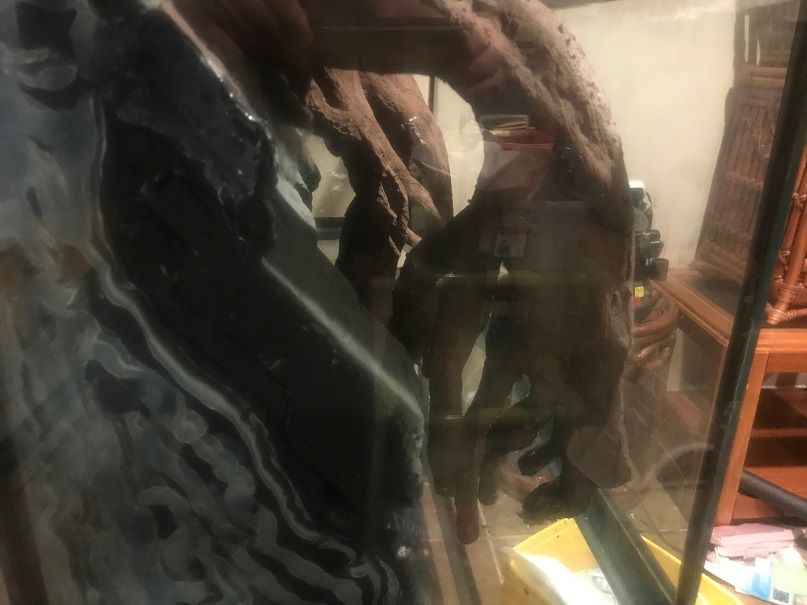
This view from the left side of the tank shows the functionality of the root design.  The big hole underneath is where my powerhead will be, mostly hidden from view by the root structure from the front of the tank.  That was my goal with the roots, to hide equipment.  Another thing that I'll do is paint the side and back of the tank with Drylok/black cement dye, to hide the silicone adhesive and equipment from view.
IMG_1233_zpsarjqv2yr.jpg

Kevin Wilson


0 user(s) are reading this topic

0 members, 0 guests, 0 anonymous users